Your old hoodie is not trash it’s a canvas. Instead of letting it collect dust in the back of your closet, grab a pair of scissors and let’s make something seriously cool. These DIY hoodie cutting ideas are easier than you think and way more satisfying than online shopping.
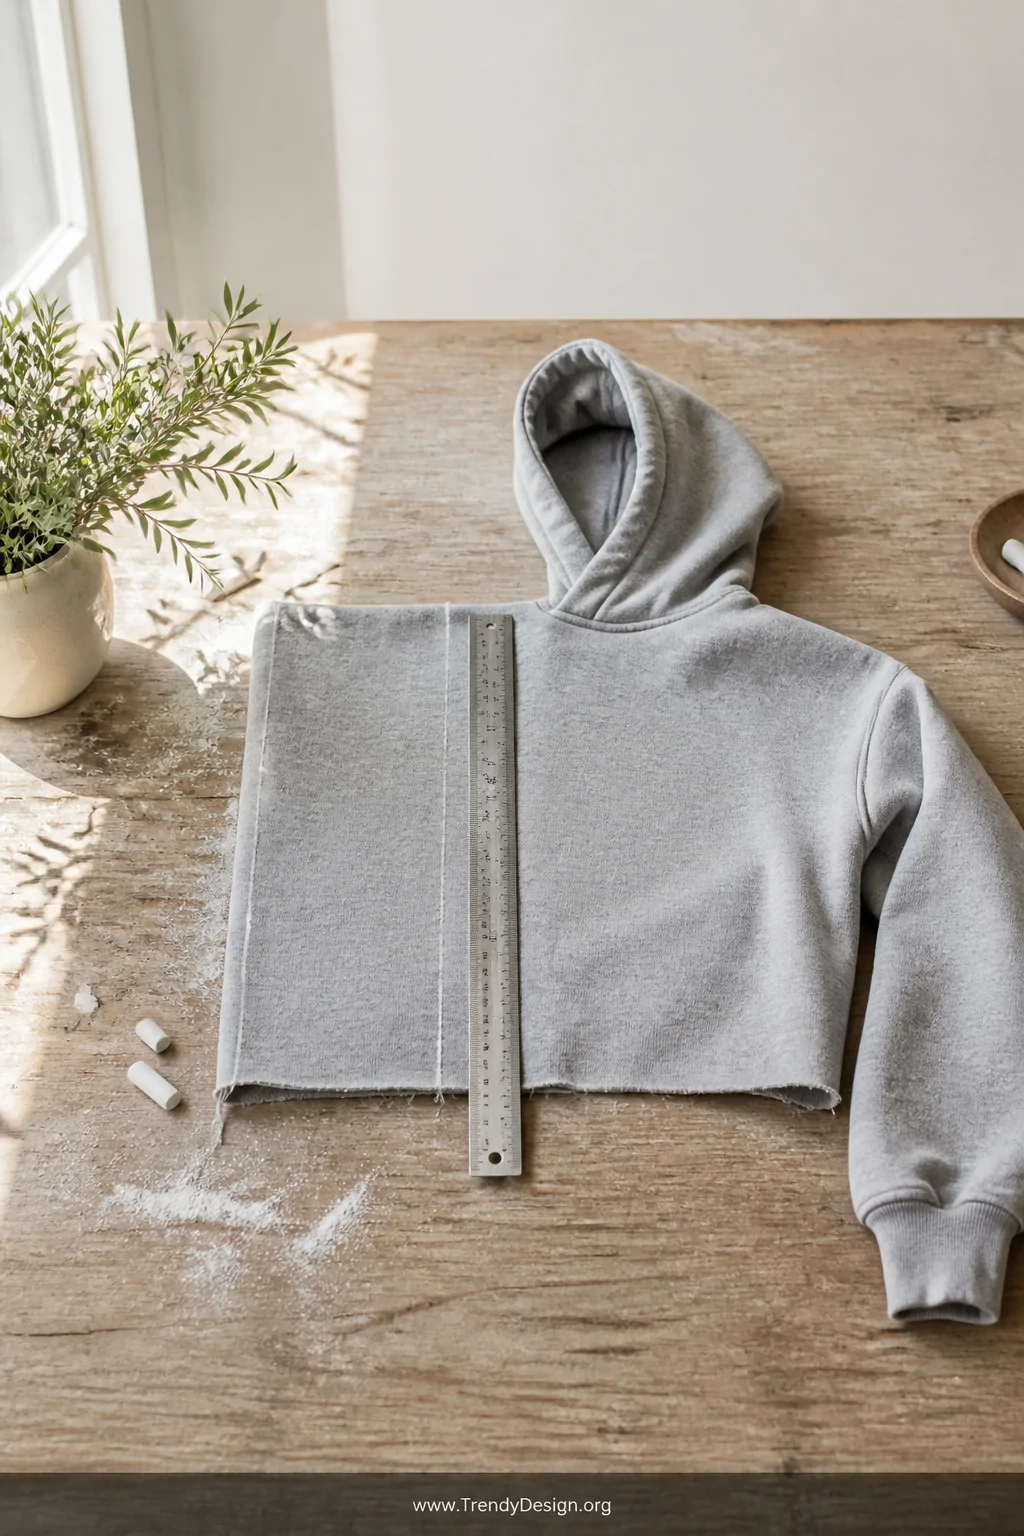
1. The Classic Cropped Hoodie Cut
As an Amazon Associate I earn from qualifying purchases.
This one is the gateway drug of DIY hoodie cutting, and honestly, it never gets old. You’re basically turning a boxy, forgettable piece into something that actually shows off your waist. All you need is a ruler, fabric chalk, and sharp scissors no sewing machine required.
The trick is deciding how short you want to go before you make a single cut. Fold the hoodie in half vertically to keep both sides even, mark your line, and cut in one clean stroke. Raw edges are totally fine here they add that effortless streetwear vibe everyone is chasing right now.
- Mark 2-3 inches below where you want the final hem (fabric curls up a bit after cutting)
- Try it on before committing to the final length
- Wash it once to let the edges fray naturally for texture
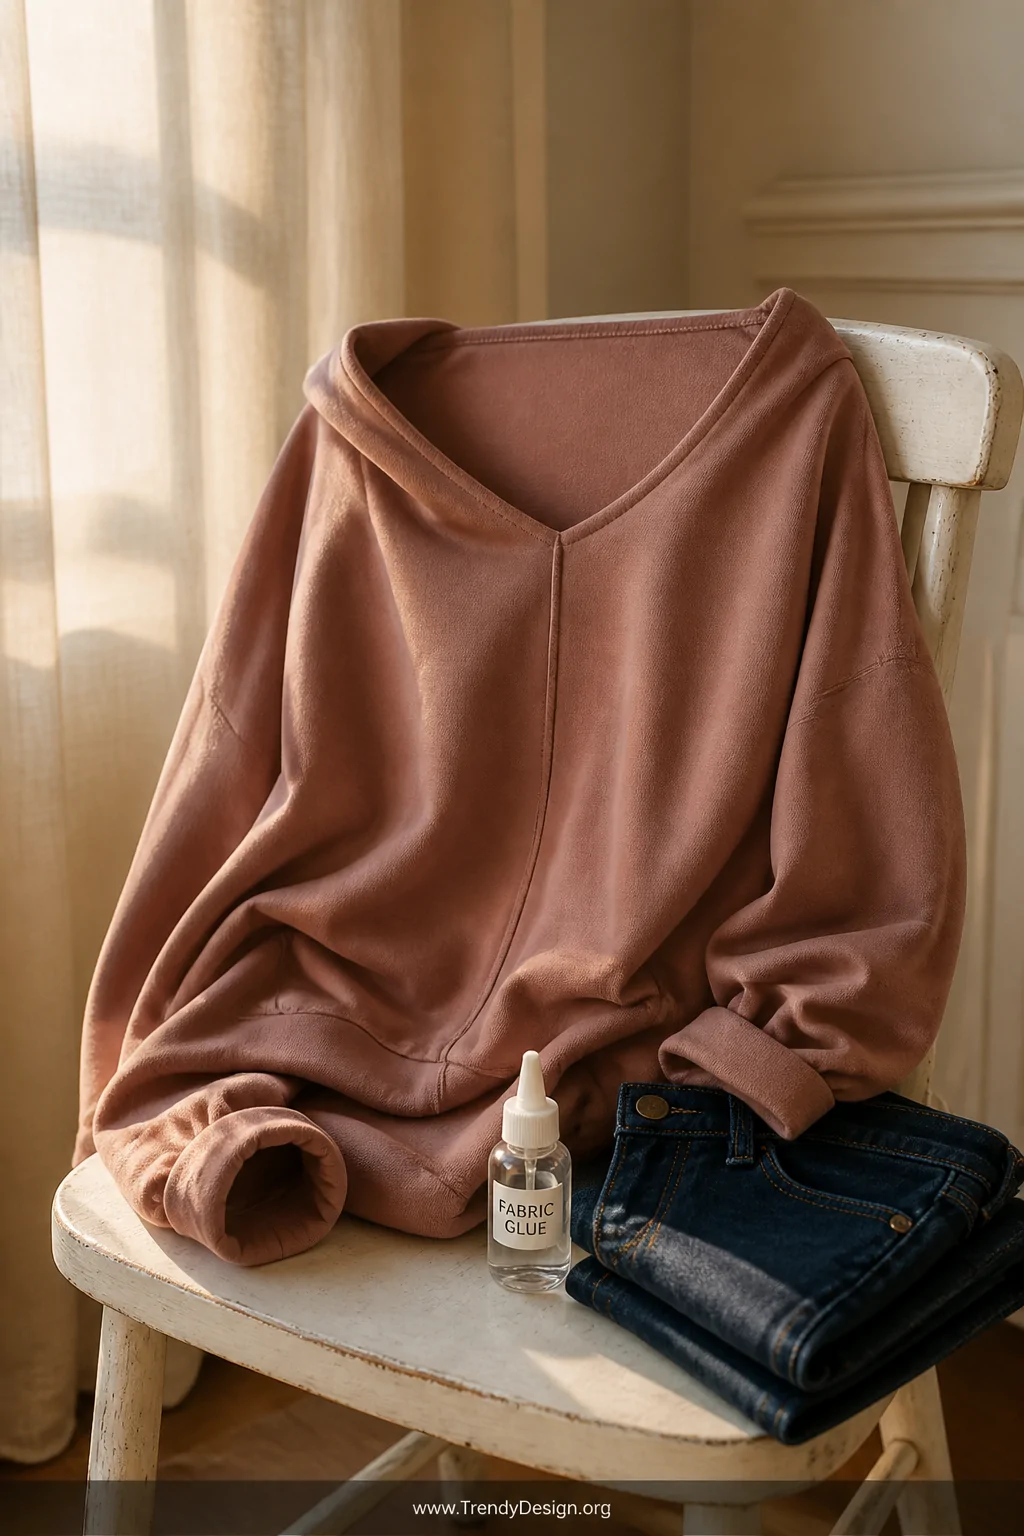
2. The Off-the-Shoulder Cutout Transformation
As an Amazon Associate I earn from qualifying purchases.
Want something that screams “I woke up like this but make it fashion”? The off-the-shoulder hoodie cut is your answer. You’re cutting a wide neckline that slides off one or both shoulders, instantly making the whole thing look intentional and artsy.
Cut slowly and symmetrically around the collar, going wider than you think you need to. The neckline will naturally tighten a little when you wear it, so give yourself some extra room. Pair it with high-waisted jeans and you’ve basically invented your own look.
Pro Tip for Cleaner Edges
If you want a slightly cleaner finish without sewing, run a thin line of fabric glue along the cut edge and fold it over. It dries flexible and holds surprisingly well through a few washes.
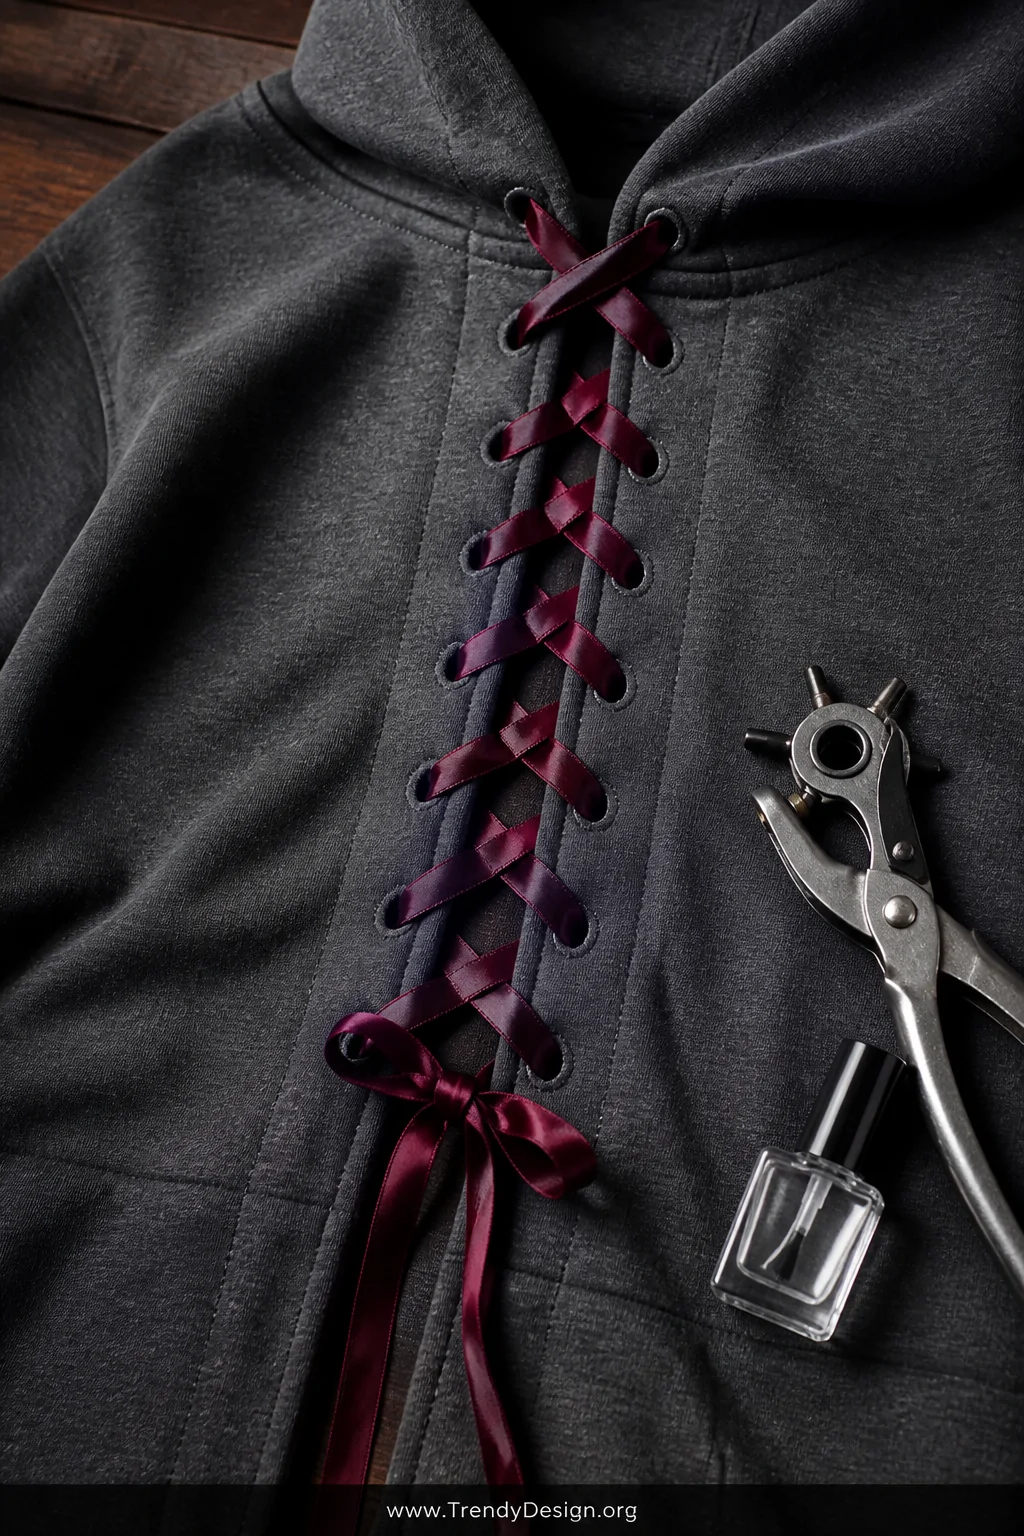
3. The Lace-Up Front Cut
As an Amazon Associate I earn from qualifying purchases.
This one takes about 20 extra minutes but the payoff is absolutely worth it. You’re cutting a vertical slit down the front of the hoodie and adding ribbon or cord lacing through small cuts on either side like a corset, but make it cozy. It sounds complicated, but it’s really just patience and a hole punch.
Use a leather hole punch or just the tip of your scissors to make evenly spaced holes along both sides of the slit. Thread your ribbon through and tie it however loosely or tightly you like. FYI, satin ribbon gives a more polished look while rope cord keeps it casual and sporty.
- Space your holes about 1.5 inches apart for the best visual balance
- Reinforce each hole with a tiny dab of clear nail polish to prevent fraying
- Mismatched ribbon colors make it even more interesting
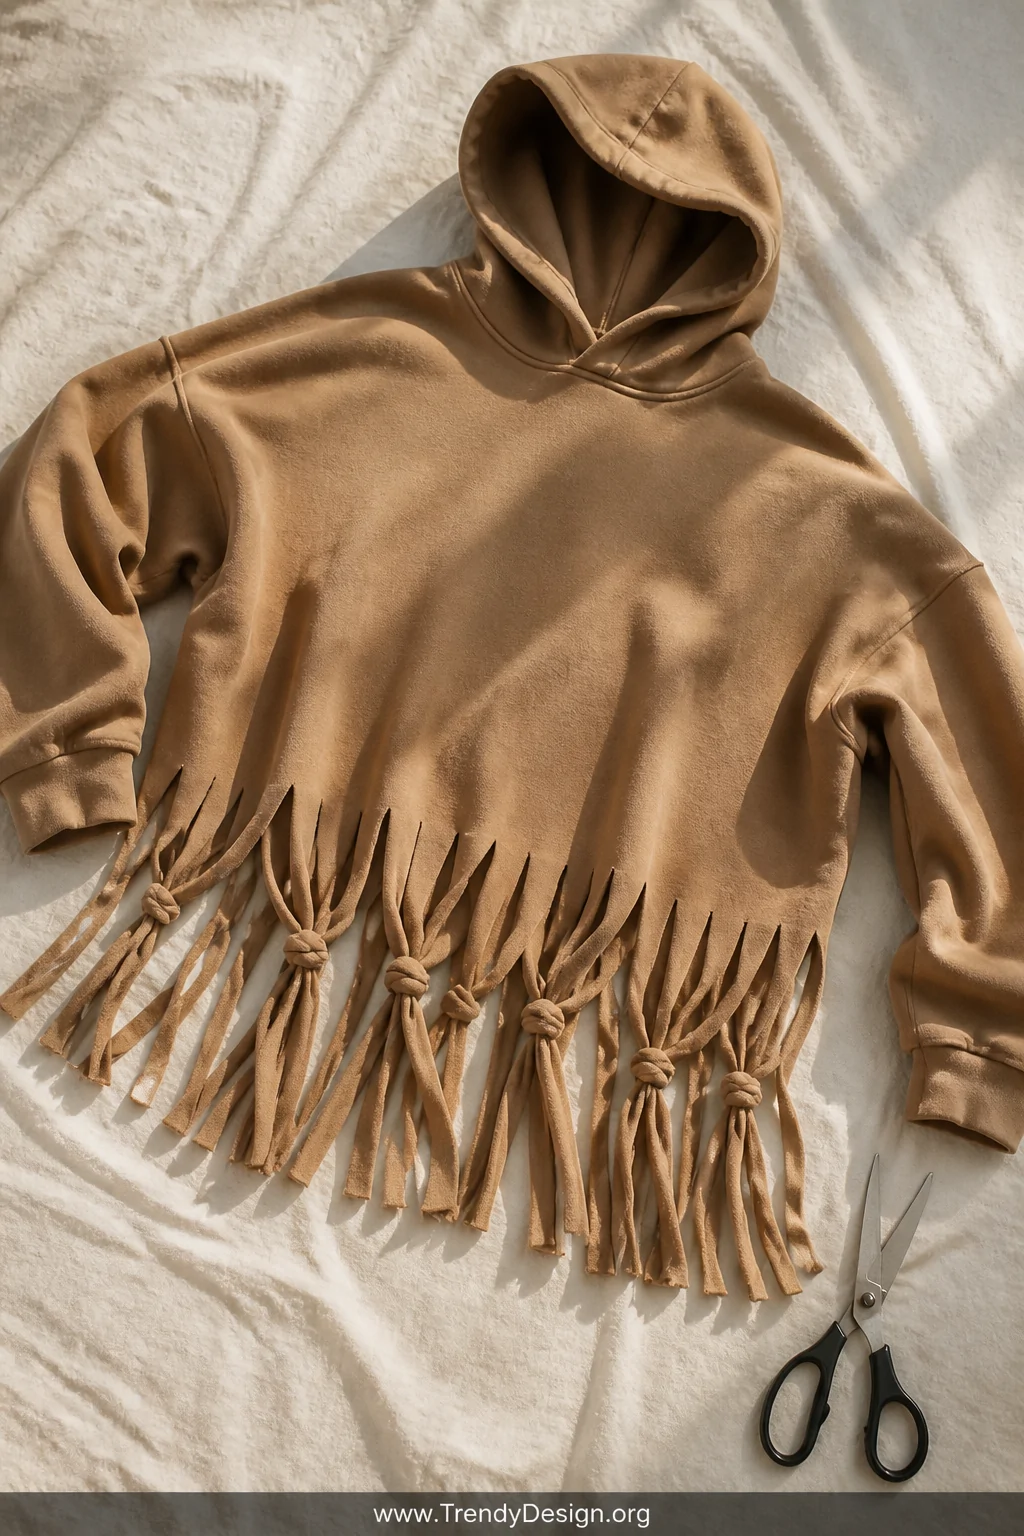
4. The Fringe Bottom Cut
As an Amazon Associate I earn from qualifying purchases.
Fringe makes everything more fun that’s just science. This DIY hoodie cutting idea involves cutting vertical strips along the bottom hem of your hoodie to create movement and texture. It’s bohemian, it’s playful, and it takes literally ten minutes.
Cut strips about half an inch wide and as long as you want the fringe to hang. The key is keeping your cuts parallel so the fringe looks intentional rather than accidental. Once you wash it, the strips will curl slightly and look even better.
Level It Up
Tie two adjacent fringe strips together in a simple knot for a knotted fringe effect that looks incredibly detailed but requires zero extra skill. You can also mix fringe on the sleeves with a cropped hem for a full boho moment.
5. The Sleeveless Muscle Tee Conversion
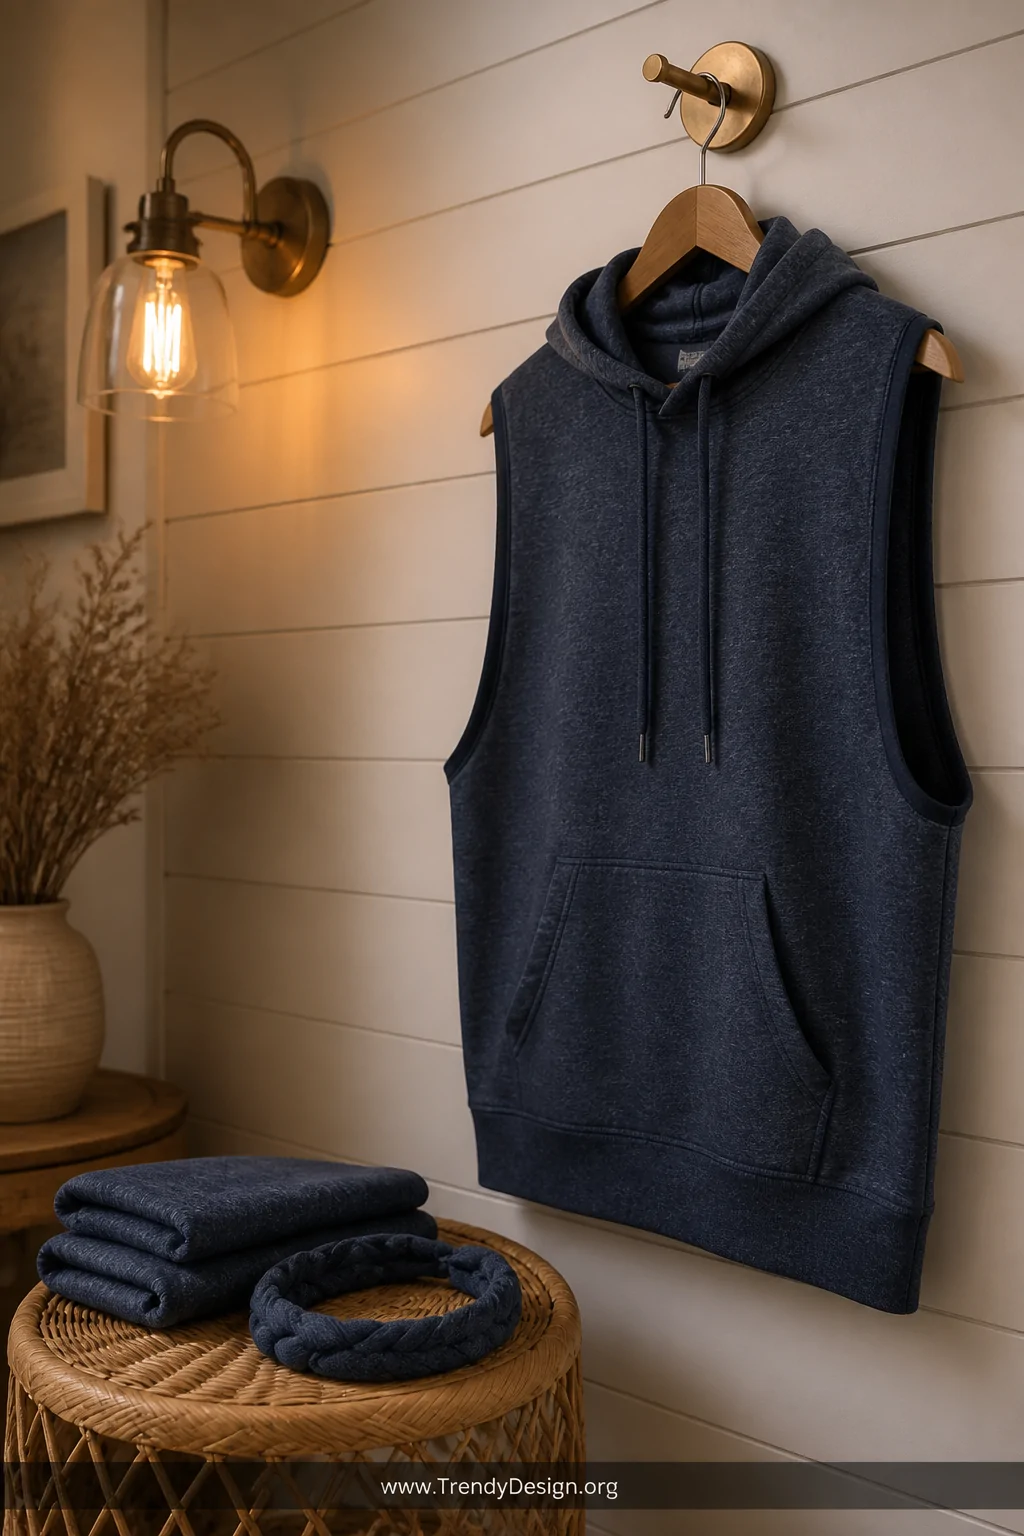
As an Amazon Associate I earn from qualifying purchases.
Hot take: cutting the sleeves off a hoodie creates the coziest, most versatile layering piece you’ll ever own. The sleeveless hoodie cut works over long sleeves in fall, over a bikini top in summer, and basically everywhere in between. It’s criminally underrated.
Cut close to the seam but leave about a half inch of fabric so the armhole doesn’t stretch out immediately. You can cut it straight across or dig deeper into the side for a more open, athletic silhouette. IMO, the deeper armhole cut looks the most intentional and elevated.
- Keep the cut fabric you can use it for headbands or wrist ties later
- Cut both sleeves at the same time by folding the hoodie flat to match them up
- A slightly angled cut at the shoulder gives a cool vintage gym feel
6. The Geometric Cutout Back Design
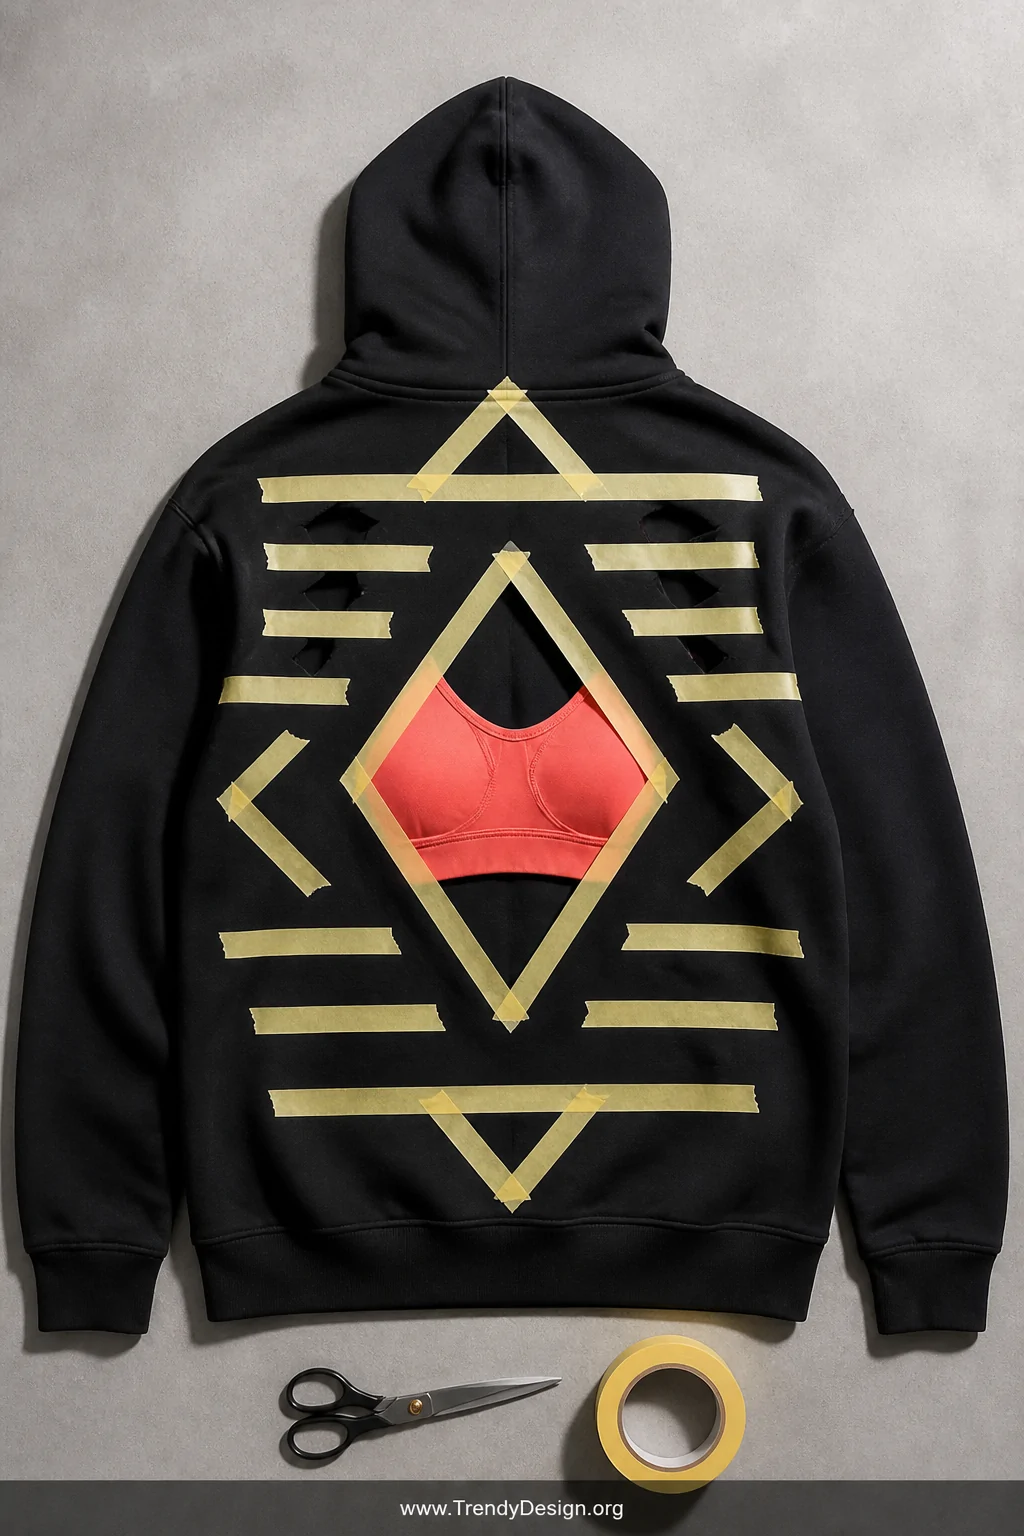
As an Amazon Associate I earn from qualifying purchases.
This one is the showstopper of all DIY hoodie cutting ideas. You’re creating a pattern of cutouts on the back of the hoodie triangles, diamonds, horizontal slits, whatever speaks to you. It looks like something you’d spend serious money on at a boutique.
Use masking tape to map out your design on the back before cutting anything. This gives you a visual preview and keeps your cuts straight and symmetrical. Start simple with three or four horizontal slits, then graduate to more complex shapes as your confidence builds.
The best part? Every single design is completely unique because you’re making the rules. Wear it with a colorful bralette underneath so the cutouts frame a pop of color it’s a whole look with basically zero effort.
Your closet is full of potential, and all it takes is a little courage and a sharp pair of scissors. These DIY hoodie cutting ideas prove that creativity doesn’t need a budget just a willingness to take the first cut. Start with the easiest one that excites you, and don’t stress about perfection. The most stylish pieces always have a little personality in the imperfections.
Leave a Reply