There’s something almost magical about rolling a simple rope of clay and watching it transform into something beautiful. Clay coil pots are one of the oldest pottery techniques in human history, and honestly, they’re still one of the most satisfying things you can make with your hands. Whether you’re a total beginner or someone who’s been elbow-deep in clay for years, these nine ideas will spark your creativity and maybe even convince you to clear off that kitchen table and get messy.
The best part about coil building? You don’t need a wheel, a fancy studio, or years of training. You just need some clay, your hands, and a little patience. Let’s dive into nine seriously fun clay coil pot ideas that range from simple and sweet to impressively sculptural.
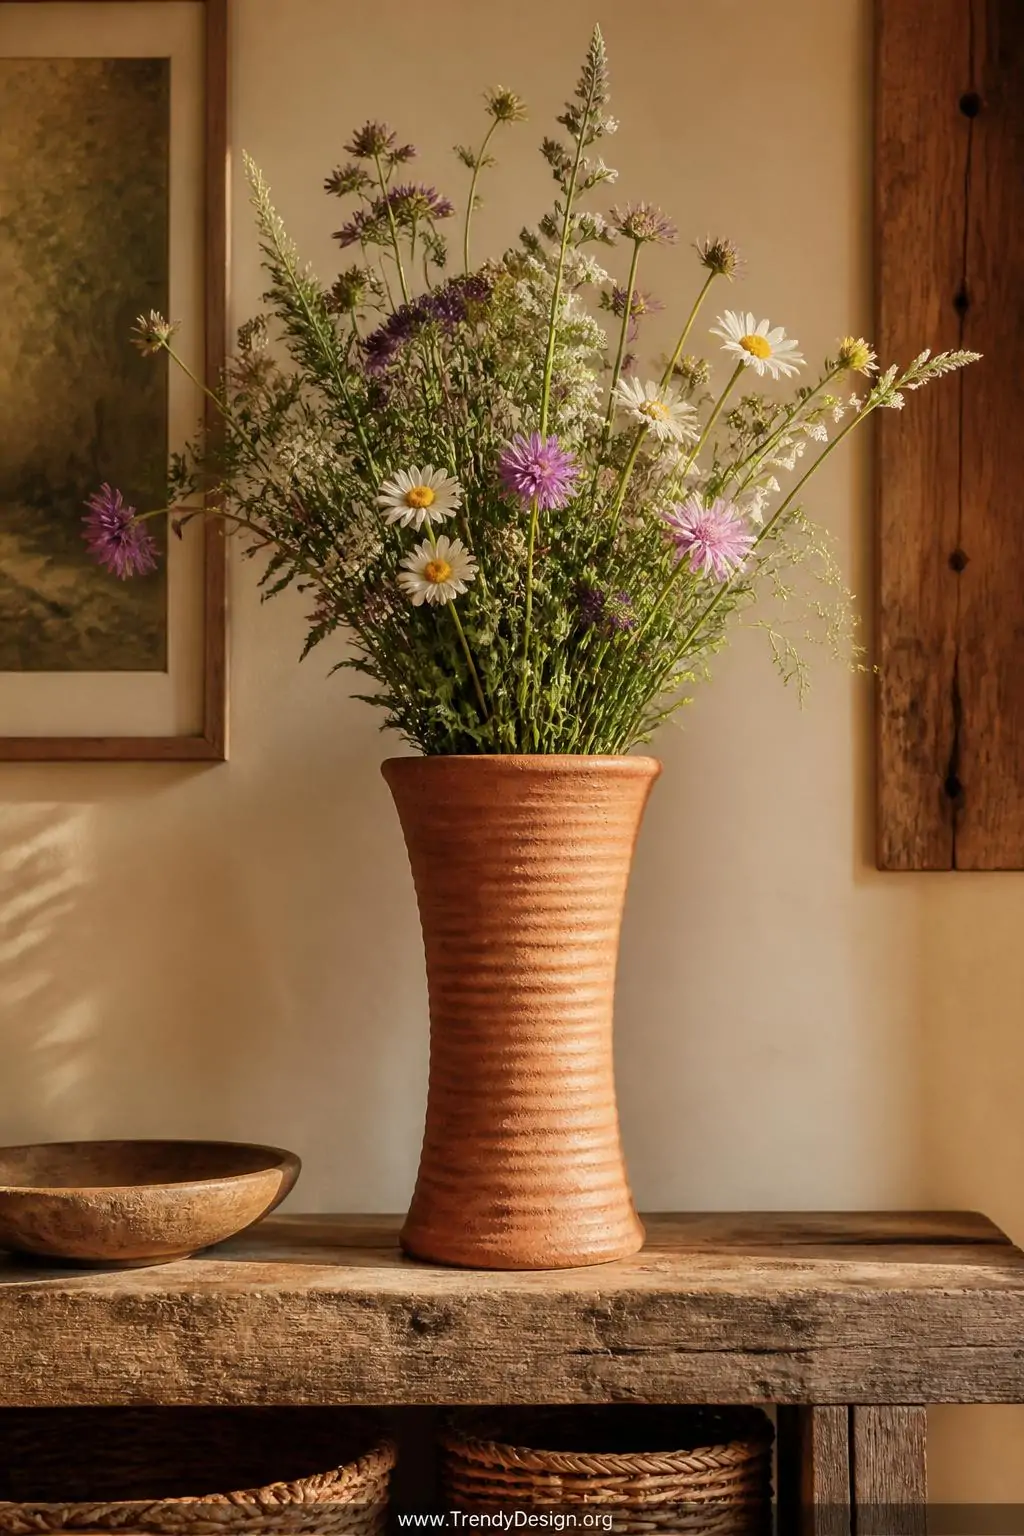
1. The Classic Pinched-Coil Flower Vase
As an Amazon Associate I earn from qualifying purchases.
This is the perfect starting point for anyone new to the coil method. A classic pinched-coil flower vase is made by stacking coils and smoothing them together on the inside while leaving the outside slightly textured for a rustic, handmade look. The result is a vase with genuine character — no two will ever look exactly alike.
To make yours stand out, try flaring the top outward as you add your final coils. This gives the vase that gorgeous trumpet shape that holds a bouquet of wildflowers like it was born to do exactly that. Add a little slip between each coil layer to keep everything bonded and strong.
- Use air-dry clay if you don’t have kiln access
- Smooth the interior coils thoroughly to prevent cracking
- Seal the finished vase before adding water to it
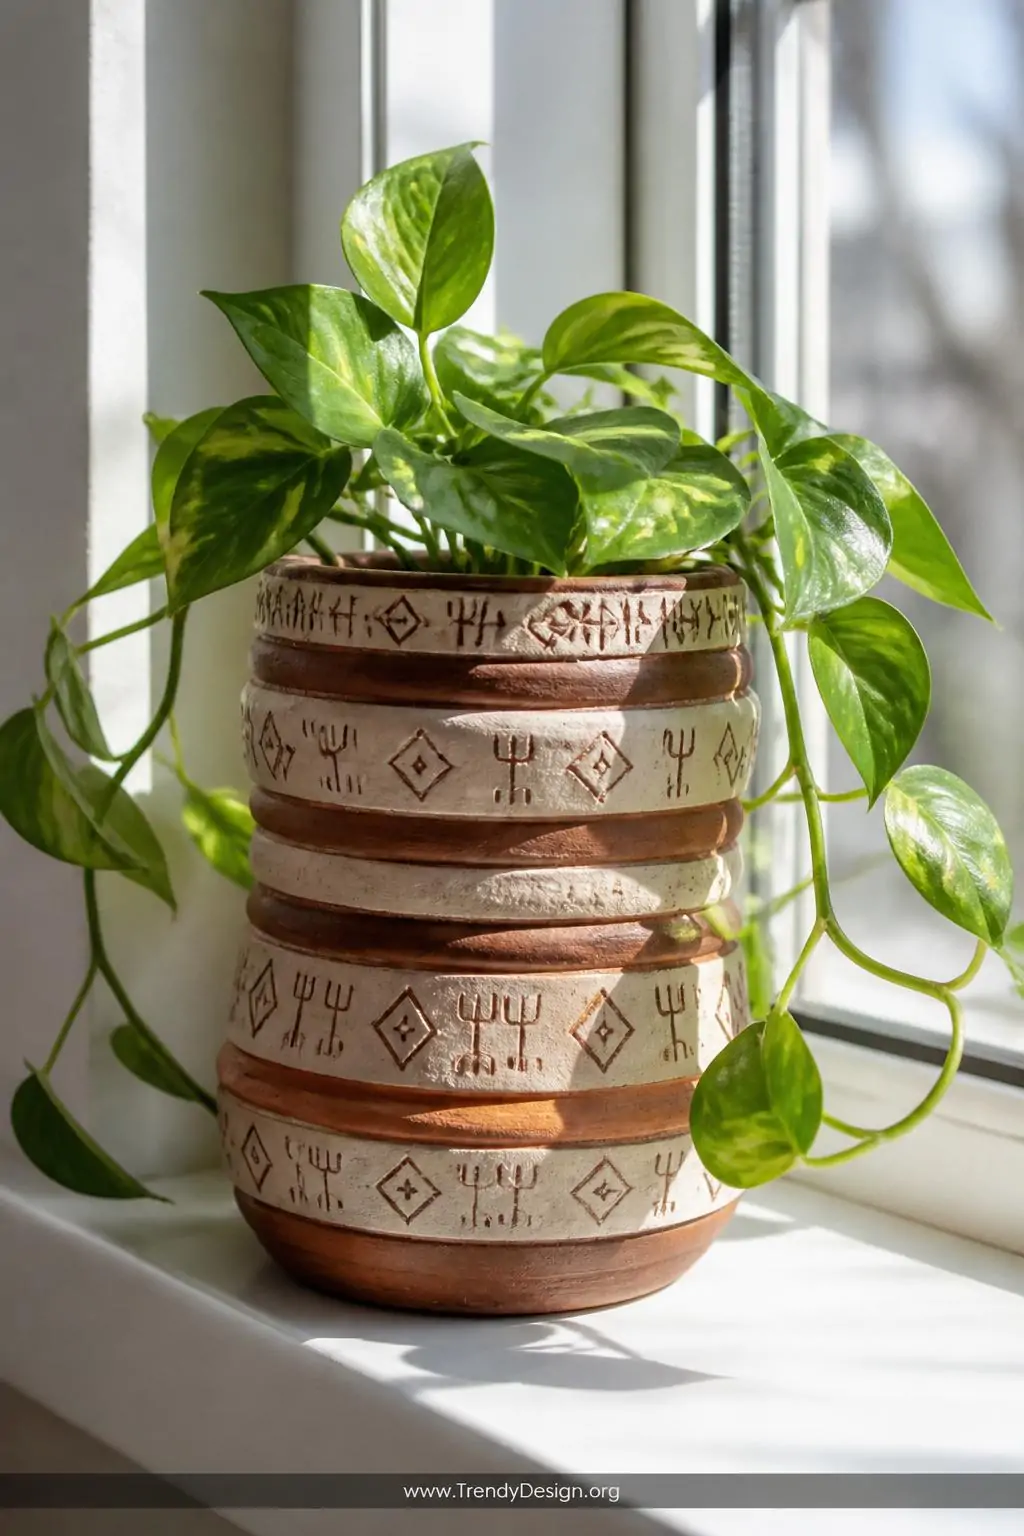
2. The Textured Coil Planter With Geometric Patterns
As an Amazon Associate I earn from qualifying purchases.
A textured coil planter with geometric patterns takes the basic coil technique and turns it into wearable art — well, plant-wearable art. Instead of smoothing your coils together, you leave them visible and intentional, creating a rhythmic, striped surface that looks incredibly sophisticated sitting on a windowsill.
You can press stamps, combs, or even a fork into the coils before they dry to add extra geometric detail. IMO, this is where coil pots really start to feel like fine art rather than a craft project. Try alternating thick and thin coils for a more dynamic, eye-catching pattern on the outside of your planter.
Tips for Geometric Success
- Plan your pattern on paper before you start building
- Keep coil thickness consistent for cleaner lines
- Use a loop tool to carve crisp geometric shapes into the surface
- Let each section firm up slightly before adding the next coil
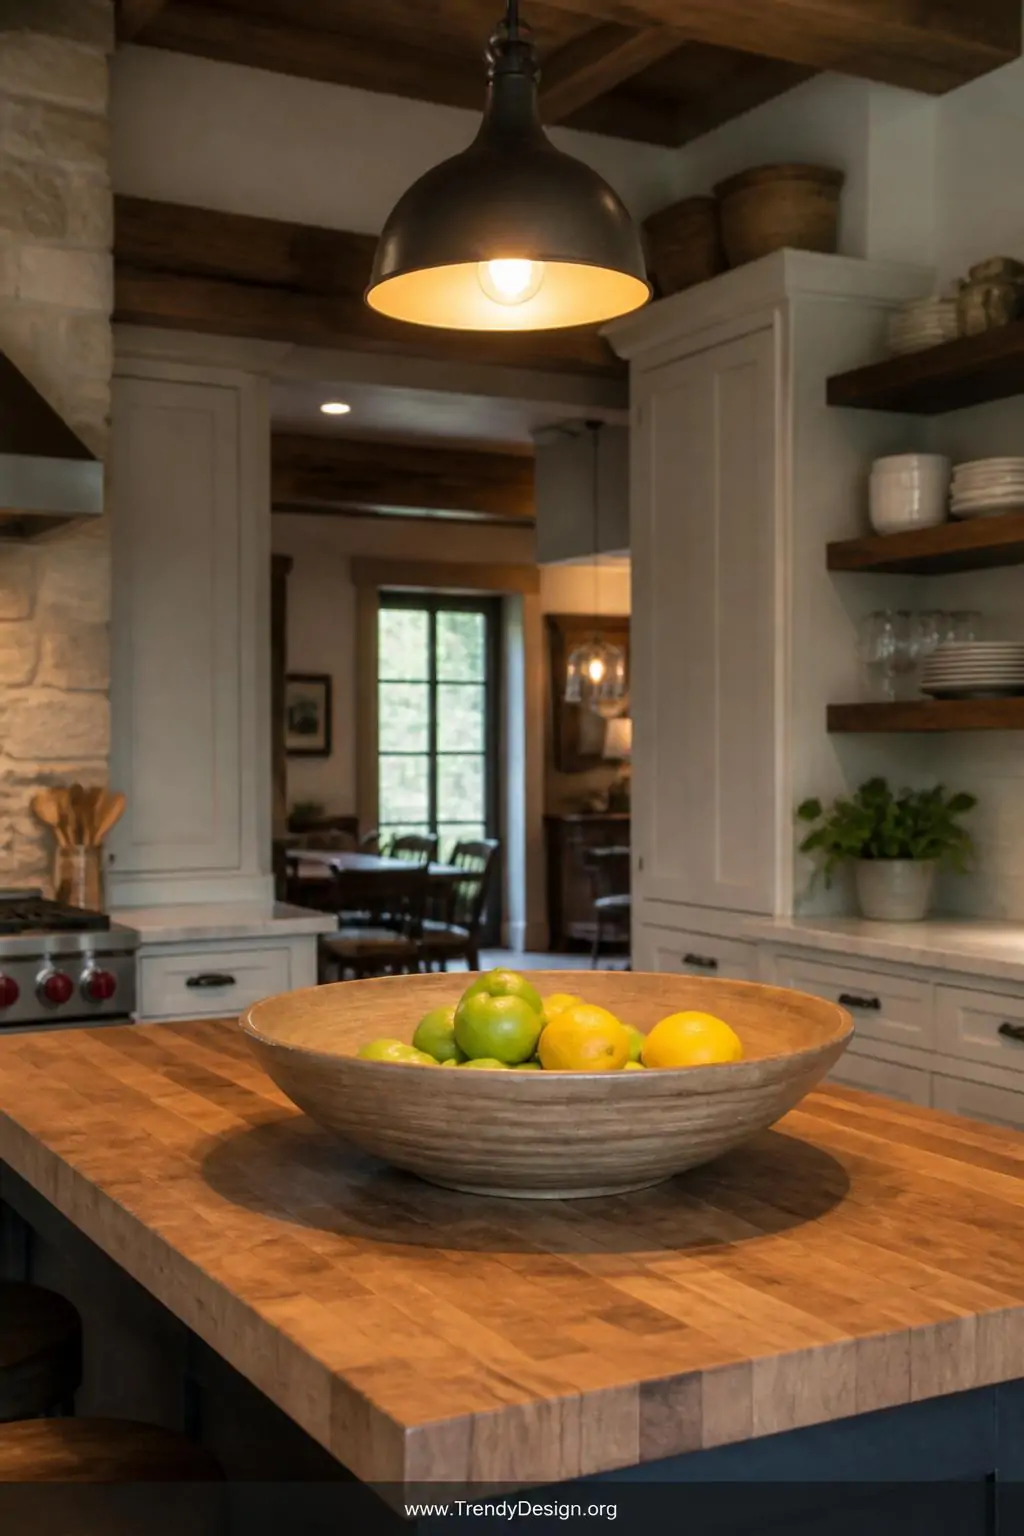
3. The Wide-Mouthed Coil Fruit Bowl
As an Amazon Associate I earn from qualifying purchases.
A wide-mouthed coil fruit bowl is one of those projects that’s functional AND gorgeous, which is really the dream combination. By gradually widening your coil rings as you build upward, you create a broad, open bowl shape that’s perfect for displaying fruit, keys, or pretty much anything that needs a beautiful home.
The trick here is keeping the base sturdy enough to support the wide opening. Build a solid pinched base first, then begin your coils from there. FYI, if your bowl starts to feel wobbly or soft, just cover it loosely with plastic wrap and let it rest for twenty minutes before continuing.
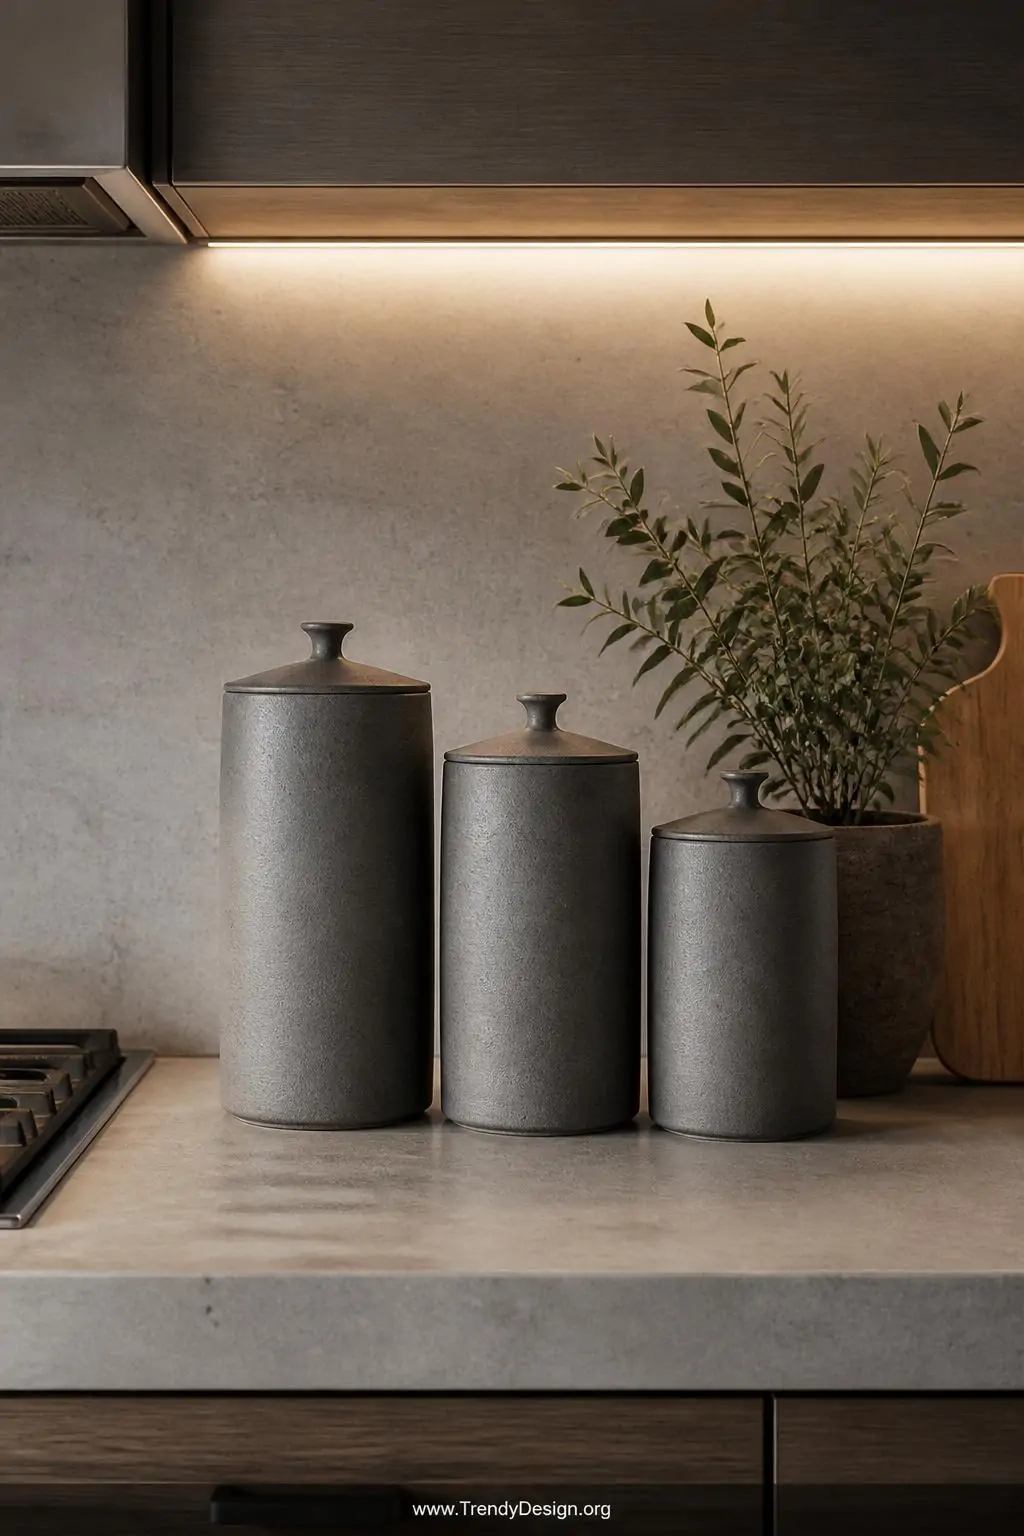
4. The Tall Coil Storage Canister With a Lid
As an Amazon Associate I earn from qualifying purchases.
A tall coil storage canister with a lid is a project that feels seriously impressive when you’re done. We’re talking the kind of piece you put on your kitchen counter and wait for someone to compliment it. Building tall with coils requires patience, but the technique is actually very forgiving compared to throwing on a wheel.
The lid is the fun part — you’ll build it as a separate shallow coil dish that sits snugly on top of the canister. Add a small coil loop or a pinched clay knob in the center as a handle. These canisters look incredible when made in a set of three with slightly different heights, like a little clay family living on your shelf.
- Score and slip every coil connection for a strong bond
- Measure the opening carefully before building the lid
- Let the canister stiffen before adding the upper coils
- Sand the bottom smooth so it doesn’t scratch your countertop
5. The Organic Coil Succulent Pot
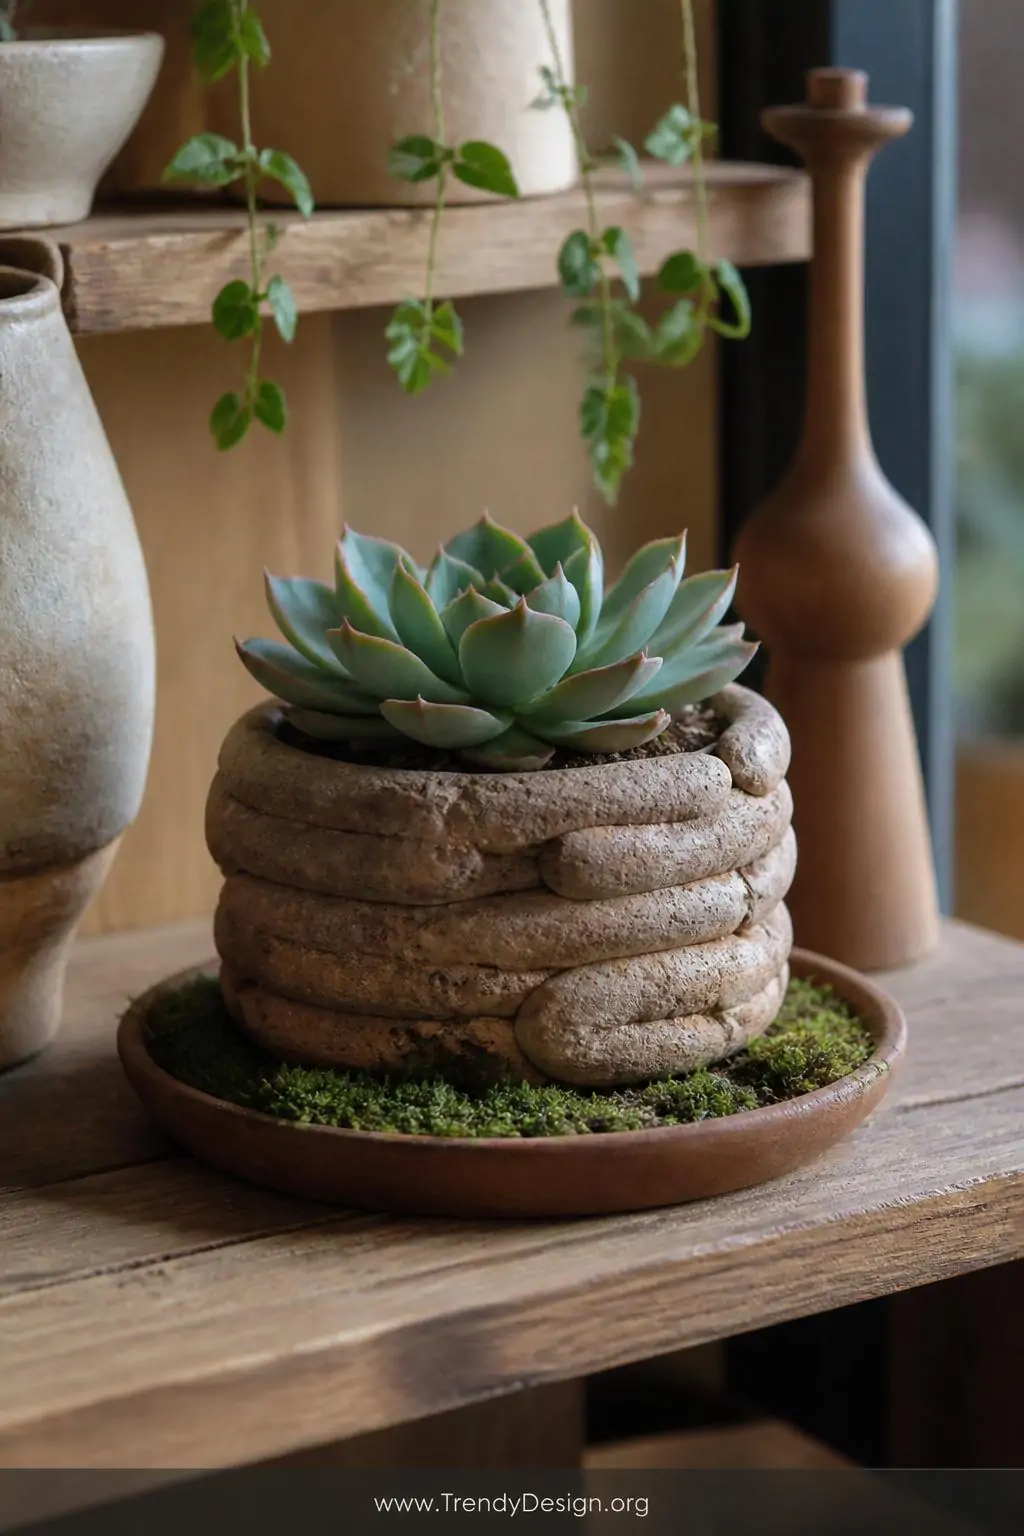
As an Amazon Associate I earn from qualifying purchases.
Not every pot needs to be perfectly symmetrical — and an organic coil succulent pot celebrates that fact beautifully. This style leans into the natural, wobbly quality of hand-rolled coils to create a pot that looks like it grew straight out of the earth itself. It’s rustic, it’s earthy, and it’s exactly the right home for a chunky little succulent.
Try building this pot with slightly uneven coils, gently pulling and nudging the walls as you go to create a naturally irregular silhouette. The texture on the outside can remain rough and coil-y, which adds to that wonderful organic feel. Honestly, the “imperfections” are what make this pot so deeply charming.
6. The Decorative Coil Vase With Sculptural Handles
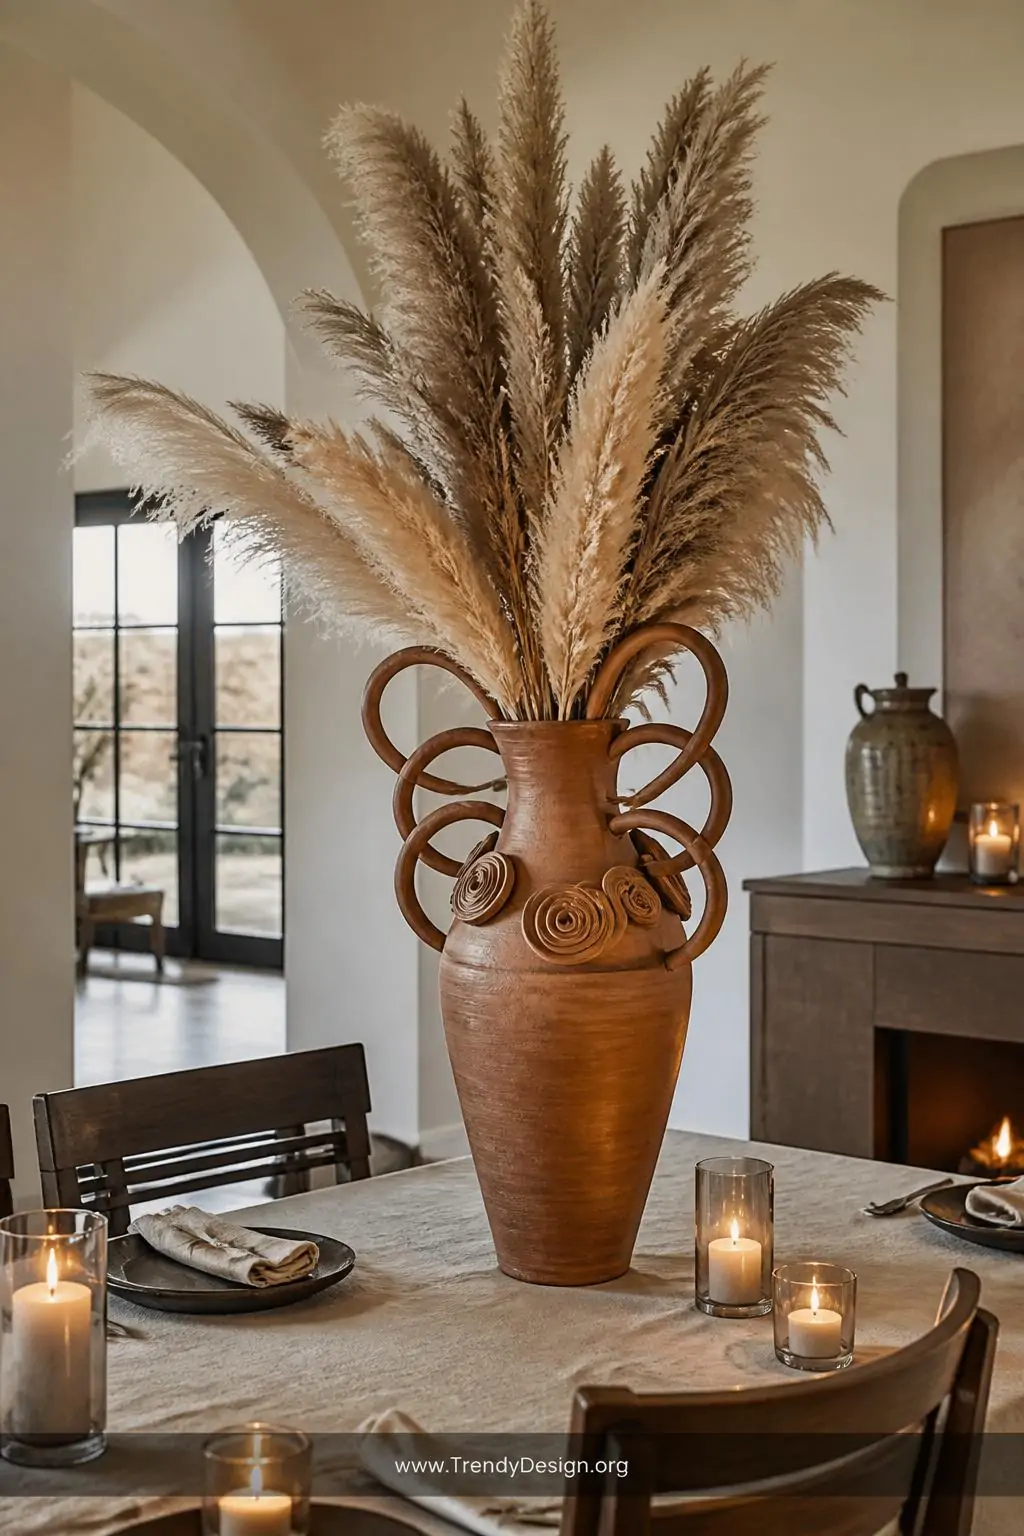
As an Amazon Associate I earn from qualifying purchases.
A decorative coil vase with sculptural handles is where things get really exciting. You build your vase using standard coil stacking, then add bold, looping clay handles on the sides that are essentially thick coils shaped and attached while the clay is still leather-hard. The handles can be simple loops or dramatically curved — totally up to you.
This style of vase has a beautiful ancient Greek or Mediterranean vibe that looks stunning on a bookshelf or dining table centerpiece. Adding sculptural elements to your coil pots is a great way to push the technique beyond basic shapes and into genuine artistic territory. You can also add small coil rosettes or dots around the handles for extra decorative detail.
Handle Attachment Guide
- Score both the handle and vase surface before attaching
- Apply slip generously to both scored areas
- Press firmly and blend the edges smoothly
- Support the handles with foam or crumpled paper while drying
7. The Coil Bowl With Carved Leaf Designs
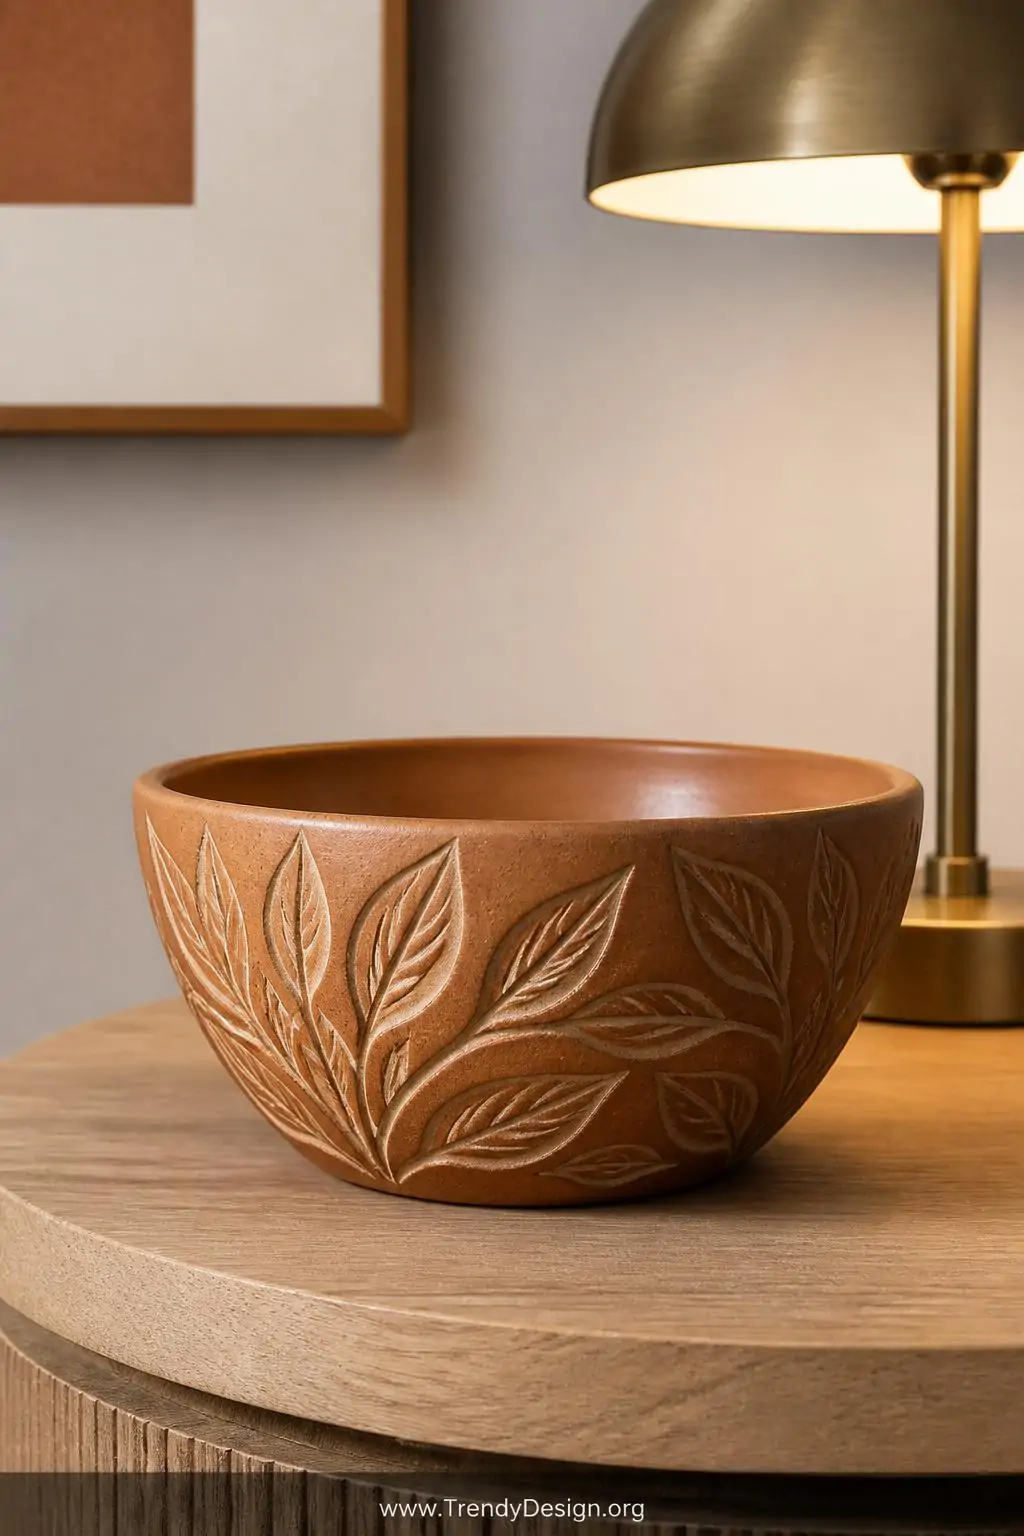
As an Amazon Associate I earn from qualifying purchases.
A coil bowl with carved leaf designs combines the building technique with surface decoration in a way that feels genuinely artisan. You build a medium-sized bowl using smooth, blended coils, then wait until the clay reaches leather-hard stage before carving delicate leaf or botanical motifs into the outer surface using a loop tool or carving knife.
The carved areas catch glaze differently than the smooth surface, creating a beautiful contrast after firing. If you’re using air-dry clay, acrylic paint works wonderfully to highlight those carved grooves. Botanical-inspired clay coil pots like this one have a timeless quality that works in any room, from a boho living space to a more minimalist modern home.
8. The Coil Lantern With Cutout Windows
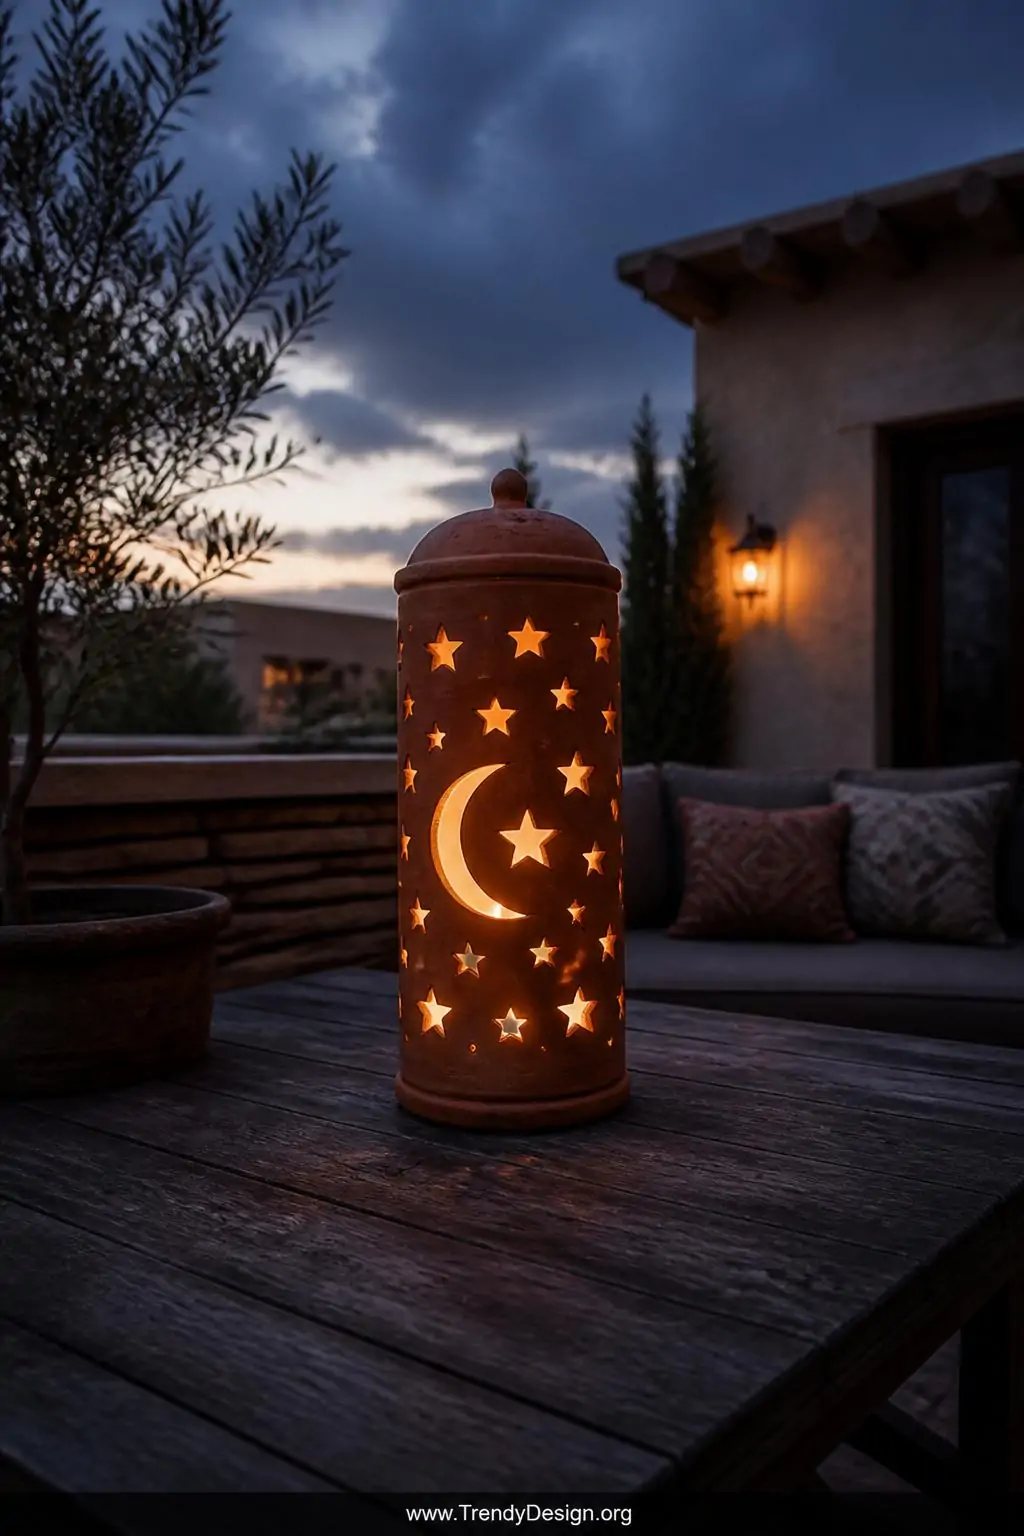
As an Amazon Associate I earn from qualifying purchases.
A coil lantern with cutout windows is honestly one of the most dramatic and rewarding clay coil pot ideas on this list. You build a tall, enclosed cylindrical form using coils, then use a craft knife to cut out geometric or organic window shapes through the walls while the clay is still leather-hard. When a tea light sits inside, the glow through those cutouts is absolutely magical.
This project requires a little more planning than an open bowl, because you’ll need to create a removable base or large enough opening at the top to place and retrieve your candle safely. Try cutting star shapes, diamonds, or even tiny moon and cloud silhouettes for a whimsical, dreamy effect in your bedroom or on a patio table.
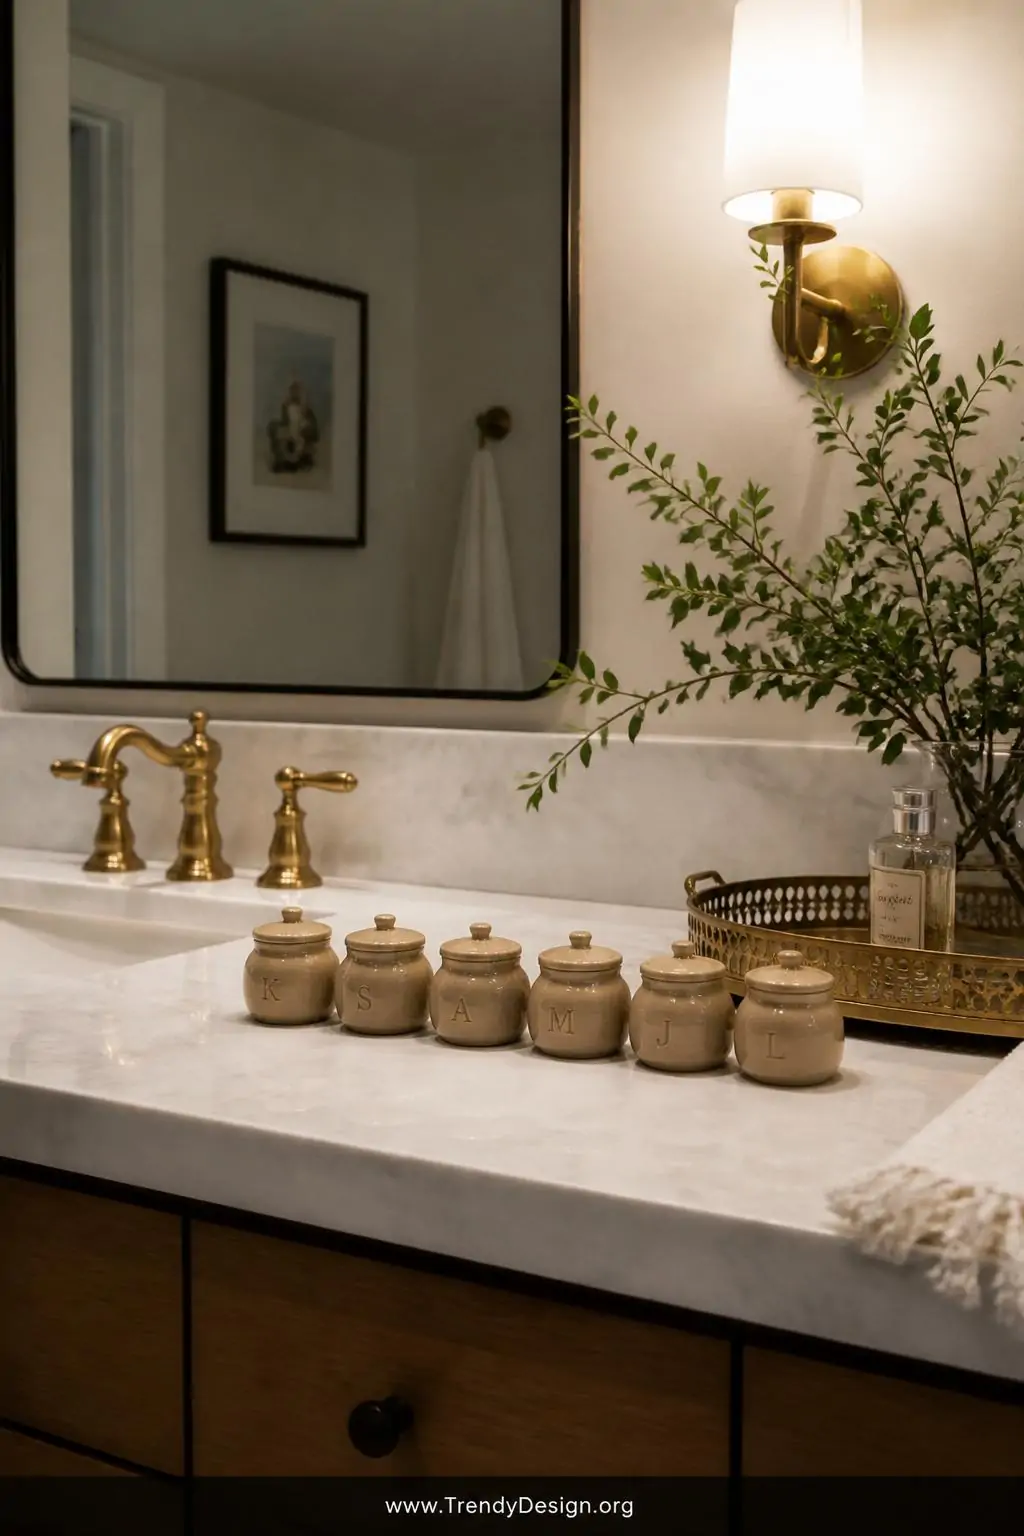
9. The Mini Coil Pot Set for Spices or Jewelry
As an Amazon Associate I earn from qualifying purchases.
A mini coil pot set for spices or jewelry is the perfect project when you want big results without committing to a big build. These tiny pots — usually just two to four inches tall — are made with thin, carefully rolled coils and are incredibly satisfying to produce in a matching set. Line them up on a spice rack, a bathroom vanity, or a desk organizer and they look like something from a boutique shop.
Making a set of four to six mini pots lets you practice consistency in your coil rolling and shaping, which actually improves your larger builds significantly. FYI, these also make the most thoughtful handmade gifts — personalize each one with a stamped initial or a carved pattern and suddenly you have something truly special to give someone you love.
- Roll coils extra thin — about the width of a pencil
- Work on a small tile so you can rotate easily
- Make lids for the spice versions using tiny pinched clay discs
- Group odd numbers together for the most visually pleasing display
The Bottom Line
Clay coil pots have been around for thousands of years, and they’re not going anywhere — because they’re just that good. Whether you build a dramatic sculptural vase with handles, a glowing lantern, or an adorable set of mini spice pots, the coil building technique gives you incredible creative freedom without requiring expensive equipment or advanced skills.
The best thing you can do right now is grab some clay — air-dry works perfectly — roll your first coil, and just start building. Your first clay coil pot probably won’t be perfect, and that’s exactly what makes it wonderful. Every wobbly wall and uneven coil is proof that a human being made something real with their own two hands, and there’s truly nothing better than that.
Leave a Reply