Birthdays deserve more than a store-bought banner and a bag of balloons from the dollar bin. Whether you’re planning a party for your best friend, your kid, or honestly just yourself, birthday DIY ideas can transform a simple gathering into something truly magical. The best part? You don’t need a craft degree or a Pinterest-worthy studio to pull these off.
These projects are fun, affordable, and totally doable even if your last craft attempt ended in a glue gun disaster. So grab your scissors, clear some table space, and let’s get into it!
1. Personalized Photo Balloon Garland
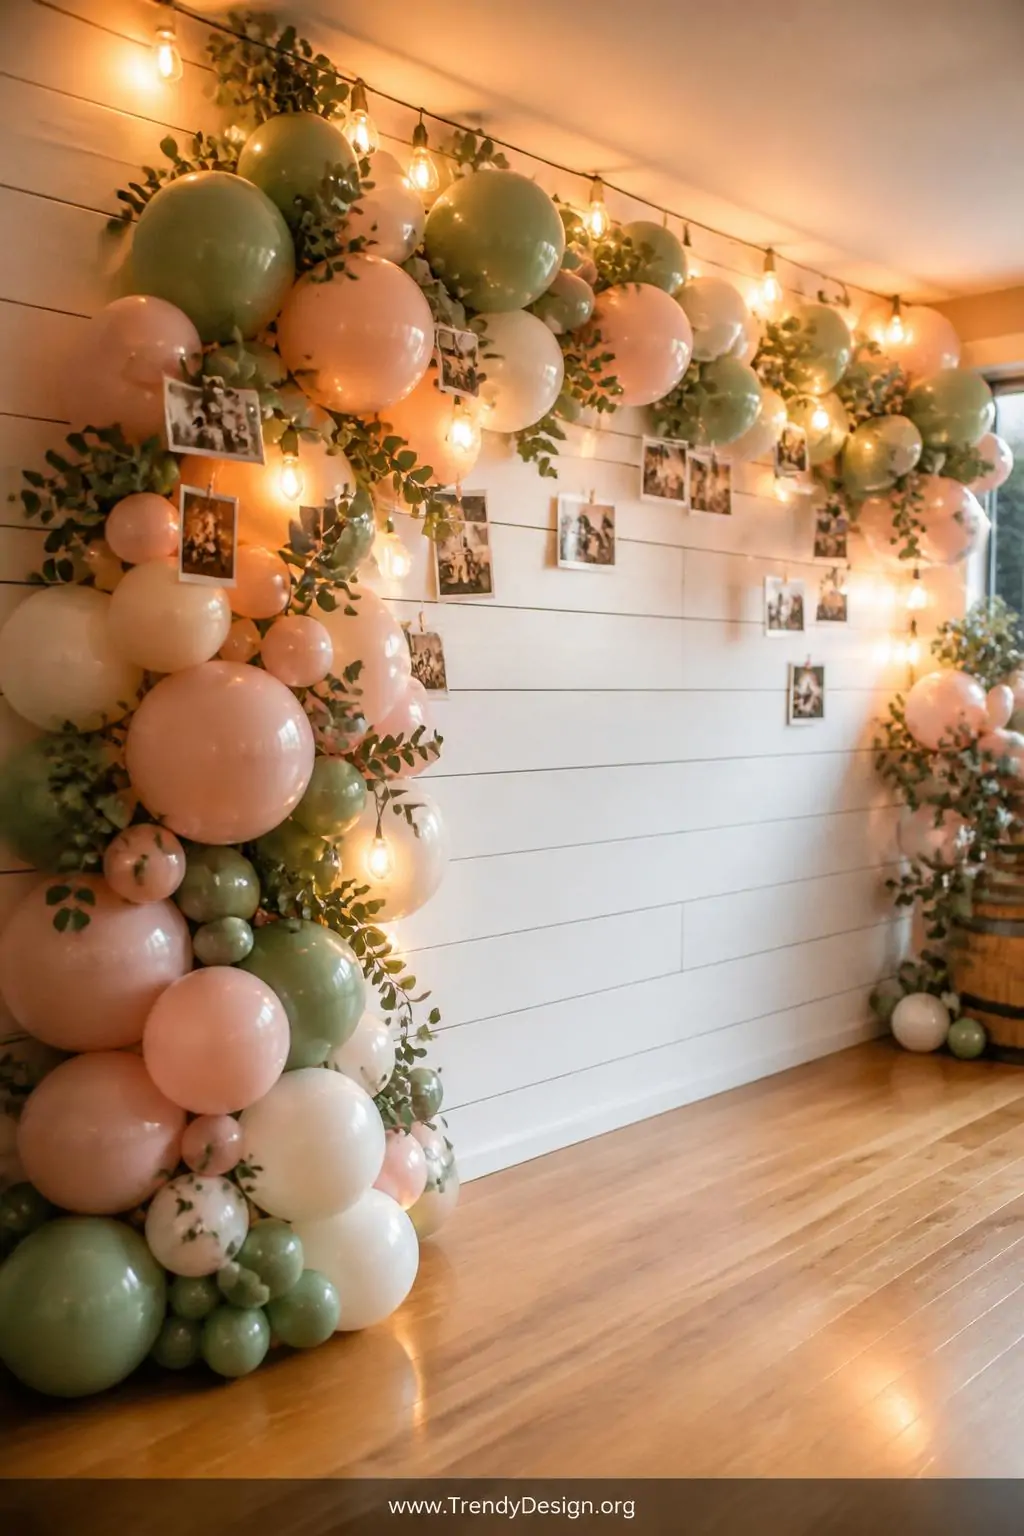
A balloon garland is already a showstopper, but adding printed mini photos tucked between the balloons takes it to a whole new level. Print out small square photos of the birthday person through the years, punch a hole in each one, and string them right into your balloon arrangement.
This doubles as both decoration and a sweet little memory lane moment. Guests will gather around it, laugh at old photos, and the birthday person will absolutely love the personal touch. IMO, this is the single easiest upgrade you can make to any party setup.
- Use a balloon decorating strip to make garland assembly much easier
- Stick to 2-3 coordinating balloon colors for a polished look
- Print photos at 3×3 inches for the perfect visible size
- Add greenery like eucalyptus sprigs for extra texture
2. DIY Cake Topper with Gold Wire

Forget the flimsy plastic toppers from the party supply store. A custom wire cake topper looks expensive and elegant but costs almost nothing to make. All you need is some gold or rose gold craft wire, pliers, and about twenty minutes of your time.
Bend the wire into letters, numbers, or a fun phrase like “Party Queen” or “Finally 30.” Twist the ends into a small coil at the base so it stands upright on the cake without falling over. These birthday DIY ideas for toppers also make incredible keepsakes that people actually hold onto after the party.
What You’ll Need
- 20-gauge gold or rose gold craft wire
- Round-nose pliers and wire cutters
- A pencil or dowel to help shape curves
- Optional: small wooden base for extra stability
3. Tissue Paper Backdrop Wall
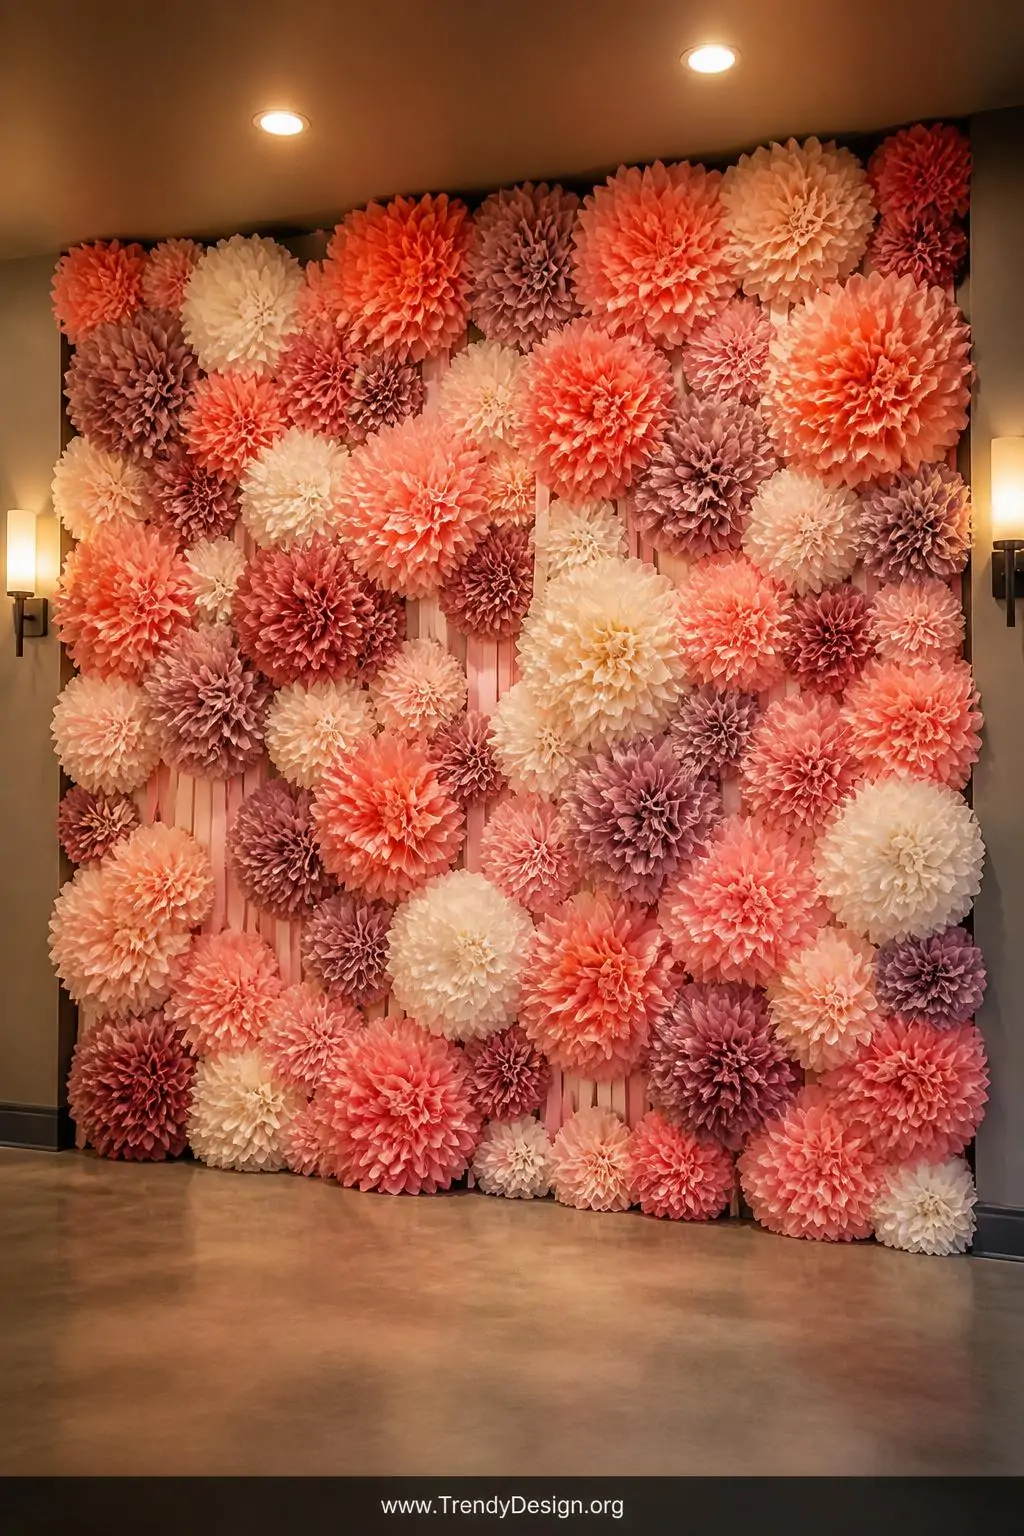
A tissue paper flower wall is one of those wildly impressive decorations that people assume took weeks but actually only takes an afternoon. You make a bunch of pom-pom flowers in different sizes and colors, then attach them to a wall using removable hooks and string.
The key is varying your flower sizes mix large 12-inch blooms with smaller 6-inch ones for depth and dimension. Stick to a cohesive color palette that matches your party theme, and don’t be afraid to fill in gaps with simple crepe paper streamers. FYI, this backdrop photographs beautifully and will make every guest’s birthday post look absolutely stunning.
You can knock out the flowers while watching your favorite show the night before the party. Make more than you think you need you’d rather have leftover flowers than a sparse-looking wall.
4. Handmade Party Favor Boxes
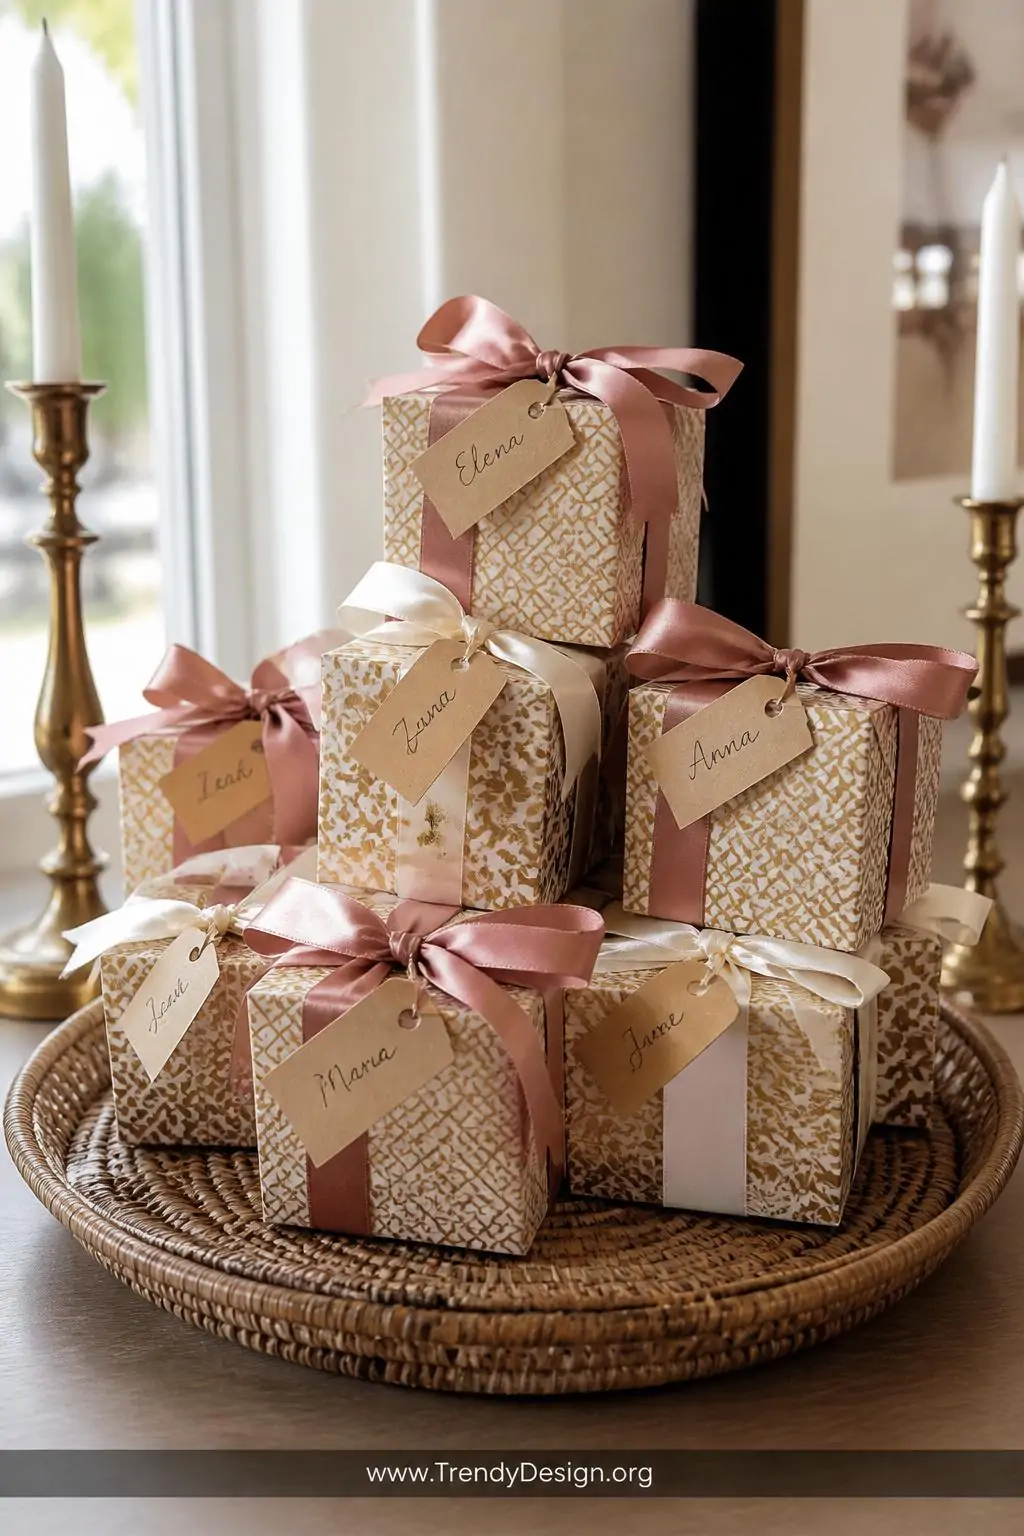
Sending guests home with a thoughtful little gift is such a warm touch, and handmade favor boxes make the gesture feel even more special. Use patterned cardstock to fold simple cube-shaped boxes, then fill them with a mix of chocolates, small candles, or personalized notes.
Templates for these boxes are free all over the internet just print, score, fold, and secure with a dab of glue. Tie them closed with a ribbon in your party colors and add a small tag with the guest’s name. It’s a beautiful little detail that guests genuinely appreciate.
- Coordinate box patterns with your overall party color scheme
- Use a bone folder for crisp, clean folds every time
- Fill with a mix of sweet and savory treats for variety
- Add a handwritten thank-you note inside for extra warmth
- Stack them on a decorative tray near the exit for easy gifting
5. Custom Birthday Banner with Watercolor Letters
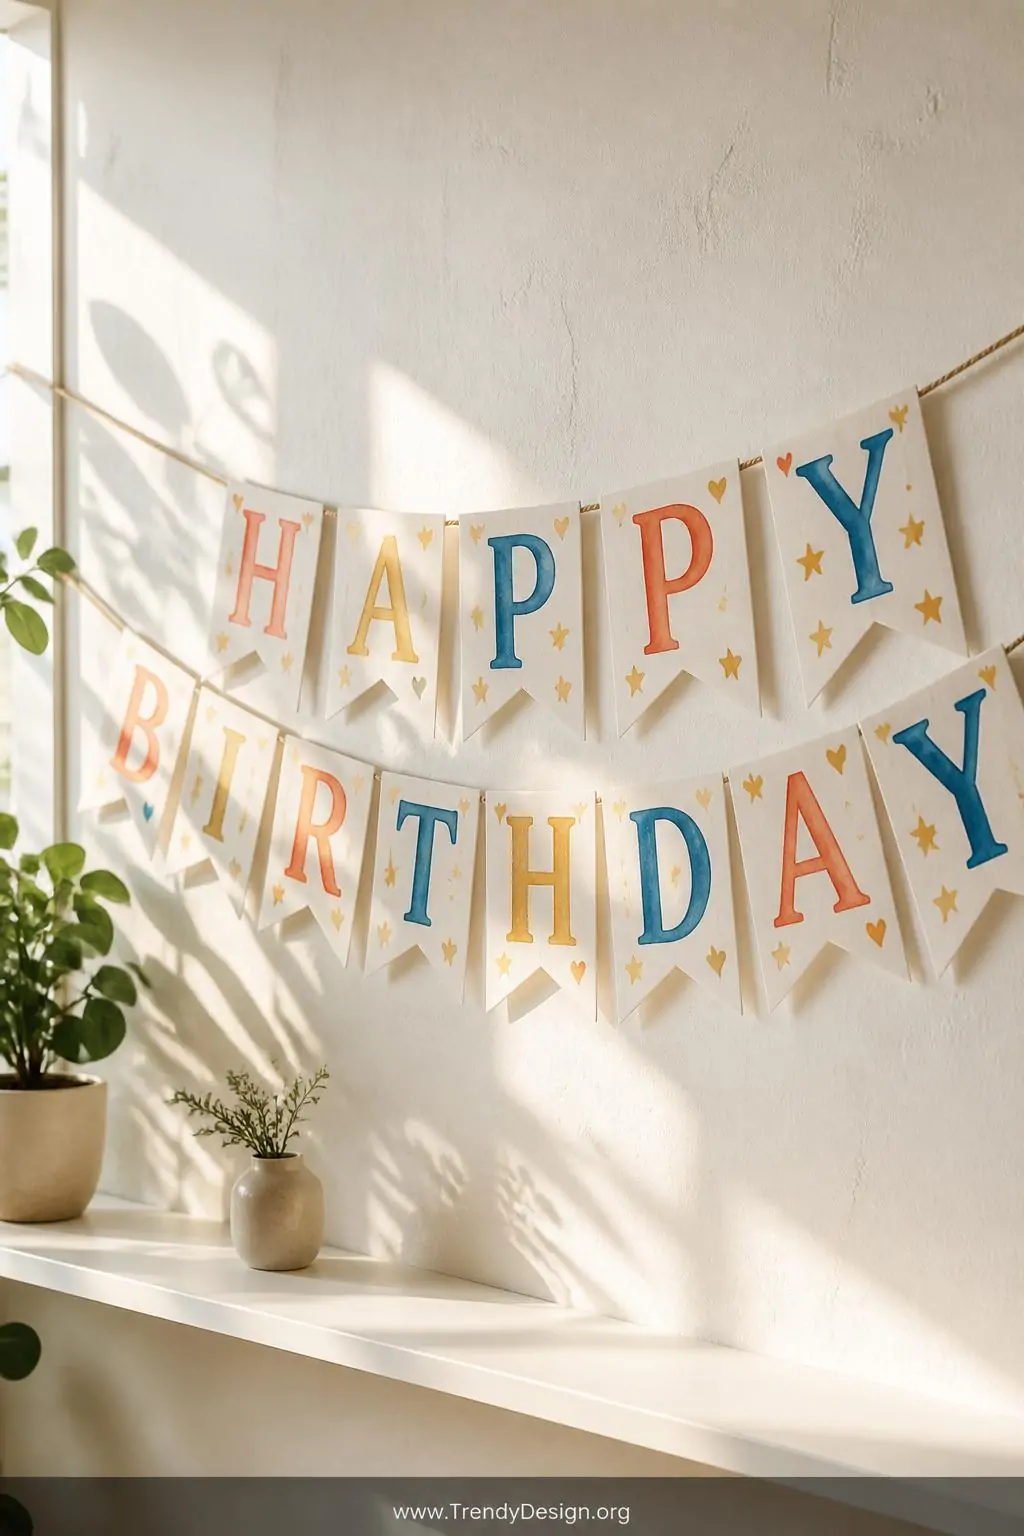
A hand-painted banner is one of those charming birthday DIY ideas that gives your party instant personality and warmth. Cut triangular pennants from white cardstock, paint each letter of “Happy Birthday” using watercolor paints, and string them together with twine once they dry.
Don’t stress about making it look perfectly uniform the slight imperfections in hand-lettering are exactly what make it look artisan and intentional. Add little dots, stars, or tiny hearts between the pennants for extra flair. Honestly, even if you think you have terrible handwriting, once it’s painted and strung up, it looks absolutely lovely.
Pro Tips for Painting Your Banner
- Lightly pencil your letters first before painting over them
- Use a flat watercolor brush for consistent letter thickness
- Let each pennant dry completely before handling to avoid smearing
- Add a second coat of paint for more vibrant, saturated color
6. DIY Centerpiece with Floating Candles and Florals
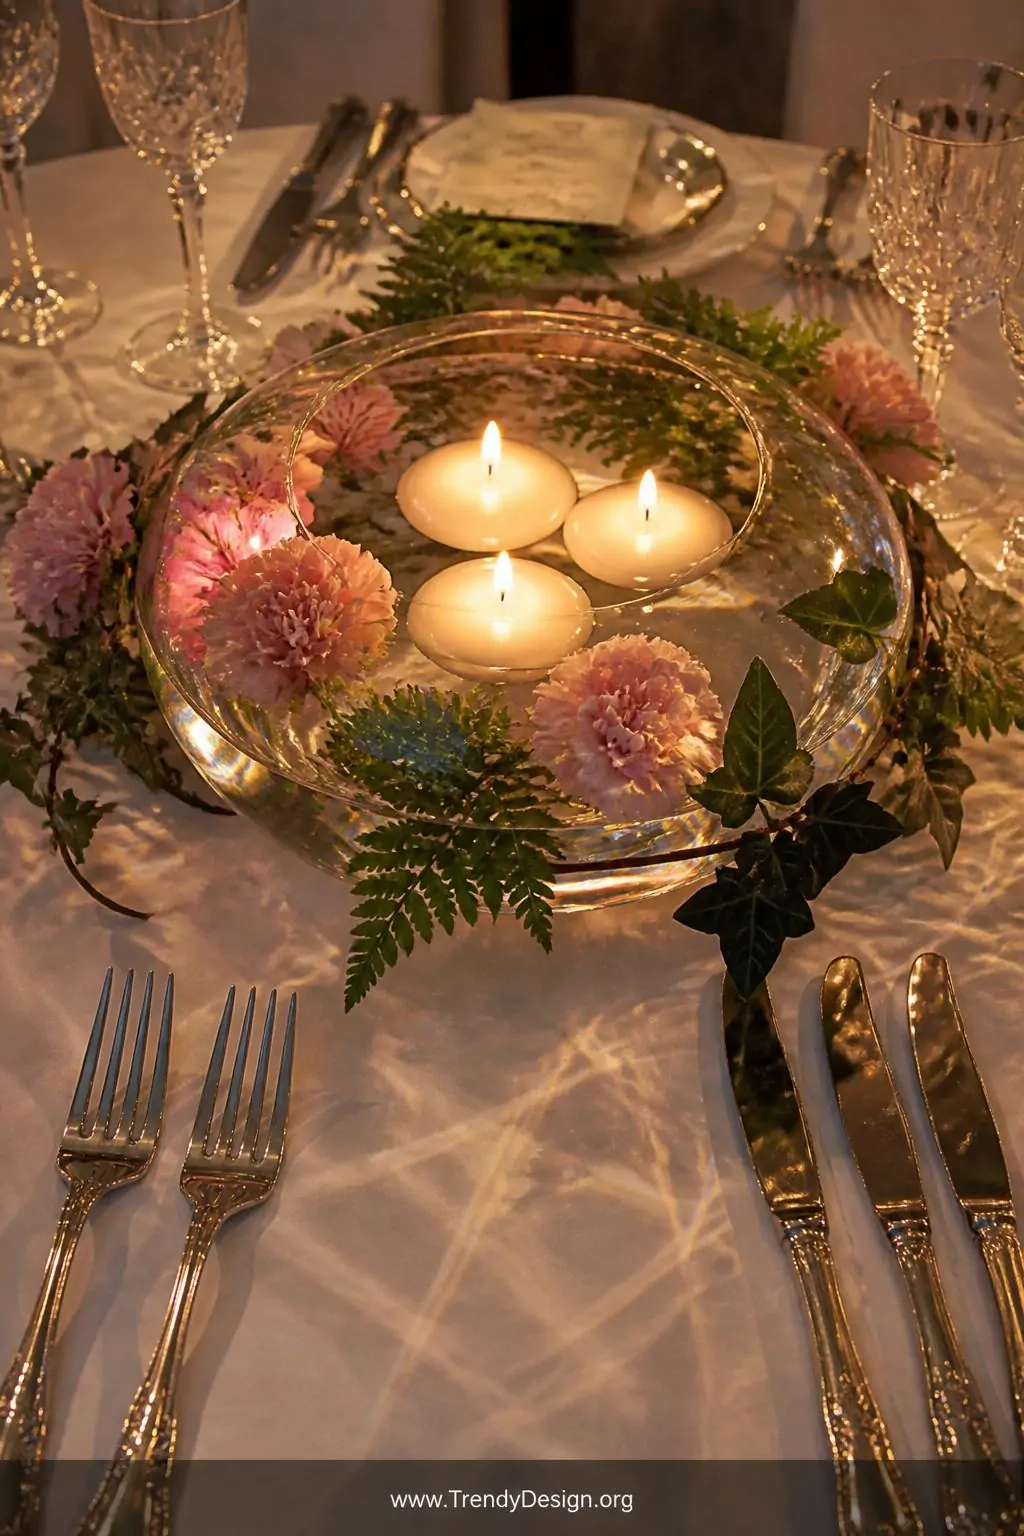
Table centerpieces can easily eat up your entire party budget if you buy them pre-made, but a floating candle and floral centerpiece looks luxurious for just a few dollars per table. Fill a clear glass vase or bowl with water, drop in some floating candles, and tuck fresh flowers around the rim.
Grocery store flowers work perfectly here grab a bunch of carnations or alstroemeria and separate the stems to spread across multiple vases. The combination of soft candlelight and flowers creates a genuinely beautiful ambiance that makes the whole room feel elevated. Pair with some simple greenery like ferns or ivy to fill out the arrangement without spending more.
These centerpieces take about five minutes each to assemble and look like something straight out of a catered event. Light the candles just before guests arrive for the most magical effect possible.
7. Painted Rock Party Name Tags
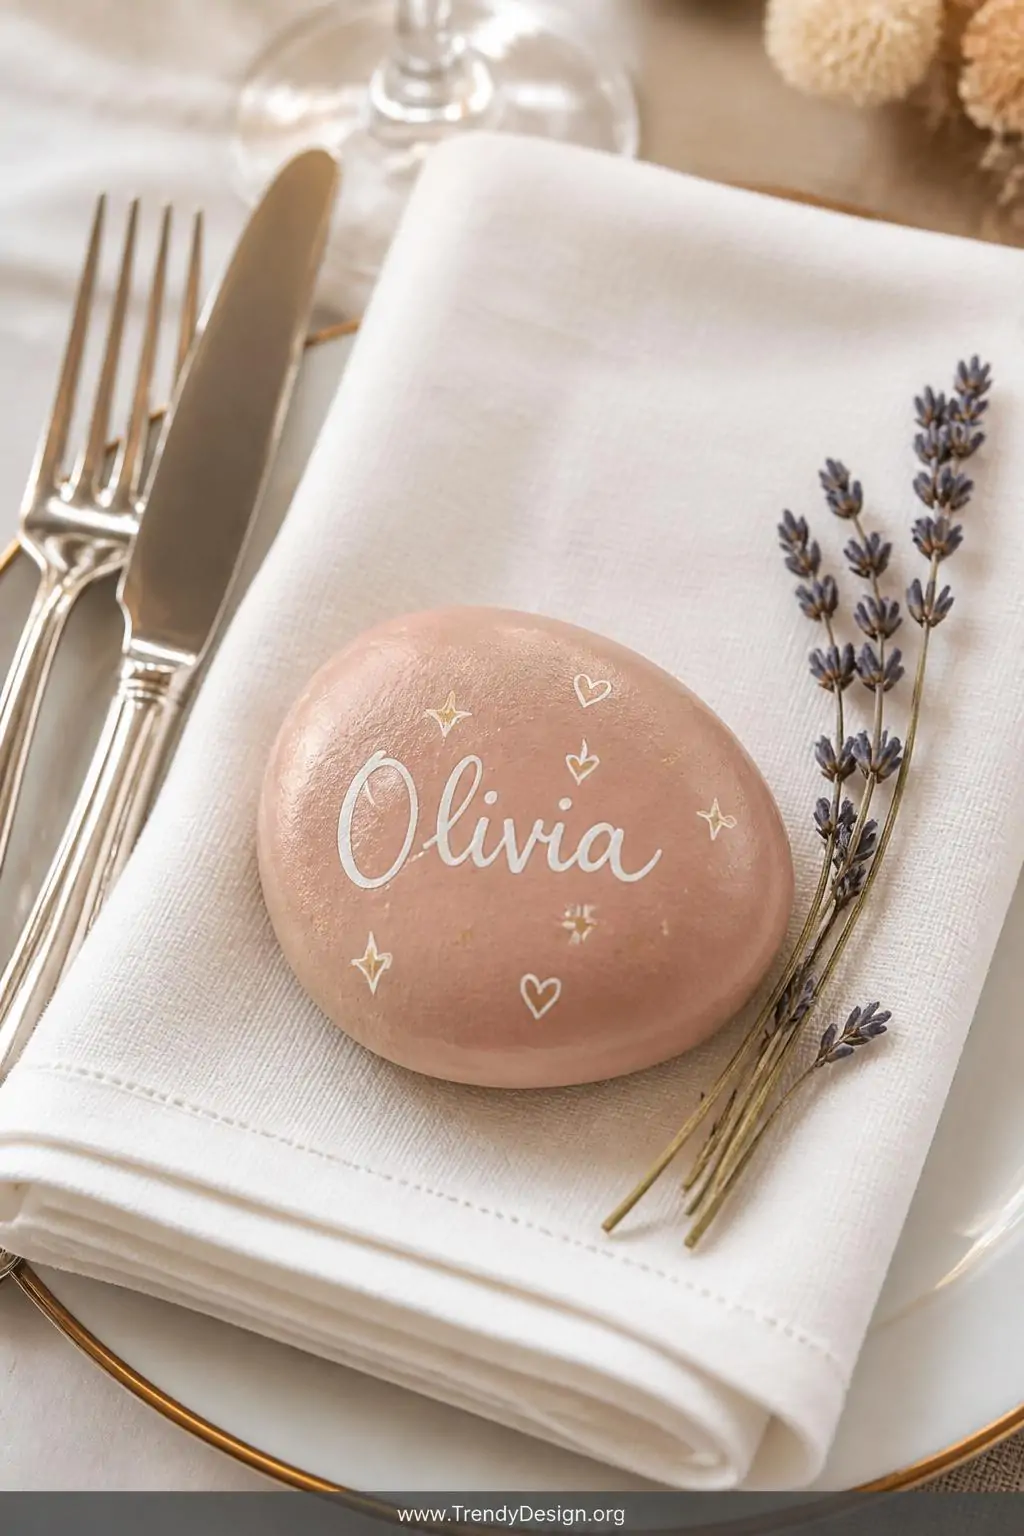
This one might surprise you, but painted rock name tags are an incredibly sweet and unique detail that guests absolutely love. Collect smooth, flat rocks from a garden center or dollar store, paint them a solid base color, and then use a paint pen to write each guest’s name in a fun font.
Place them at each seat setting as both a name tag and a little party favor guests can take home. You can add tiny designs like stars, flowers, or hearts around each name to match your theme. FYI, kids especially go wild for these it becomes a treasure they keep on their dresser for months.
- Use acrylic paint for a smooth, opaque base coat
- Oil-based paint pens give the crispest lettering results
- Seal with a clear varnish spray once completely dry
- Try themed shapes like hearts for a Valentine’s birthday or stars for a celestial theme
There you have it seven genuinely fun and accessible birthday DIY ideas that cover everything from your dessert table to your guest seating. The beauty of DIY birthday decorating is that every single detail carries a little piece of your personality and care, and guests absolutely feel that difference. So pick one project, pick three, or go full crafty chaos and try them all either way, the birthday person is going to feel incredibly celebrated and loved.
Leave a Reply