So you’ve just finished a gorgeous corner-to-corner blanket and you’re staring at those raw edges wondering what to do next. Don’t just bind off and call it a day the border is where the magic truly happens! A beautiful border can transform a good blanket into an absolutely show-stopping heirloom piece that everyone will want to touch and admire.
Whether you’re a beginner who just conquered your first C2C project or a seasoned hooker looking for fresh inspiration, these crochet borders for C2C blanket ideas will give you exactly what you need. Grab your favorite hook, pick a complementary yarn color, and let’s make those edges sing!
1. The Classic Shell Border
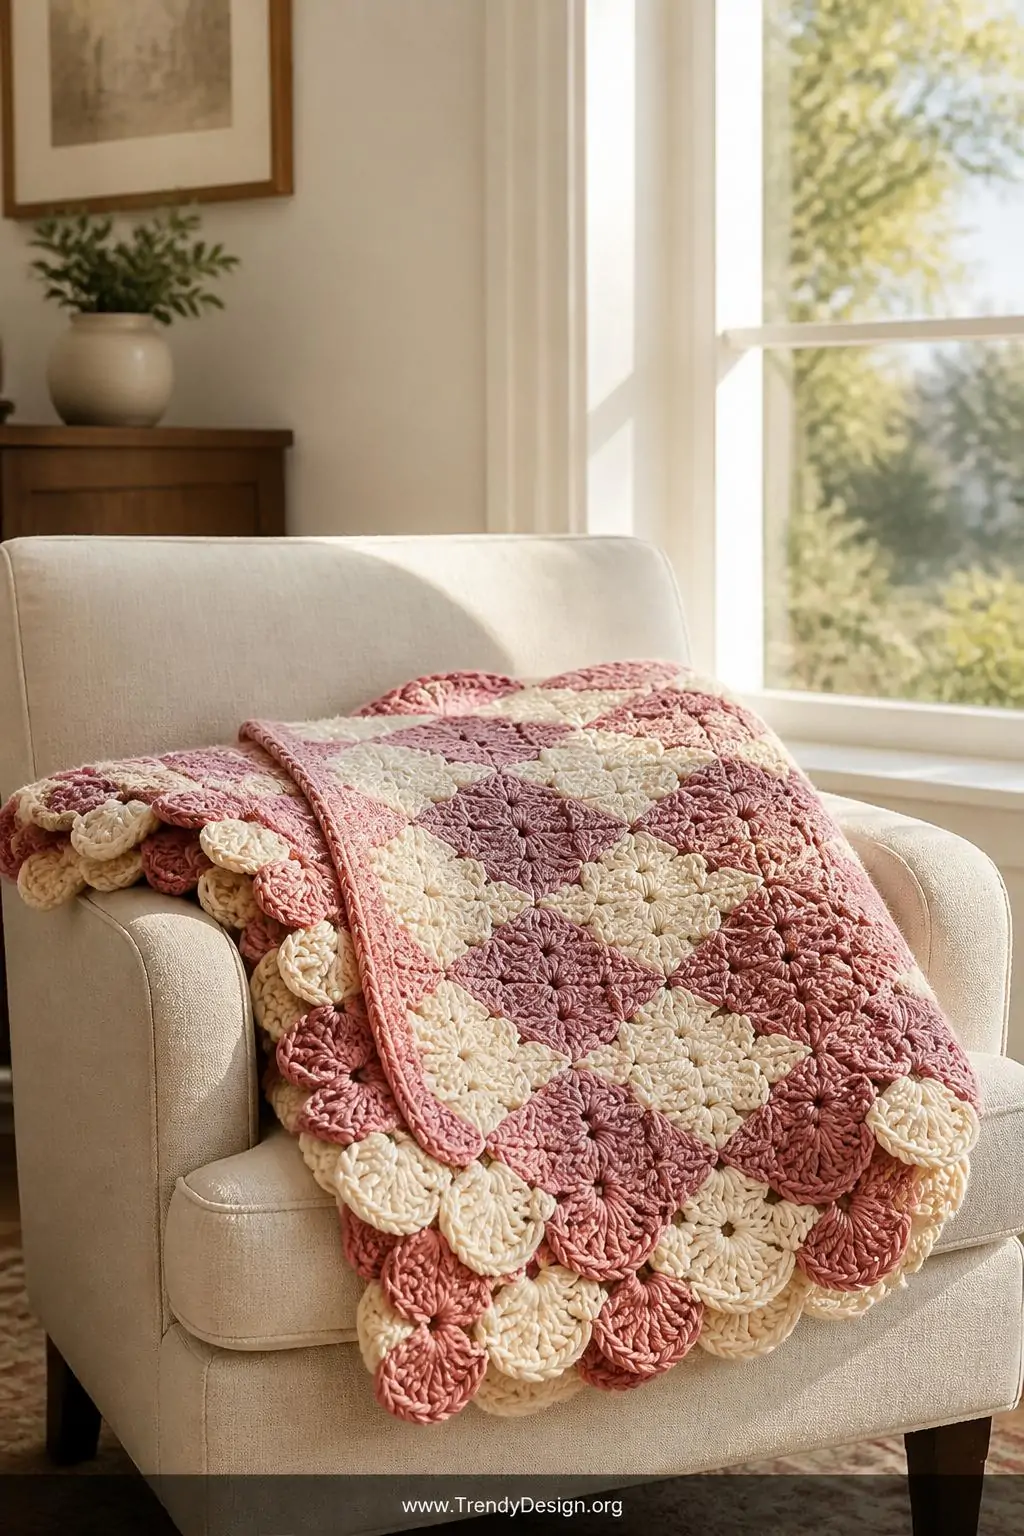
The shell border is honestly the little black dress of the crochet world it works with absolutely everything. Made by working multiple double crochets into the same stitch, shells create a soft, scalloped edge that frames your C2C blanket beautifully without competing with the main design.
The best part? Shell borders are beginner-friendly and work up surprisingly fast. You can do a single round for a subtle finish or stack two rounds for a more dramatic statement. Try using a contrasting color for the second round to make those shells really pop!
- Use 5 double crochets per shell for a classic look
- Work a foundation round of single crochets first for even spacing
- Space shells evenly by skipping 2 stitches between each one
- Try variegated yarn for an extra magical shell border
2. The Picot Edge for Delicate Charm
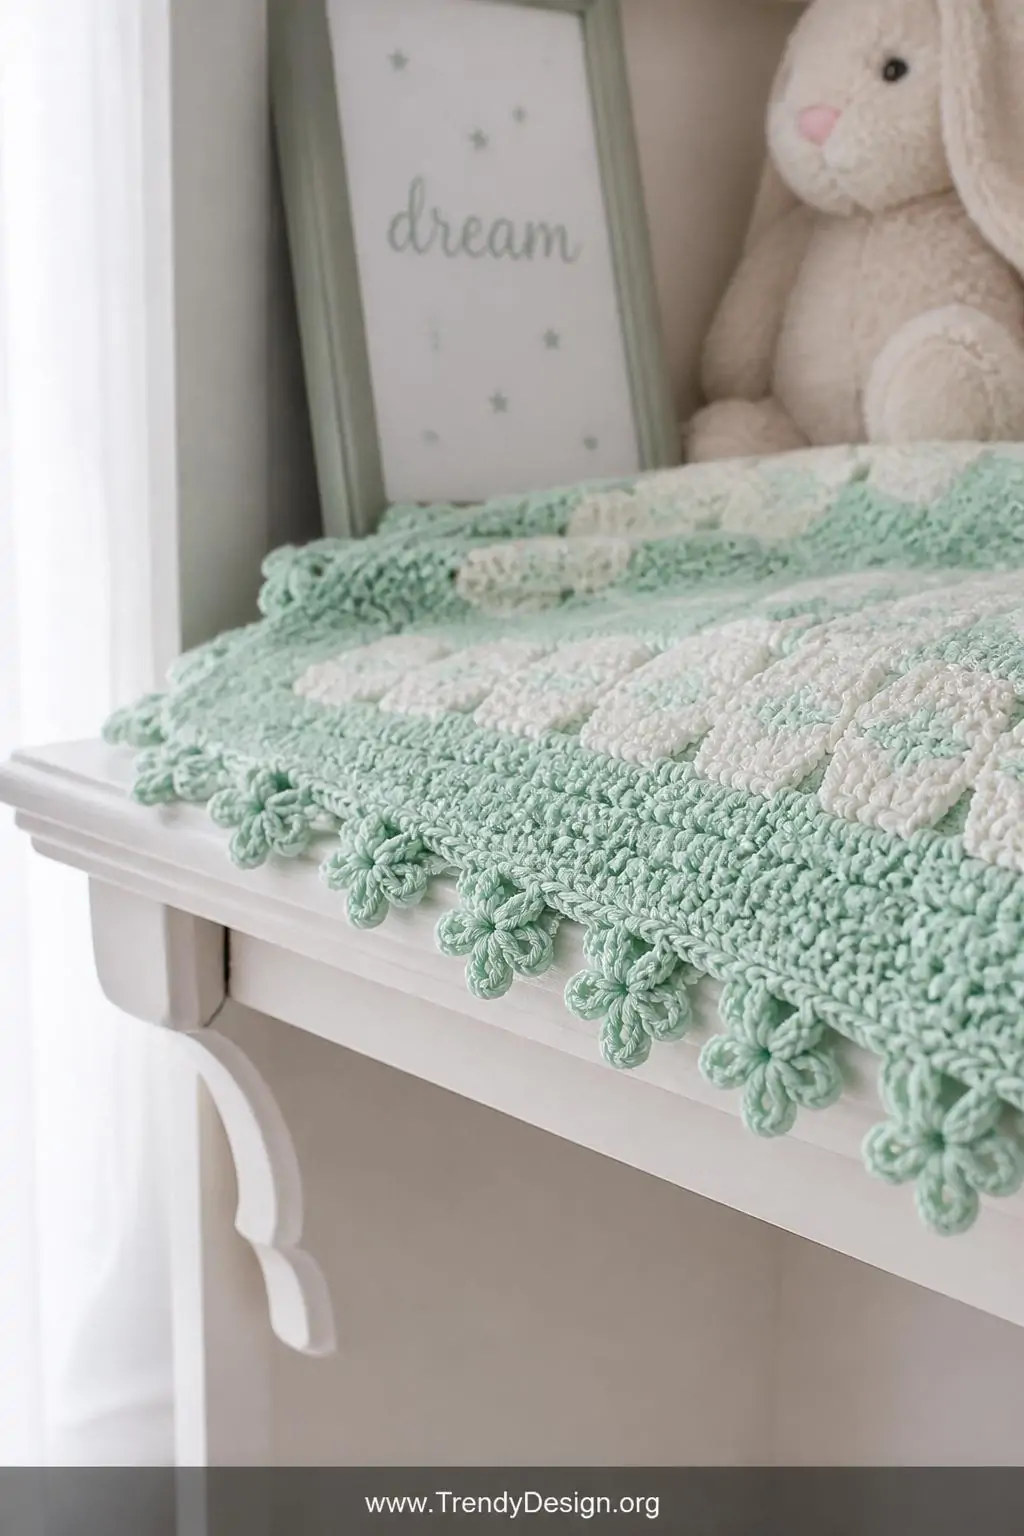
If you want your crochet borders for C2C blanket to look absolutely dainty and elegant, the picot edge is calling your name. These tiny little loops of yarn create a lacy, refined finish that looks incredibly intricate even though it’s surprisingly simple to execute.
A picot is made by chaining 3 (or 4 for a bigger loop) and then slip-stitching back into the first chain. Repeat this along your entire edge and watch something truly lovely emerge. This border style works especially well on baby blankets or feminine-themed projects where softness is the whole vibe.
Tips for Perfect Picots
- Keep your tension consistent for uniform little loops
- Use a slightly smaller hook for crispier picots
- Space picots every 3 stitches for a balanced look
3. The Bobble Border for Playful Texture

Oh, bobbles those satisfying little puffs of yarn that are just so incredibly fun to make. A bobble border adds serious tactile texture to your C2C blanket and gives the whole piece a playful, dimensional quality that flat borders simply can’t match.
FYI, bobble borders do use more yarn than simpler options, so make sure you have enough before you start. The payoff is absolutely worth it though. These borders look incredible on children’s blankets and cozy throw blankets where you want something that begs to be picked up and cuddled.
Alternate bobble stitches with single crochets for spacing, or go bold and place bobbles right next to each other for maximum texture drama. Either way, your blanket’s edges will look like they belong in a boutique shop window.
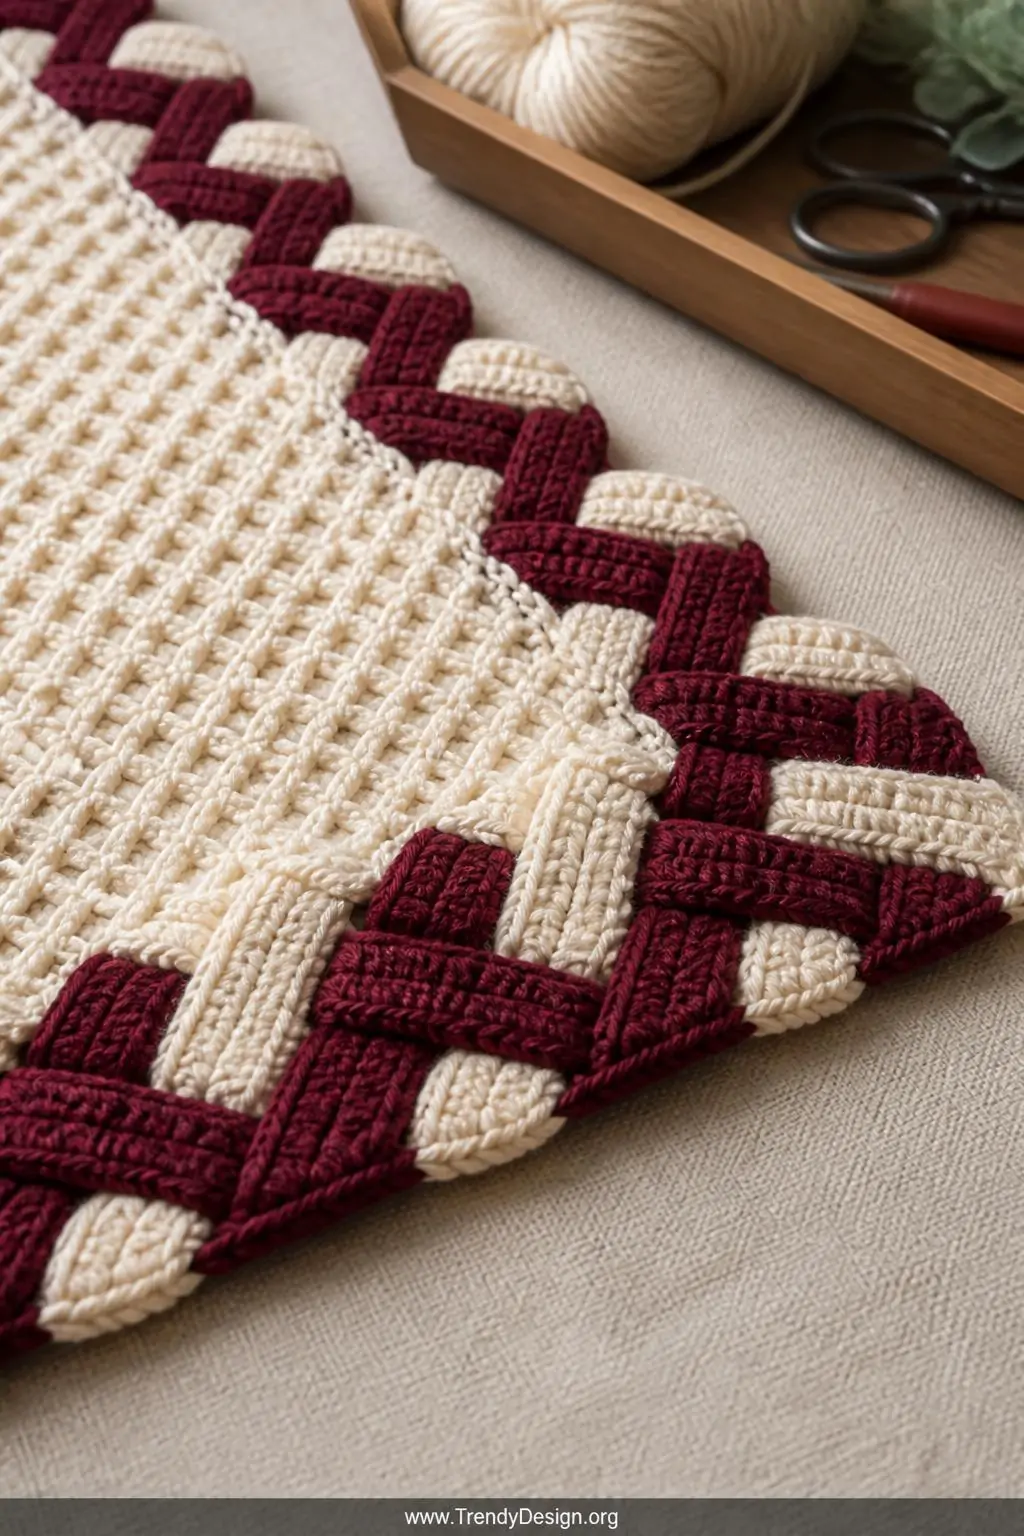
4. The Granny Square Border Mashup
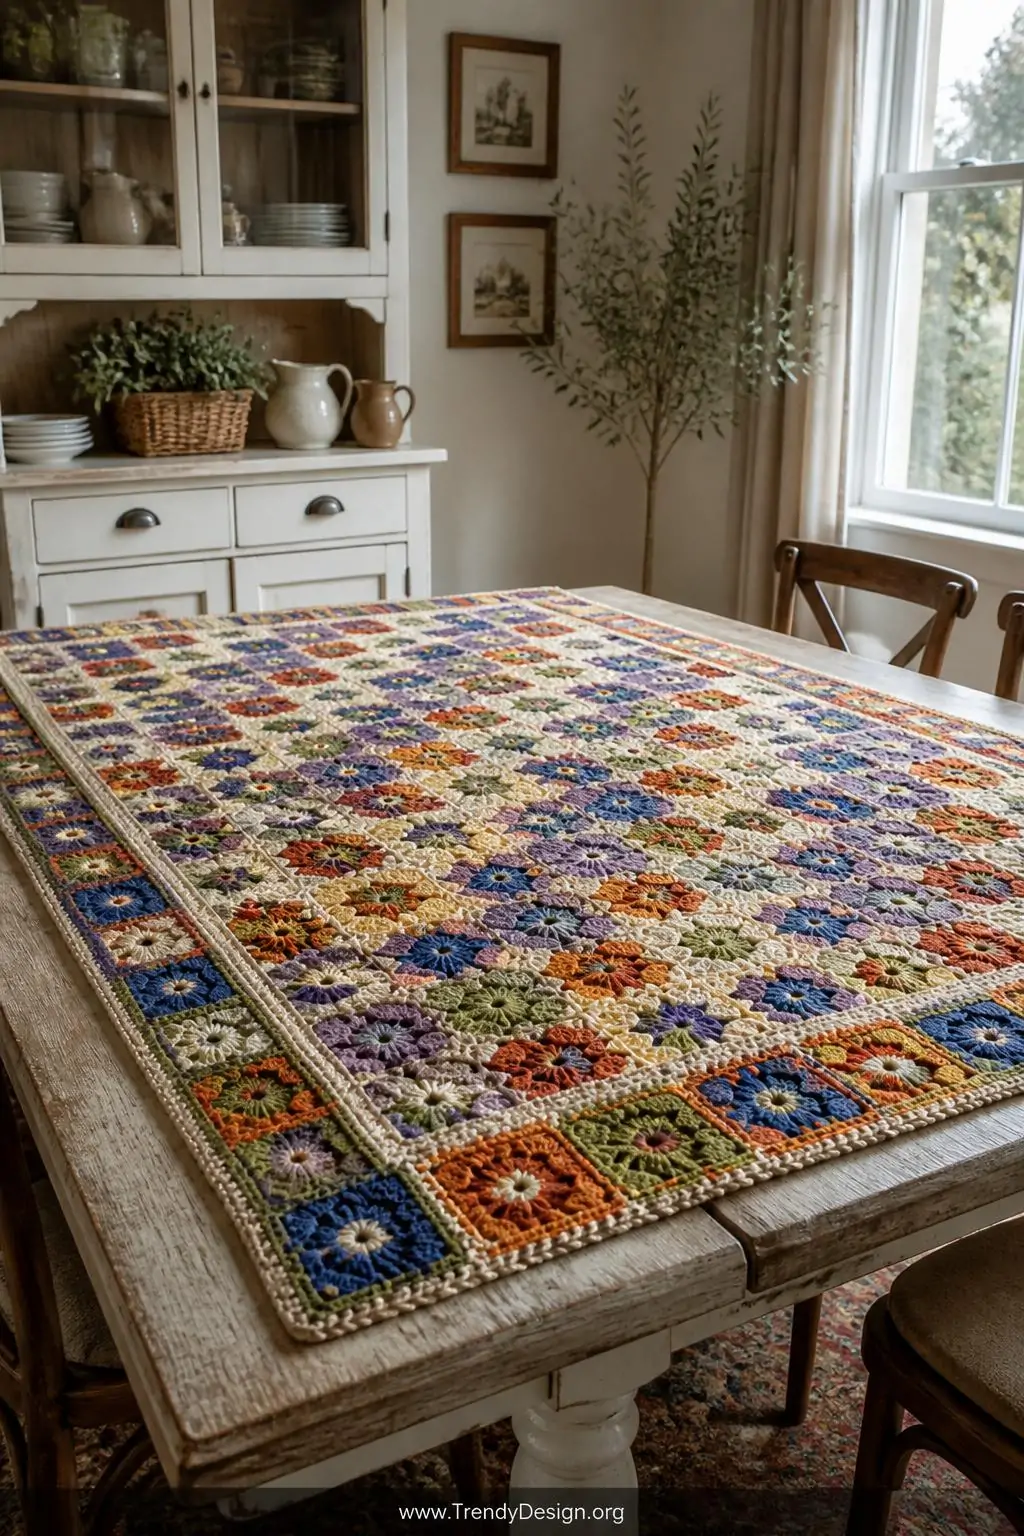
Here’s a fun idea that will genuinely make people do a double-take: border your C2C blanket with a row of mini granny squares. This unexpected combination of two classic crochet techniques creates a border that feels both nostalgic and completely fresh at the same time.
You can crochet small granny squares separately and join them as you go along the edge, or work them directly into the blanket border stitches. IMO, this is one of the most creative crochet borders for C2C blanket projects because it adds so much personality and makes your work truly one-of-a-kind.
- Make 4-round granny squares for a proportional border
- Use leftover yarn colors from the main blanket for cohesion
- Join squares with a flat slip stitch join for a neat finish
- Add a final single crochet round to tie everything together
5. The Wavy Ruffle Border
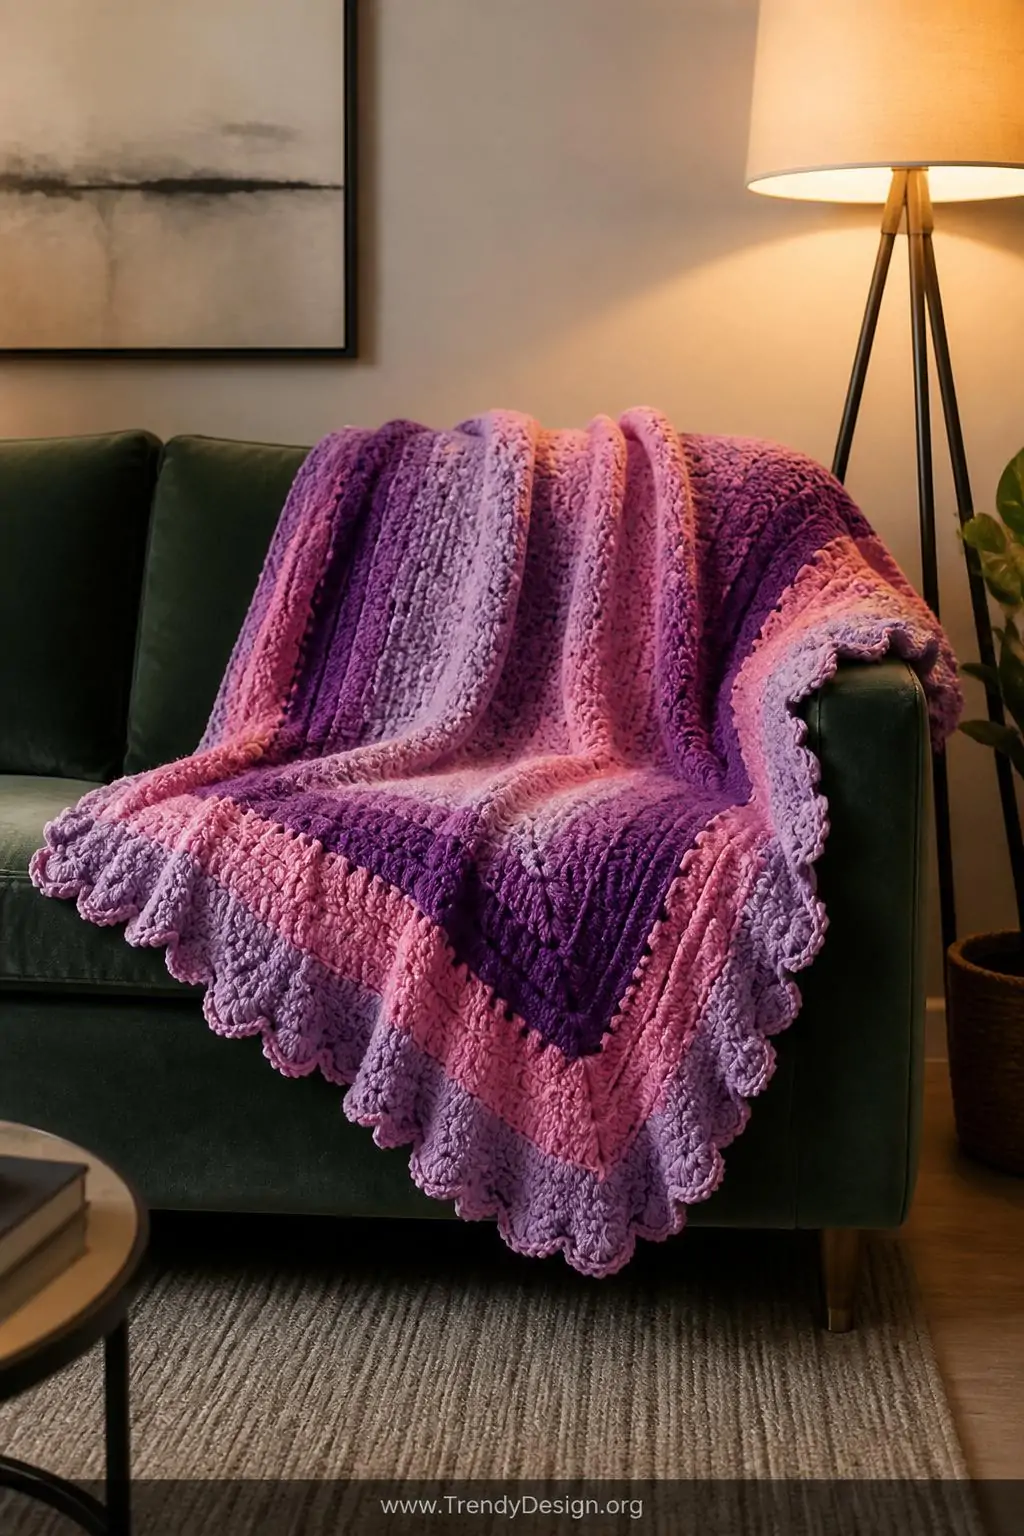
Want your blanket to have some serious personality and movement? A ruffle border creates gorgeous, flowing waves along the edge that make the whole piece look like it has a life of its own. This is the border style that photographs beautifully and makes people immediately ask “where did you buy that?”
The trick to a wavy ruffle is simple you just work extra stitches into your foundation round, causing the fabric to naturally gather and flare outward. Two or three rounds of increasing stitches will give you a lovely ruffle effect that frames your blanket like a picture frame at a fancy gallery.
Creating the Perfect Ruffle
Start with a round of single crochets as your base. Then work 2 double crochets into every stitch on the next round, and 3 double crochets into every stitch on the final round. The magic of multiplication does all the work for you!
6. The Spike Stitch Border for Modern Edge
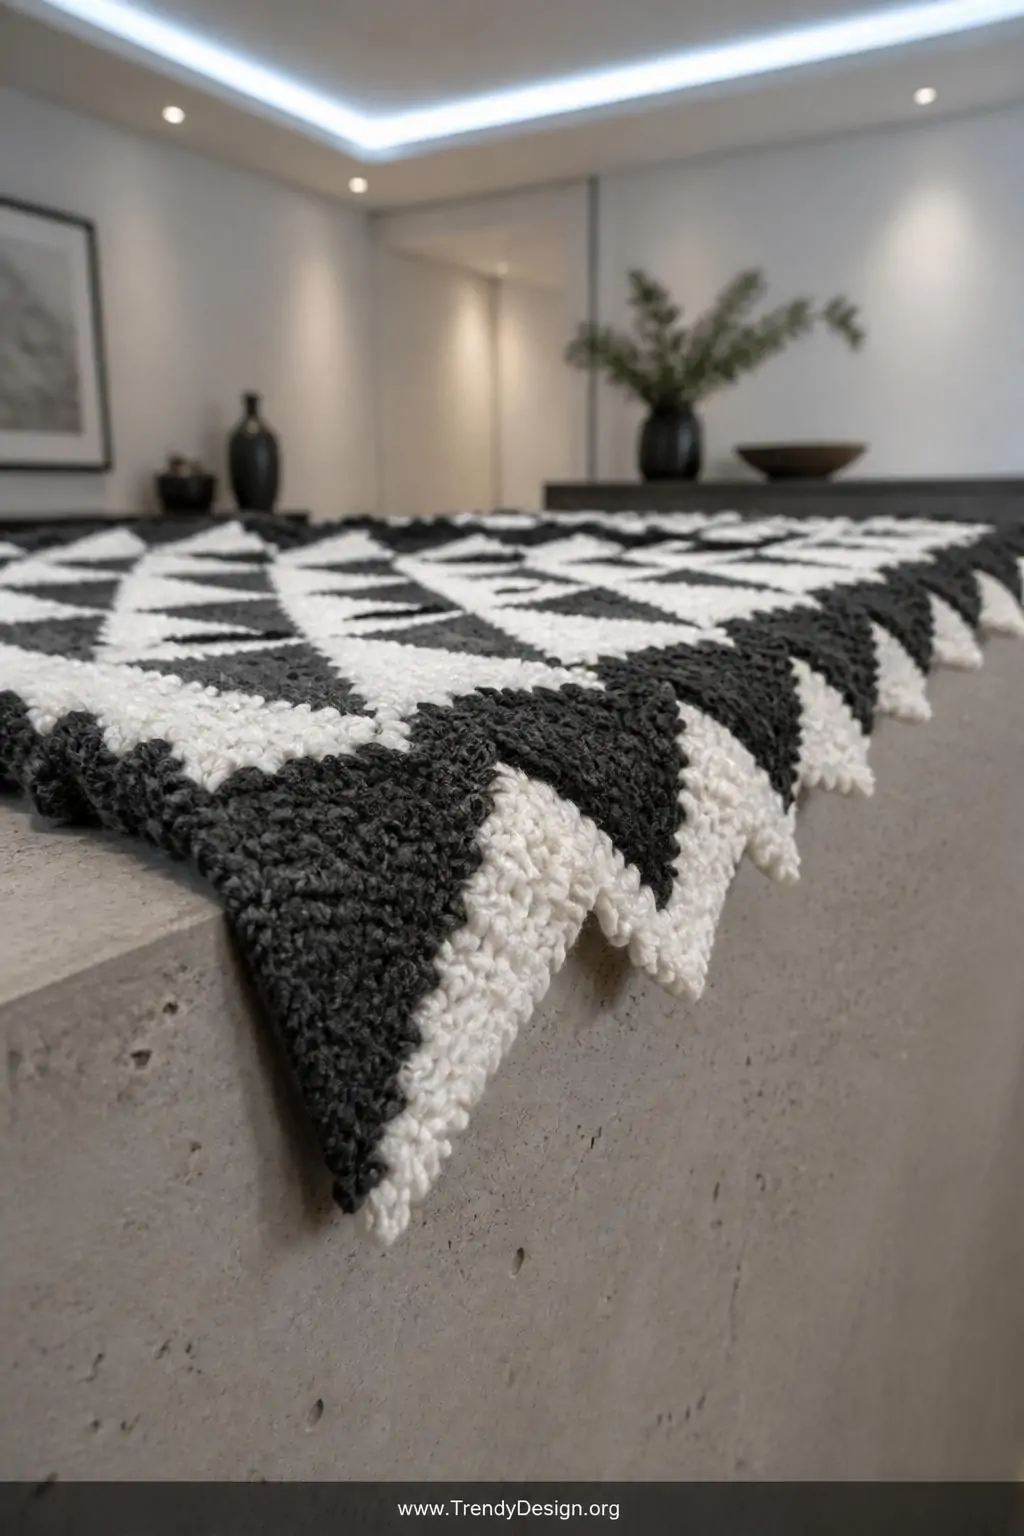
If you’re into modern, geometric aesthetics, the spike stitch border is going to be your new obsession. Spike stitches reach down into rows below the current working row, creating bold diagonal lines that add a contemporary, graphic quality to your blanket’s edge.
This border style works especially well on C2C blankets with geometric or colorful patterns because it echoes that angular energy all the way to the very edge. Work spike stitches in a contrasting color for maximum visual impact, and watch your blanket go from pretty to absolutely stunning.
- Insert your hook 2-3 rows below for dramatic spike length
- Alternate spike colors for a striped border effect
- Keep consistent stitch count to avoid puckering
7. The Moss Stitch Border for Rustic Coziness
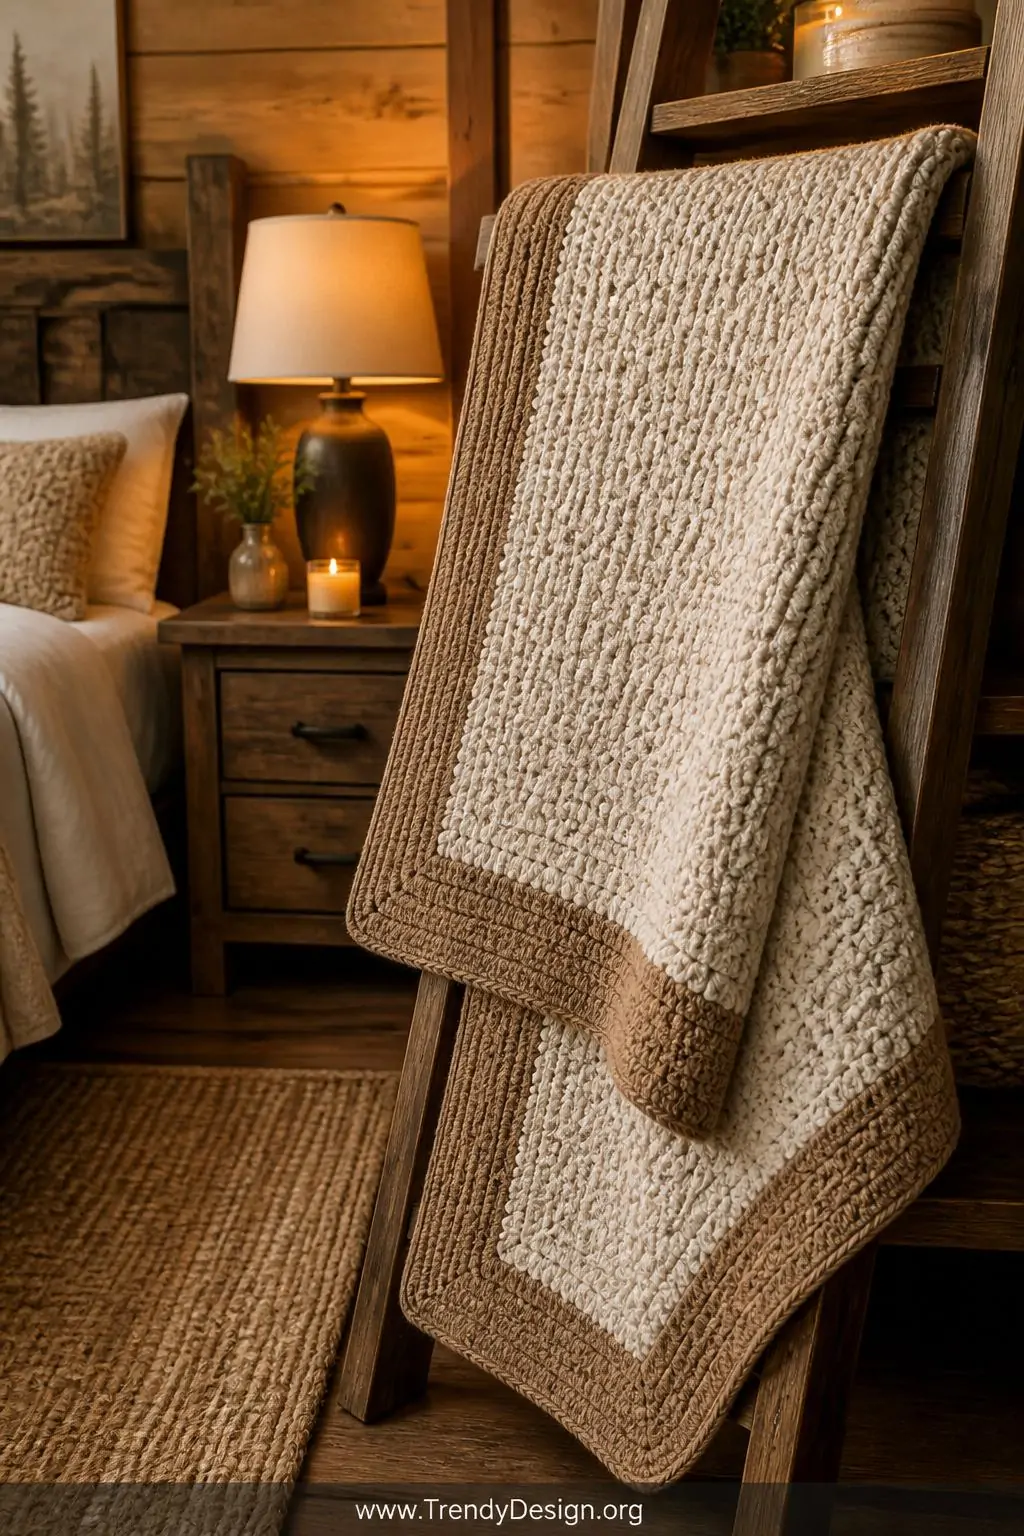
The moss stitch (also called the linen stitch or woven stitch) creates a beautifully dense, fabric-like border that gives any C2C blanket an incredibly cozy, rustic feel. It alternates single crochets and chain stitches in a way that mimics woven fabric, which is just incredibly satisfying to look at and touch.
This border style is particularly wonderful for neutral-toned blankets, farmhouse-style projects, and anything meant to look warm and inviting. Honestly, adding a moss stitch border in a warm caramel or cream color to any blanket instantly makes it look like it belongs in a cozy cabin retreat magazine spread.
Work several rows of the moss stitch for a thick, substantial border that really grounds the entire piece. The more rows you add, the more impressive and intentional the finished blanket looks overall.
8. The Tunisian-Inspired Entrelac Border
Ready to really level up? An entrelac-inspired border creates a stunning woven, basket-weave appearance along your blanket’s edge that looks incredibly advanced but is totally achievable with some patience and practice. This border uses a series of interlocking rectangles to create that signature woven texture.
FYI, this one takes a bit more time than the other crochet borders for C2C blanket ideas on this list, but the results are genuinely jaw-dropping. People will insist you’re a professional designer, and you’ll have every right to smile mysteriously and just say “thank you.” This border is your chance to make something truly extraordinary.
- Watch a detailed video tutorial before starting
- Use a smooth, solid-colored yarn to show the texture clearly
- Work in a slightly heavier weight yarn for defined structure
- Block your finished blanket to make the border really shine
There you have it eight absolutely wonderful crochet borders for C2C blanket projects that will take your finished pieces from lovely to completely unforgettable. Whether you choose the simple elegance of a picot edge or the bold drama of an entrelac border, remember that the border is your final love letter to your handmade creation. Choose a border that makes your heart happy, grab that hook with confidence, and finish that blanket like the talented crocheter you absolutely are. Happy hooking!
Leave a Reply