There is something so special about turning your favorite memories into beautiful home decor you actually made yourself. Whether you are sprucing up a bare wall, creating a cozy gallery corner, or just looking for a fun weekend project, DIY photo card ideas are the perfect way to add personality and warmth to any room. Grab your scissors, your favorite photos, and maybe a hot cup of coffee, because we are about to get seriously creative together.
The best part? You do not need to be an artist or spend a fortune at a fancy home decor store. These ideas are approachable, budget-friendly, and honestly just really fun to make. Let’s dive in!
1. The Classic String Lights Photo Card Display
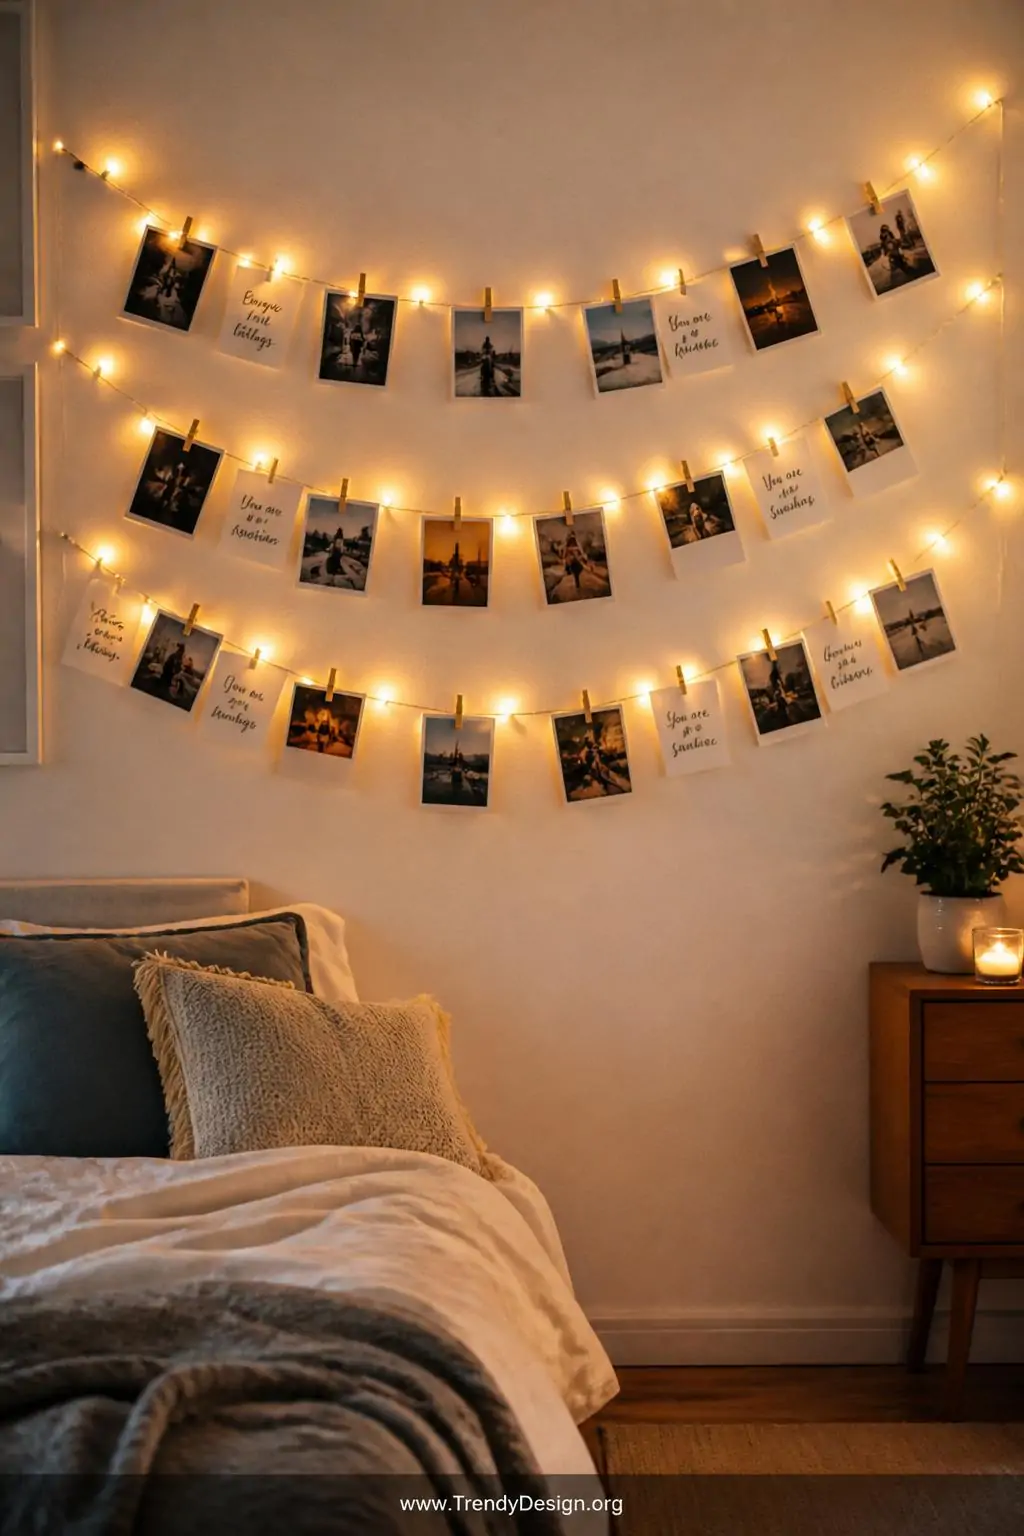
This one never gets old, and there is a very good reason for that. String lights paired with mini photo cards create a warm, dreamy atmosphere that works in bedrooms, living rooms, and even hallways. The soft glow behind your printed memories gives the whole setup an almost magical quality that guests always comment on.
To make this work, print your photos at a smaller size, around 4×4 or 4×6 inches, and use mini wooden clothespins or binder clips to hang them along the string lights. You can arrange them in a straight line across a wall or drape them in a casual swooping pattern. Either way, the result looks effortlessly stylish.
- Use warm white lights for a cozy, vintage feel
- Mix black and white photos with color ones for visual interest
- Add small decorative cards with handwritten quotes between photos
- Layer two or three strands for a fuller, more dramatic display
2. Watercolor Border Photo Cards
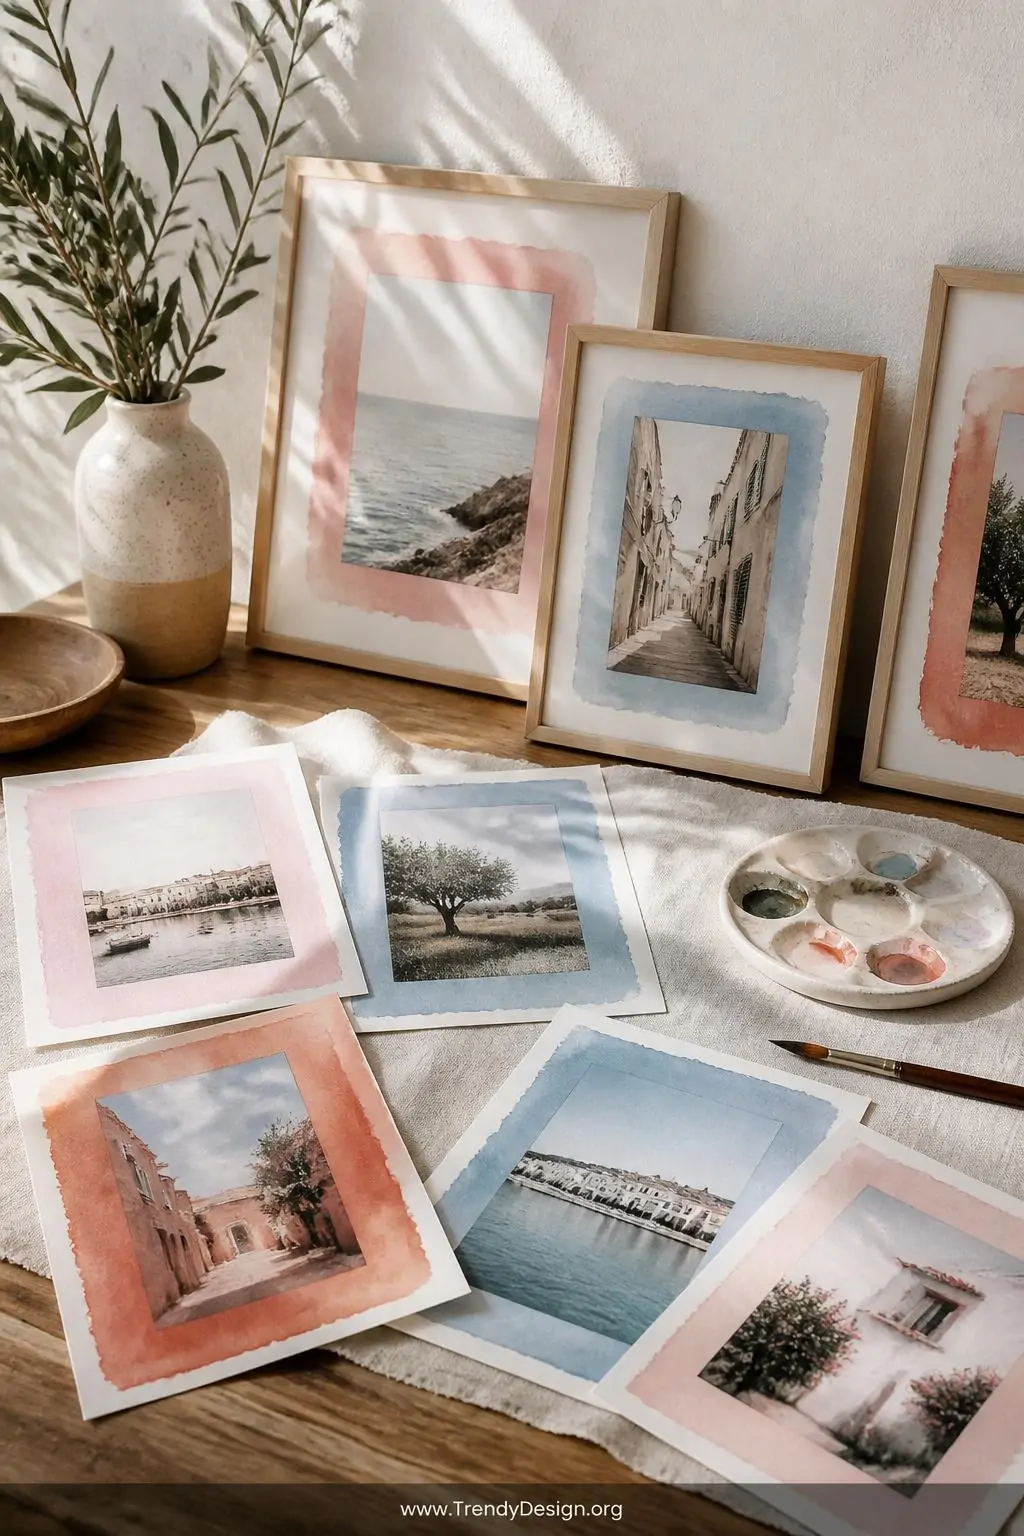
If you want your DIY photo card ideas to feel a little more artistic and elevated, adding a watercolor border is a game changer. You do not need to be Picasso for this one, FYI. A few loose brushstrokes in complementary colors around the edge of a printed photo create a gorgeous handmade effect that looks intentional and beautiful.
Simply print your photos on matte paper, leave a white border around the image, and use watercolor paints to add soft washes of color around the edges. Pastel pinks, dusty blues, and warm terracottas all work wonderfully. Once dry, these cards can be displayed in frames, pinned to a corkboard, or layered into a gallery wall arrangement.
Best Color Combinations to Try
- Blush pink and gold for romantic or wedding photos
- Ocean blue and seafoam for travel and beach memories
- Earthy terracotta and sage for outdoor and nature shots
- Lavender and cream for a soft, dreamy nursery display
3. Washi Tape Frame Photo Cards
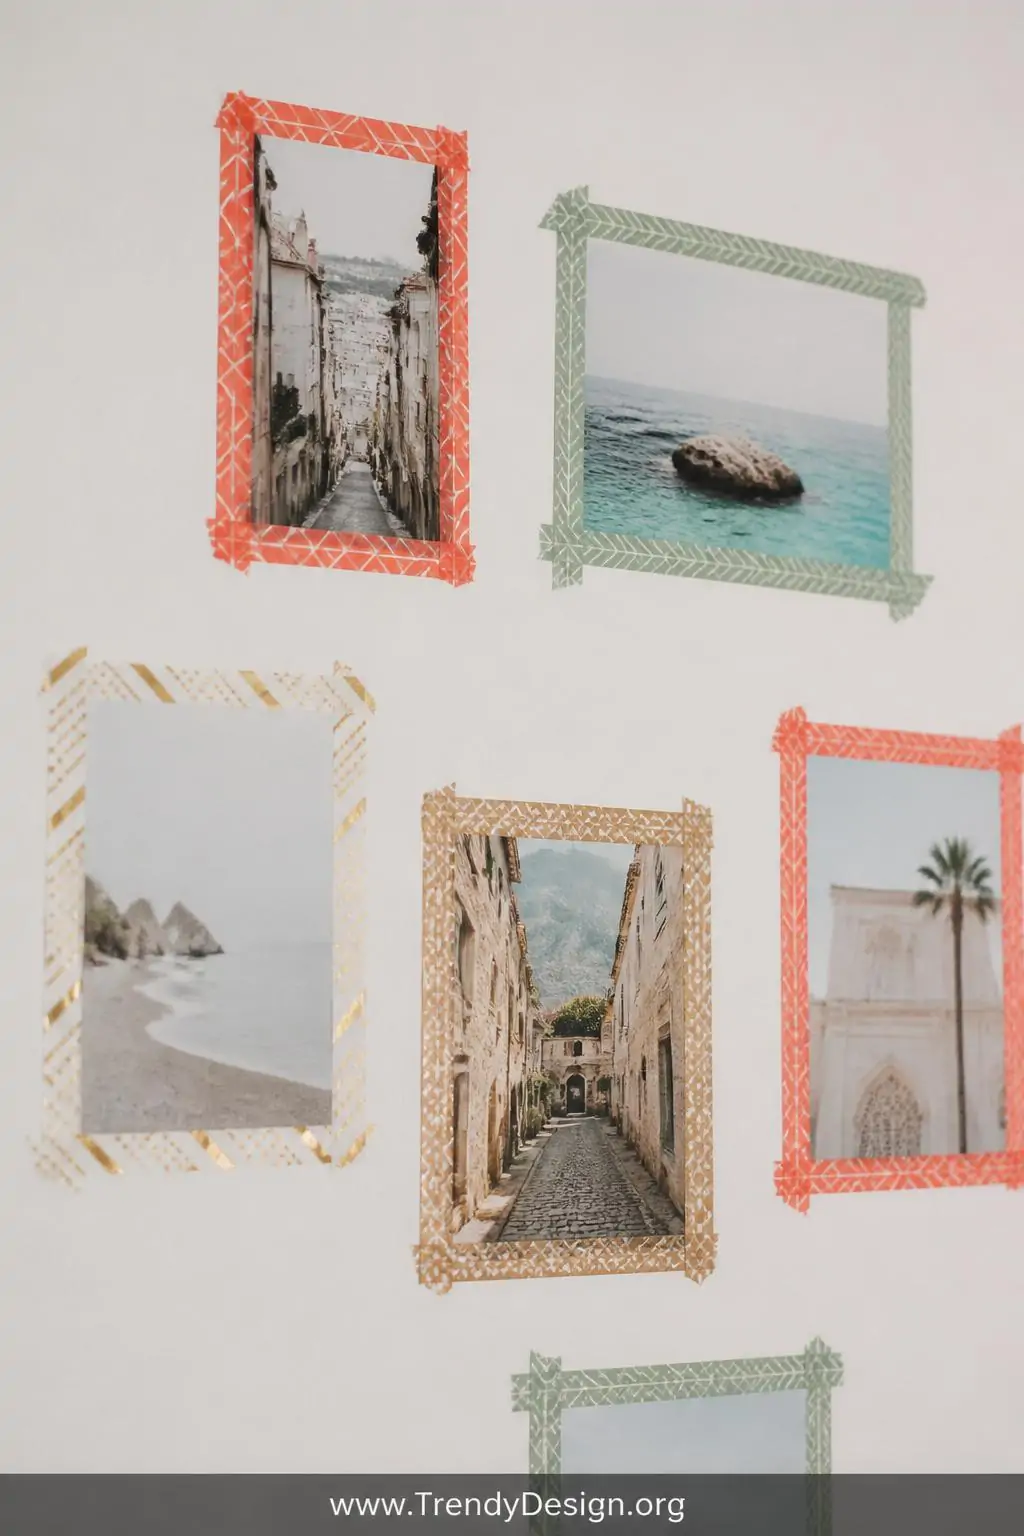
Washi tape is basically the craft supply world’s best-kept secret, and it is absolutely perfect for creating colorful, removable photo card displays without putting holes in your walls. You can use washi tape directly on the wall to create faux frames around your printed photo cards, or tape the borders of each card itself for a fun, decorative effect.
The beauty of this approach is how flexible it is. Rearranging your display takes seconds, and swapping out photos for new ones is completely stress-free. IMO, this makes it one of the most practical DIY photo card ideas for renters or anyone who loves to frequently refresh their decor.
4. Kraft Paper Envelope Photo Card Holders
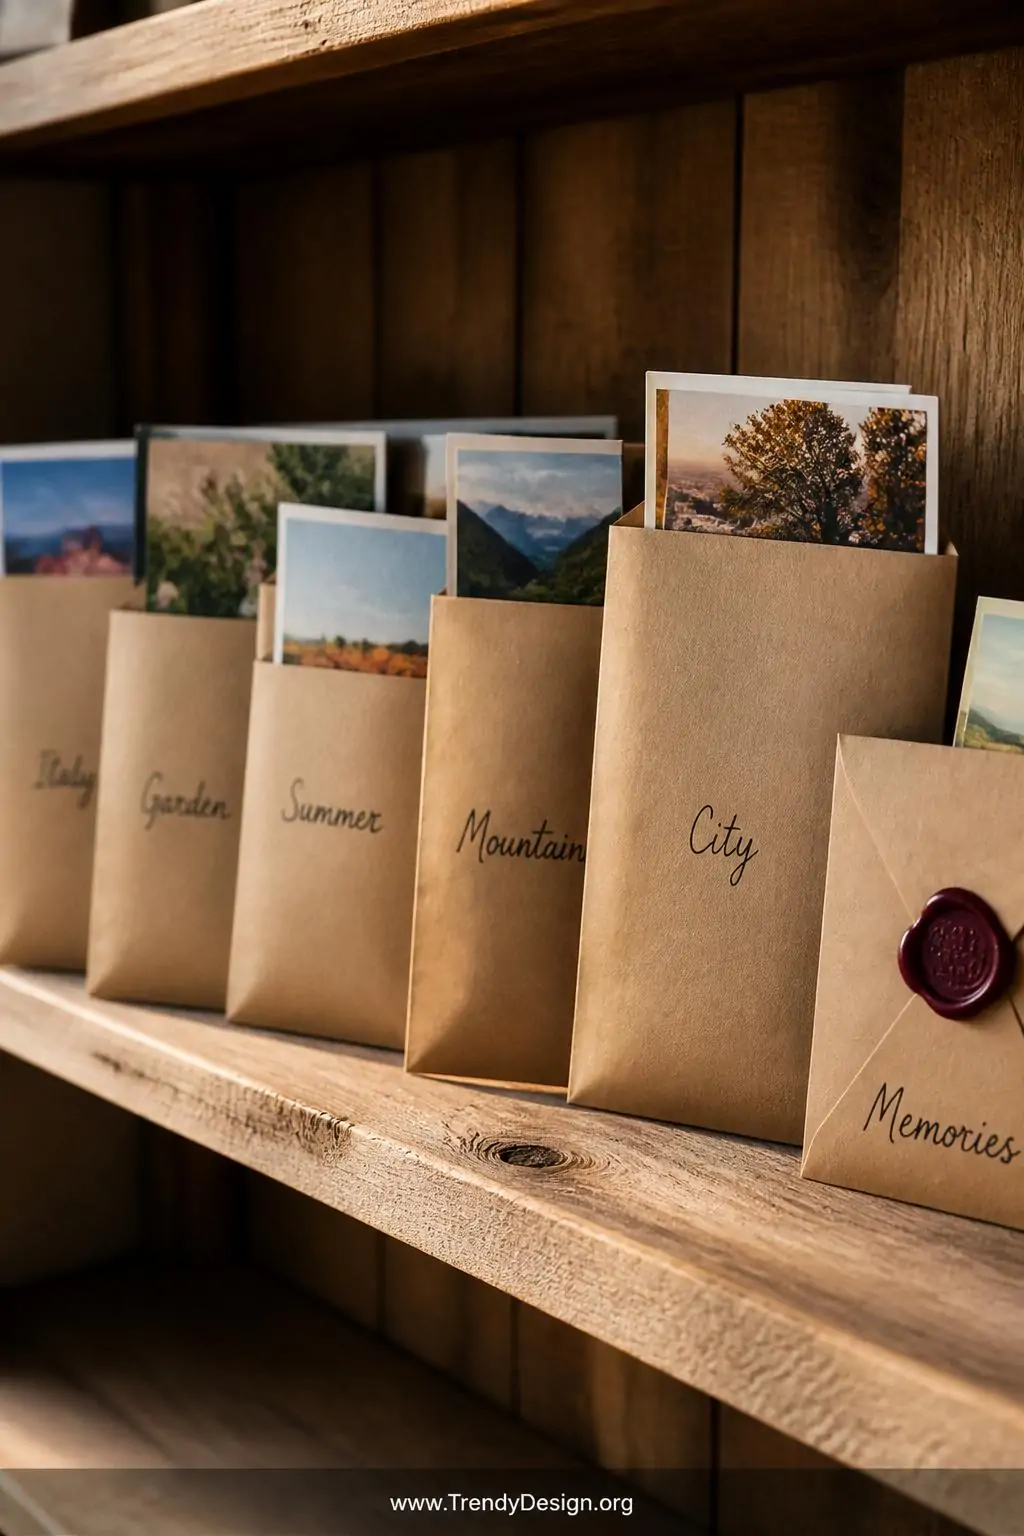
This idea brings a lovely vintage stationery vibe to your photo displays, and it is way easier than it looks. Kraft paper envelopes make gorgeous little pockets for displaying photo cards, especially when you tuck the card in so it peeks out slightly from the top. The combination of the warm brown paper with your colorful photos is genuinely stunning.
You can hang a row of envelopes along a shelf, clip them to a piece of twine stretched between two nails, or arrange them in a cascading pattern on a corkboard. Add a small handwritten label on each envelope with a date, location, or sweet little caption to make the display even more meaningful and personal.
- Mix different envelope sizes for an eclectic, layered look
- Seal some envelopes with a wax stamp for extra charm
- Use envelopes as seasonal displays that you can easily swap out
- Try white envelopes for a cleaner, more modern aesthetic
5. Polaroid-Style Printed Photo Cards
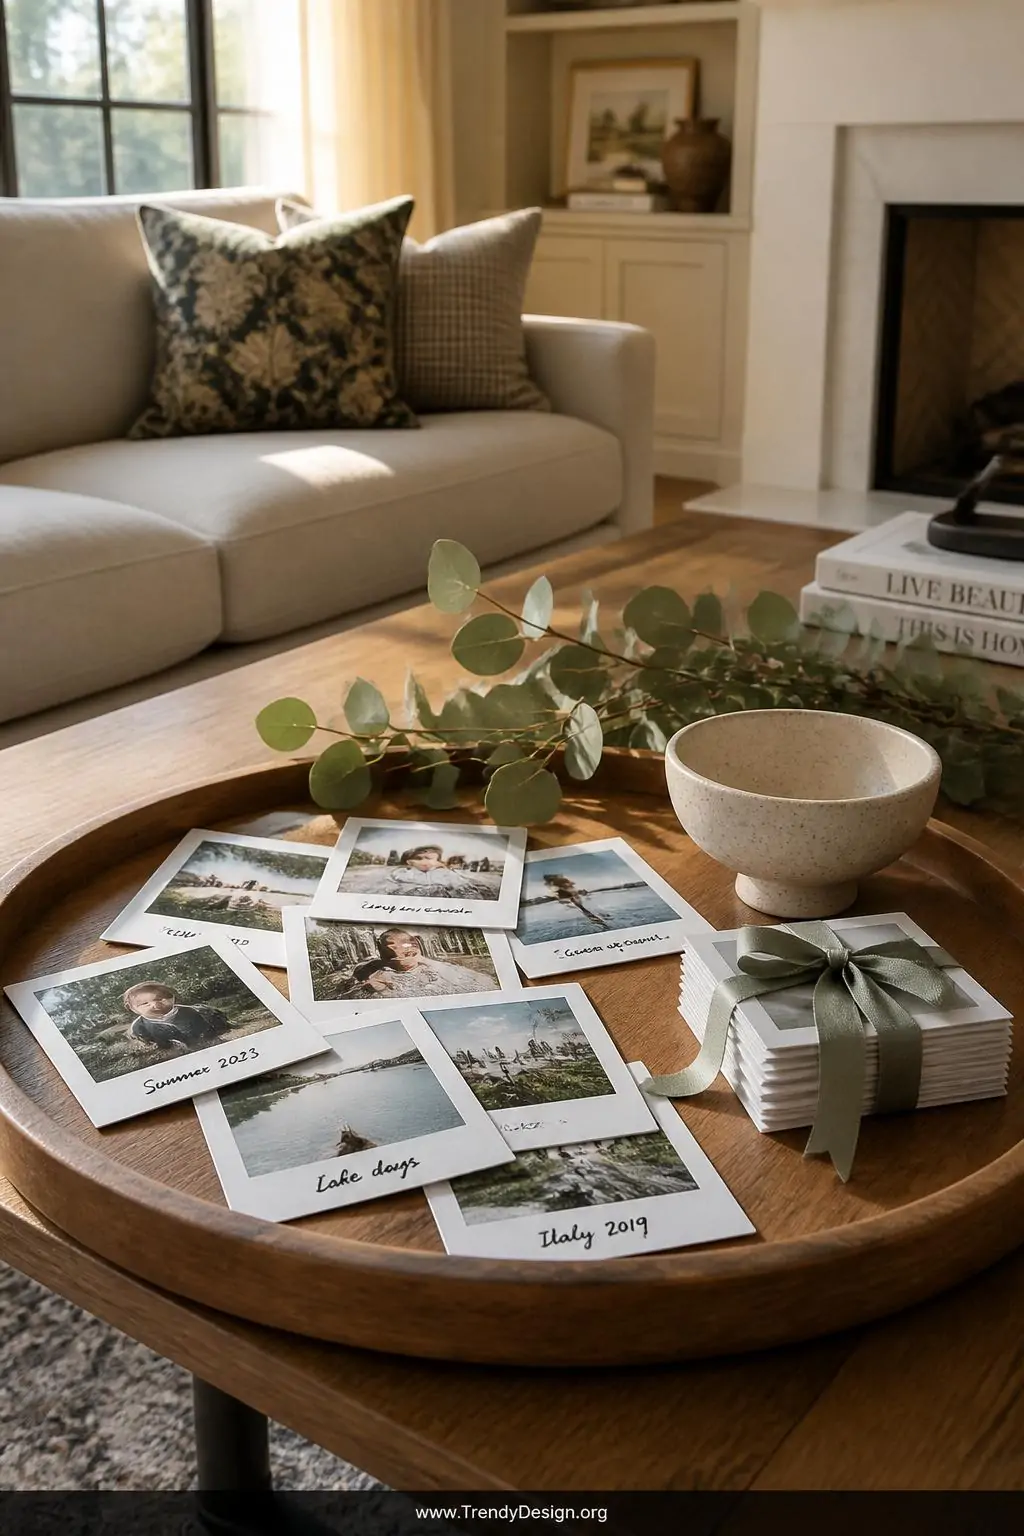
Everything about the polaroid aesthetic just hits differently, and you can recreate that nostalgic magic at home without an actual polaroid camera. Print your digital photos with a wide white border at the bottom and use the extra space to write a handwritten caption, date, or little doodle. The result looks adorably retro and completely intentional.
These DIY photo card ideas work beautifully when grouped together in clusters on a wall, scattered across a dresser top, or displayed in a wide shallow tray on a coffee table. Honestly, a stack of these tied together with a ribbon also makes one of the most thoughtful and personal gifts you can give someone.
Ways to Display Your Polaroid-Style Cards
- Pin them in an overlapping collage pattern on a large corkboard
- Tuck them into the frame edges of a large mirror
- Display them in a clear acrylic frame as a rotating collection
- Scatter them on a styled bookshelf between your favorite objects
6. Botanical Press Photo Card Overlays
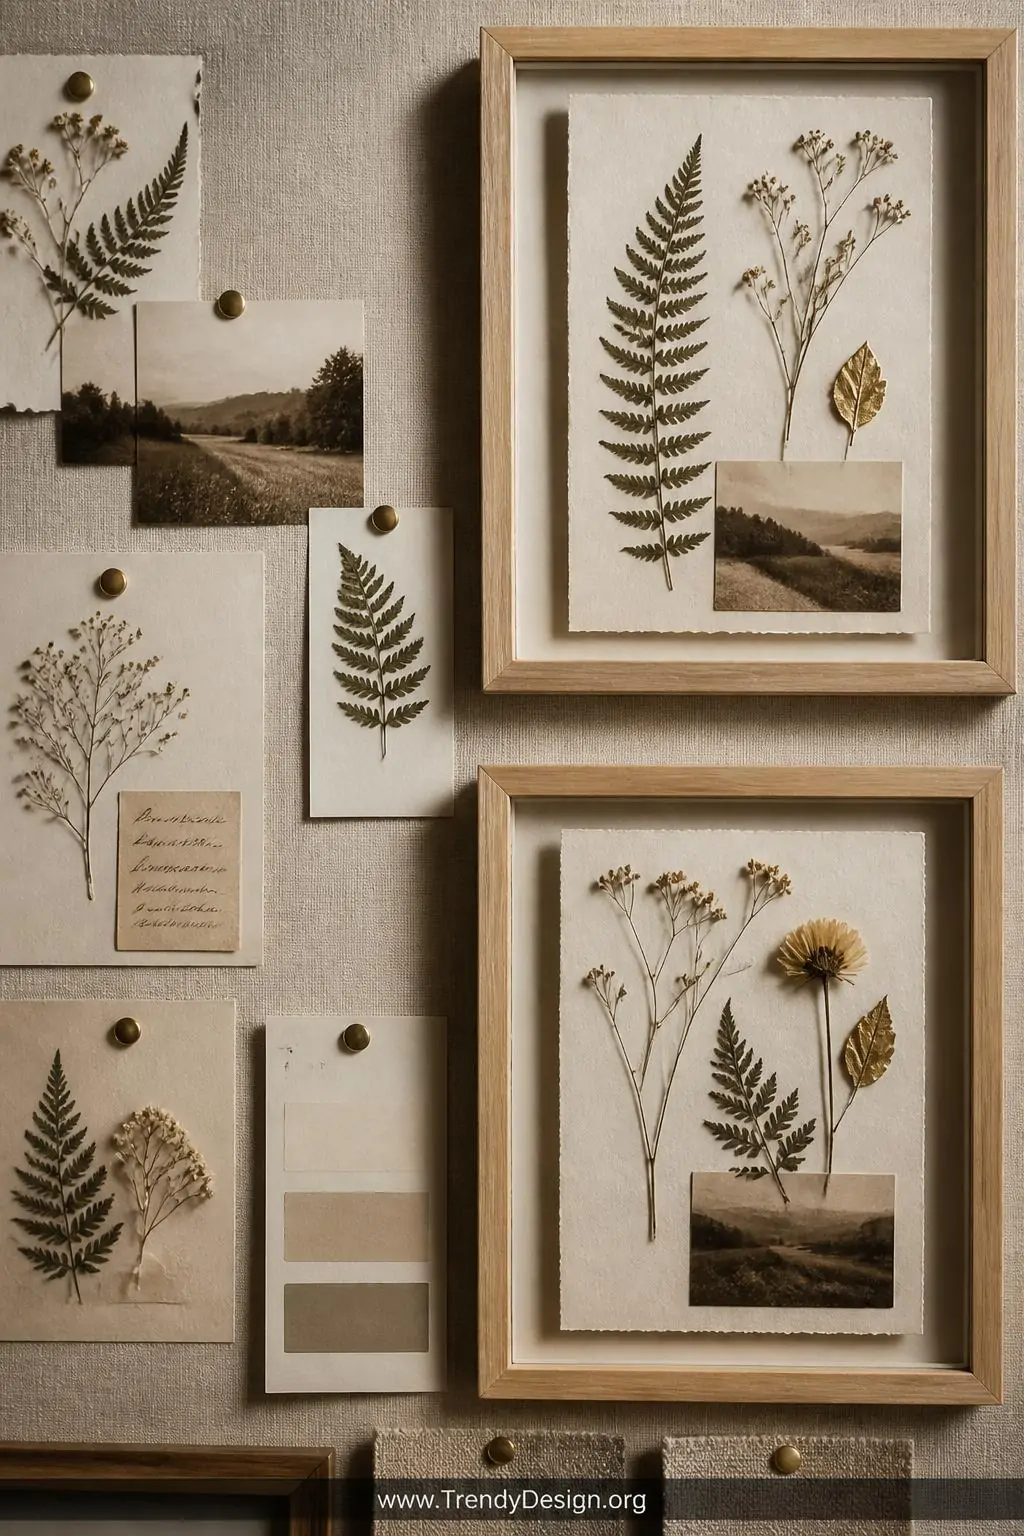
This one sounds fancy but is actually one of the most relaxing and therapeutic crafts you will ever try. Pressing small leaves, flowers, and ferns between the pages of a heavy book for a week or two gives you beautiful flat botanicals that you can layer directly onto photo cards for a stunning nature-inspired effect. The organic textures against your printed photos create a truly one-of-a-kind piece of art.
Arrange your pressed botanicals around the borders of your photo cards and secure them with a thin layer of decoupage glue or clear craft glue. Once sealed, these cards have a beautiful preserved quality that makes them feel like genuine keepsakes. Display them in simple wooden frames or pin them to a linen-covered board for maximum impact.
7. Layered Scrapbook-Style Photo Cards
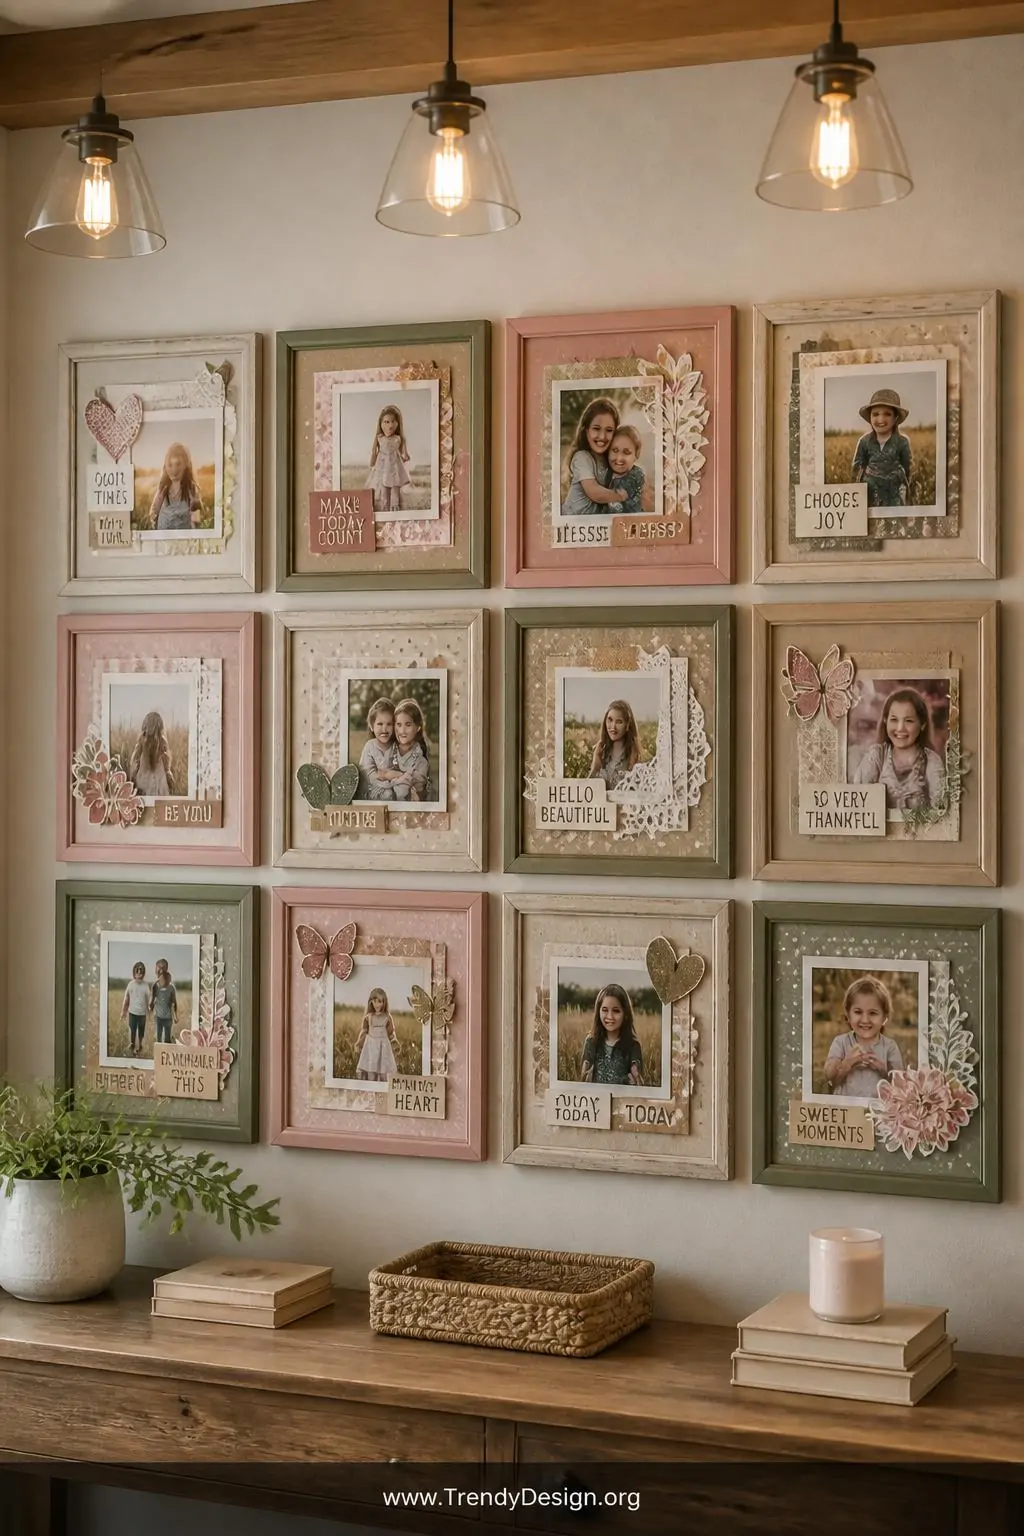
If you have ever loved the idea of scrapbooking but felt overwhelmed by the commitment, layered scrapbook-style photo cards are your perfect entry point. Each card is its own little mini-scrapbook page, combining a printed photo with patterned paper backgrounds, stamped designs, stickers, and handwritten journaling. The result is rich, textured, and full of personality.
Start with a cardstock base slightly larger than your photo, then layer patterned paper, your photo, and any embellishments you love. These cards can stand alone in frames, be grouped together in a dedicated display wall, or collected into a photo box as a tangible memory album. FYI, this approach is also incredibly fun to do with kids, turning a rainy afternoon into a beautiful memory-making session.
- Choose a consistent color palette to tie multiple cards together visually
- Use alphabet stamps or stickers to add names and dates
- Add small journaling strips with your favorite memories from the moment
- Mix textures like velvet stickers, kraft tape, and glossy photos
Ready to Start Creating?
These DIY photo card ideas are proof that decorating your home beautifully does not require a big budget or professional design skills. It just requires a little creativity, some of your favorite photos, and the willingness to have fun with the process. Every single one of these projects is completely customizable to your personal style and the aesthetic of your space.
Pick the idea that excites you most and start there. You might just discover that making your own home decor is one of the most satisfying and joyful hobbies you have ever picked up. Your walls are waiting!
Leave a Reply