So you’ve been staring at that sad, outdated dresser in the corner and wondering if it’s finally time to haul it to the curb. Hold that thought! Before you say goodbye to a perfectly good piece, consider giving it a fresh coat of paint instead. Furniture painting ideas are everywhere right now, and honestly, they’re one of the most satisfying ways to refresh your home without spending a fortune.
Whether you’re a total beginner or someone who already owns more paintbrushes than shoes, there’s a technique here for you. Grab your coffee, get comfortable, and let’s talk about five creative ways to breathe new life into your furniture.
1. The Classic Chalk Paint Makeover
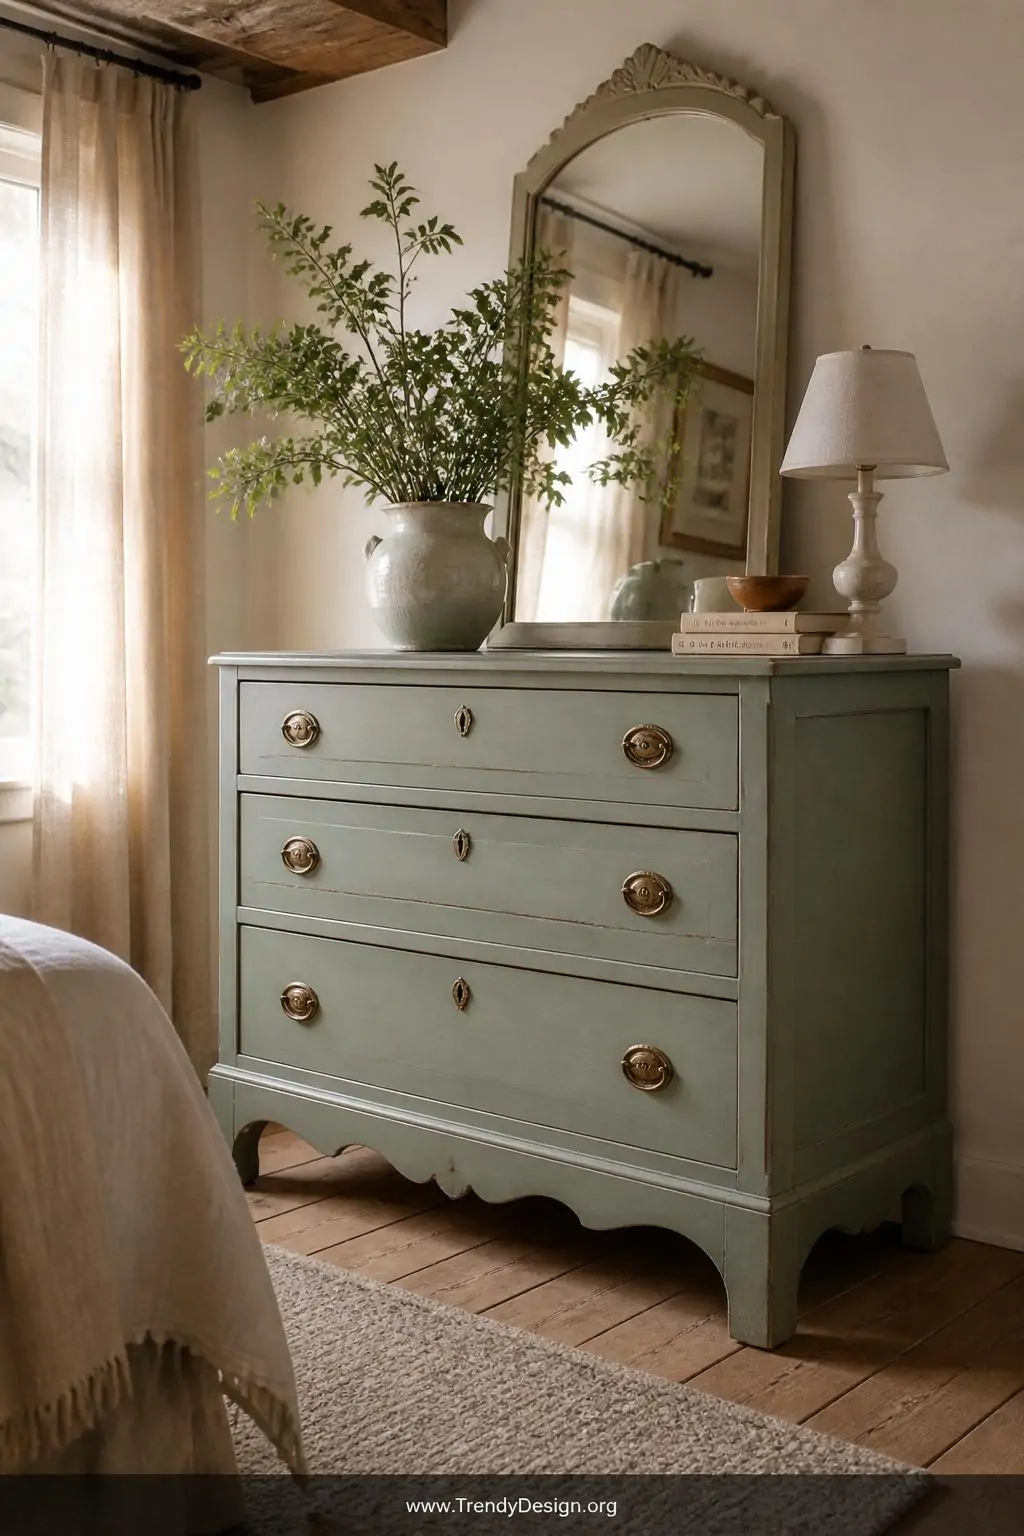
If you’ve never tried chalk paint, you’re seriously missing out. Chalk paint is the ultimate beginner-friendly option because it sticks to almost any surface without priming or sanding first. Yes, you read that right you can basically just open the can and go to town.
The result is that gorgeous matte, velvety finish you see all over Pinterest and Instagram. It works beautifully on dressers, chairs, side tables, and even old kitchen cabinets. Pair it with a light sanding after it dries and a coat of wax, and you’ve got a piece that looks like it belongs in a boutique shop.
- Popular colors: soft white, dusty sage, warm charcoal
- Best for: wood, metal, and even fabric surfaces
- Finish it off with clear or dark wax for extra depth
2. Bold Two-Tone Color Blocking
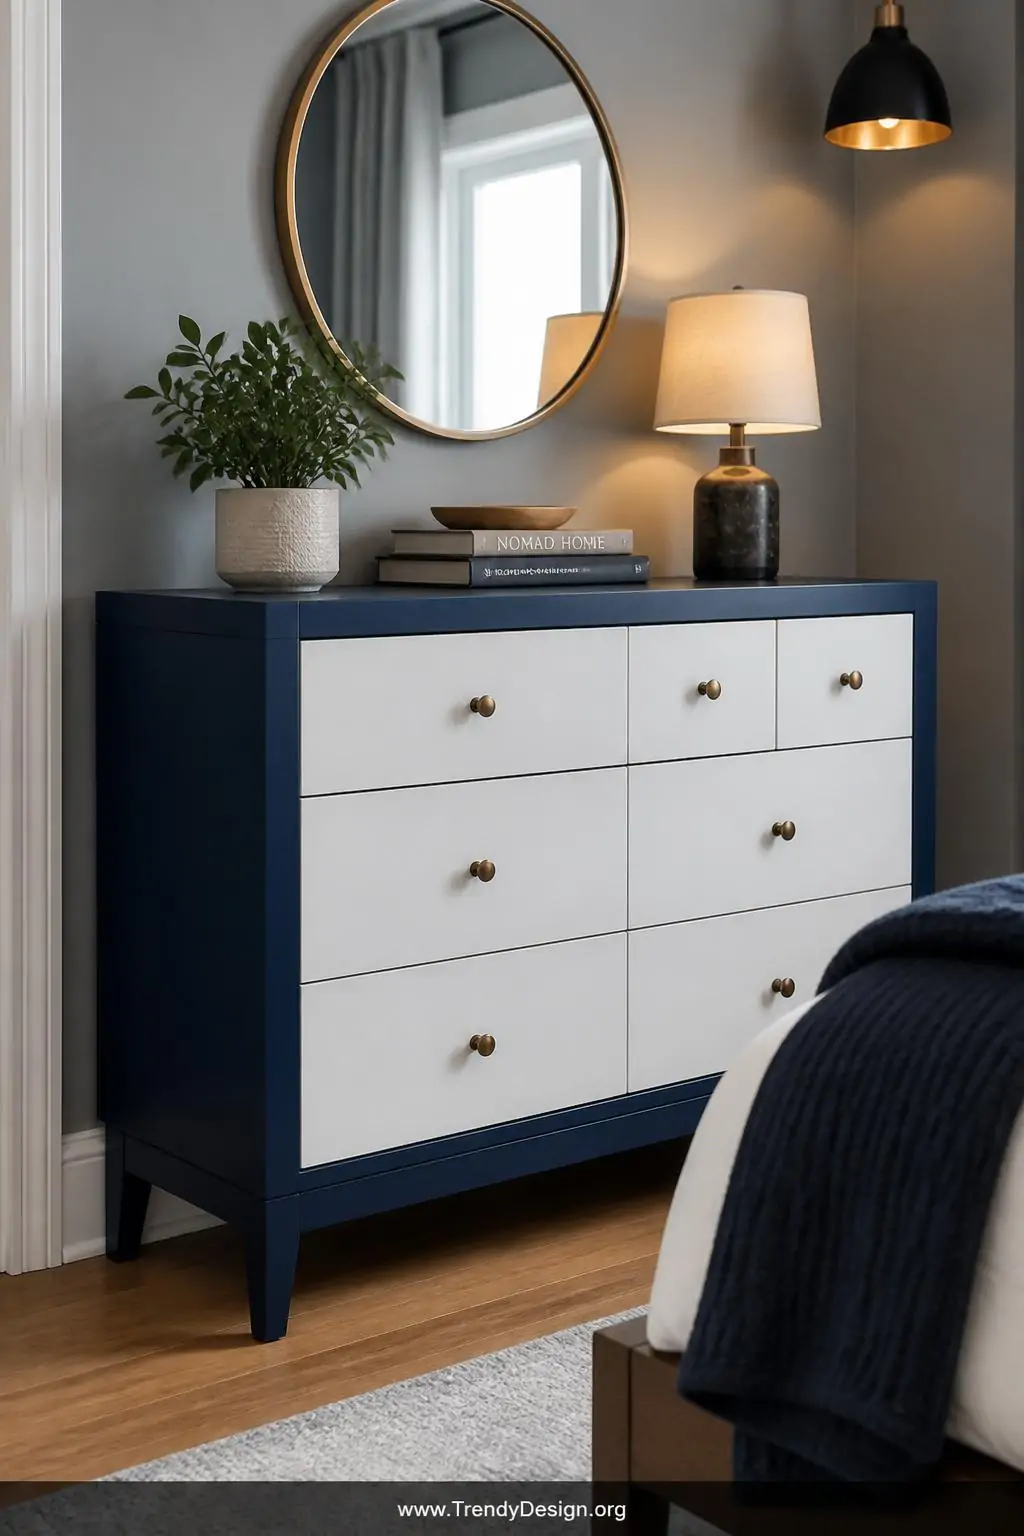
This is where things get really fun. Color blocking involves painting different sections of a furniture piece in contrasting colors, and the results can be absolutely stunning. Think a navy dresser body with bright white drawer fronts, or a mustard yellow chair with a forest green seat.
FYI, you don’t need any fancy skills to pull this off just painter’s tape and a little patience. The key is choosing colors that complement each other without competing too much. A good rule of thumb is to use one neutral and one bold shade so the piece feels intentional rather than chaotic.
Quick Tips for Color Blocking Success
- Use quality painter’s tape for clean, crisp lines
- Let the first color dry completely before taping and painting the second
- Stick to two or three colors maximum for a cohesive look
- Consider the room’s existing color palette before choosing shades
3. Gorgeous Ombre and Gradient Effects
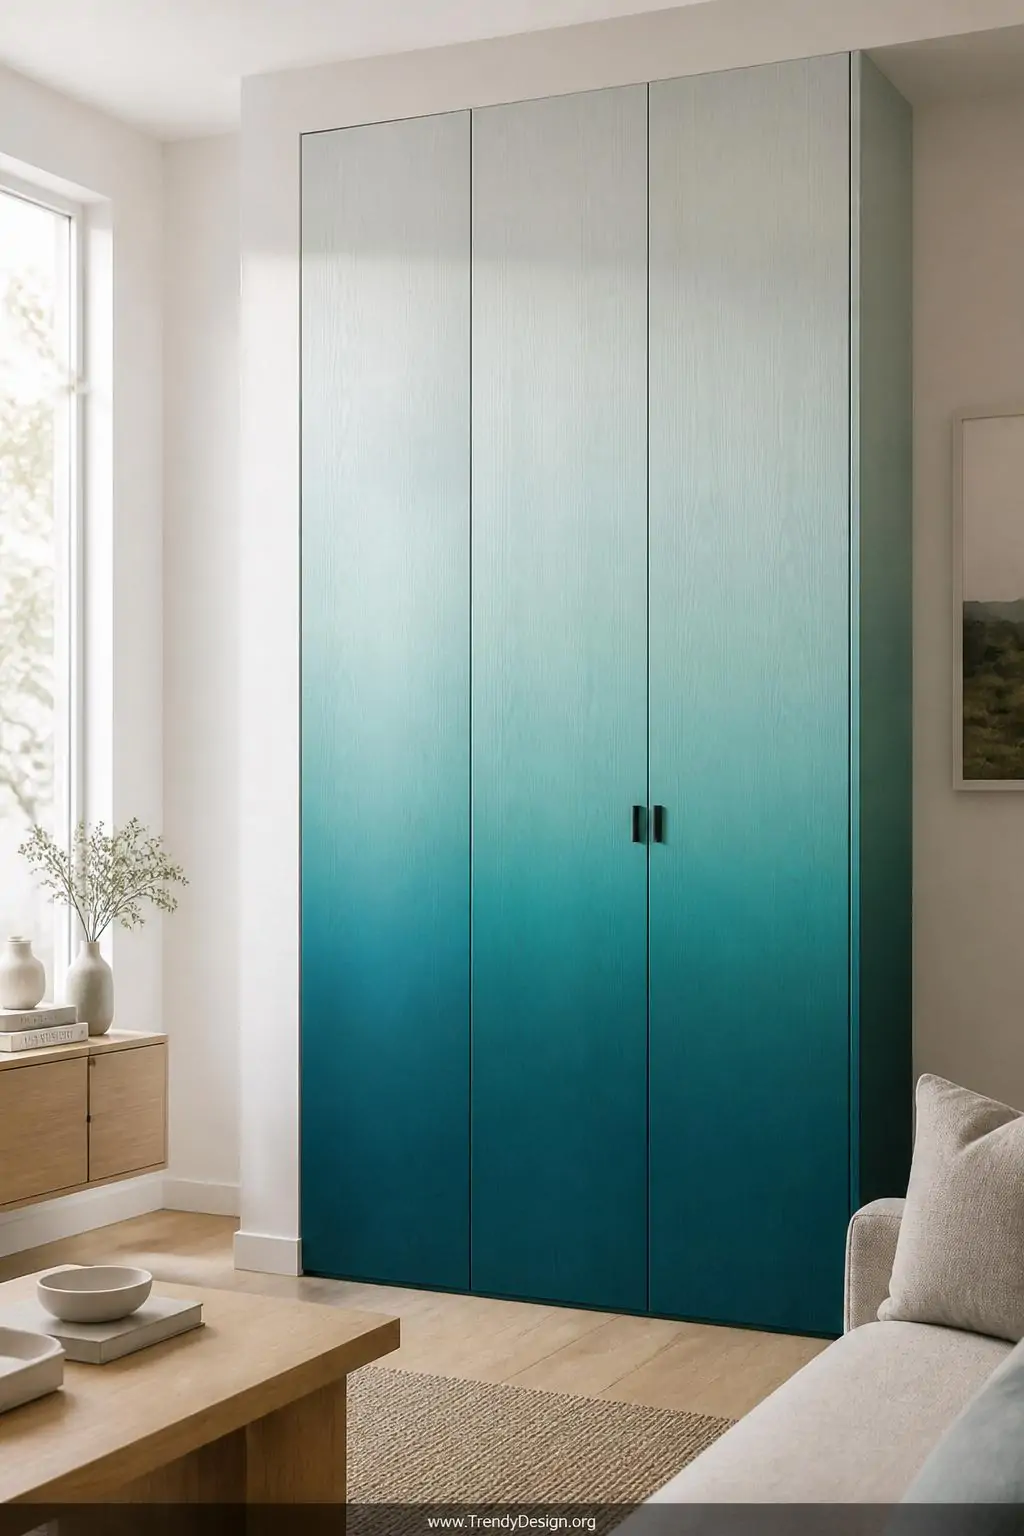
If you want something that truly makes people stop and say “wait, did you MAKE that?”, ombre furniture painting is your answer. An ombre effect blends two or more shades seamlessly, creating a dreamy gradient look that feels modern and artistic. It sounds intimidating, but it’s more forgiving than you’d think.
The trick is to work quickly while the paint is still wet, using a dry brush or sponge to blend the colors where they meet. Start with your darkest shade at the bottom and work upward toward a lighter tone. IMO, this technique looks absolutely magical on tall bookshelves, wardrobes, or console tables where you have vertical space to play with.
Water-based paints work best here since they stay workable a little longer, giving you more time to blend without rushing. Practice on a piece of cardboard first if you’re nervous it’s a total game changer for building confidence.
4. Stenciled Patterns and Decorative Details
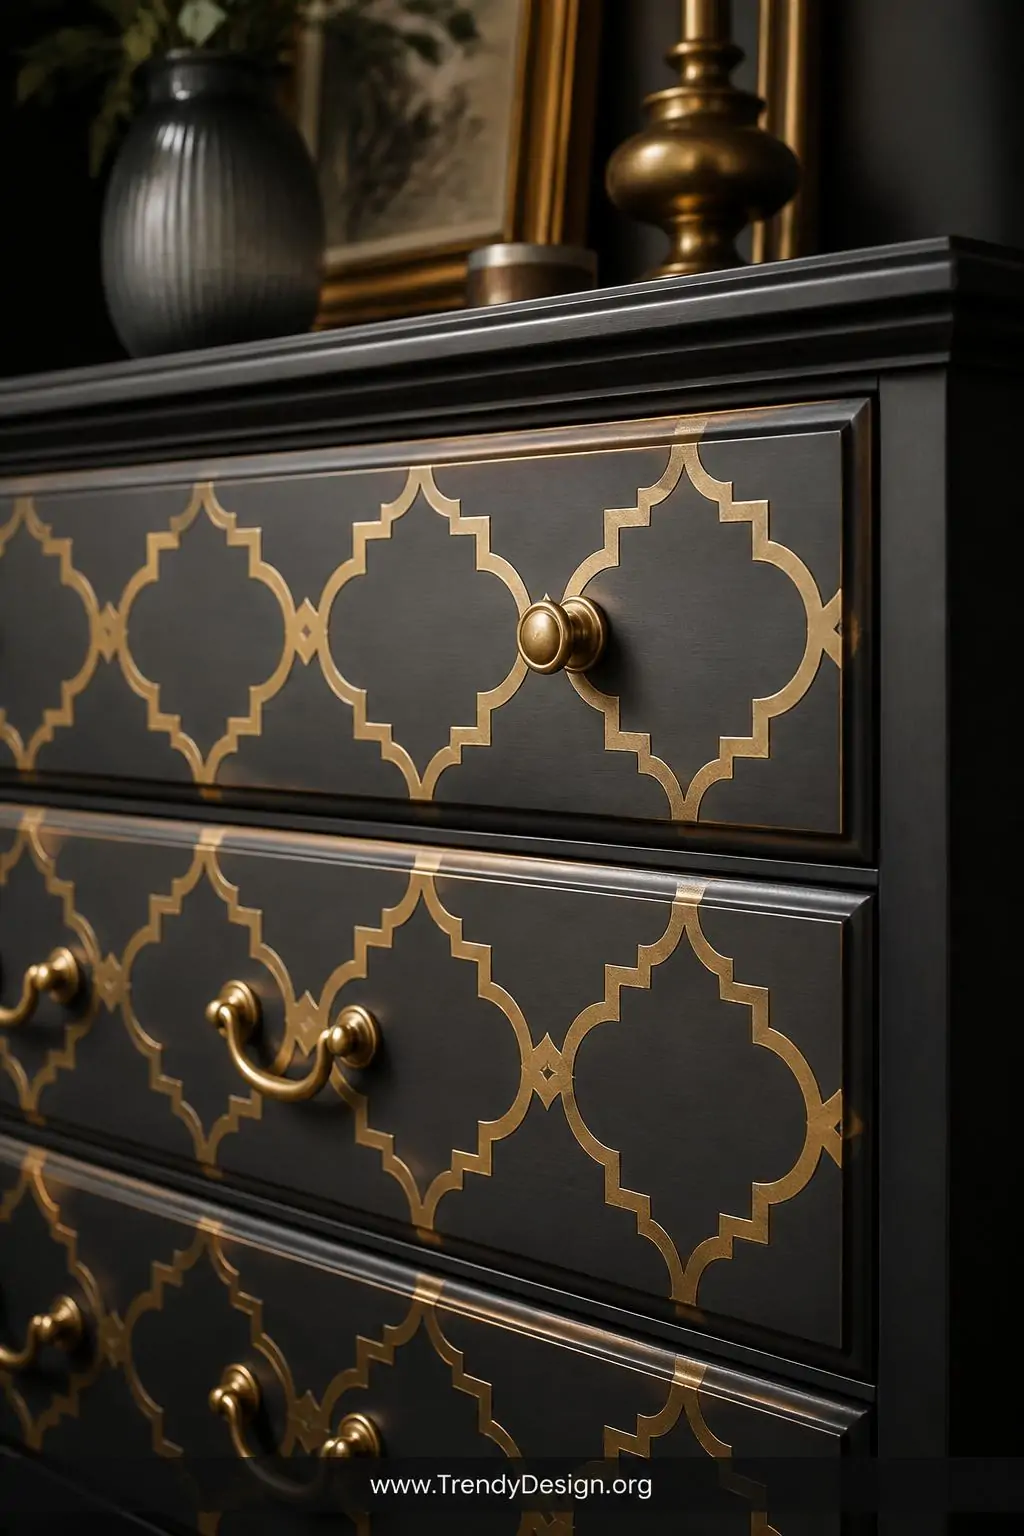
Sometimes a solid color just isn’t enough, and that’s completely valid. Adding stenciled patterns is one of the most creative furniture painting ideas for people who want something truly unique and personalized. Geometric patterns, floral motifs, Moroccan-inspired designs the options are endless.
You can find affordable stencils online or at craft stores, and they’re incredibly easy to use. Simply tape your stencil in place, dab paint over it with a foam roller or brush, and peel it back to reveal the pattern underneath. The key word there is “dab” don’t brush or you’ll get bleeding under the edges.
- Try a repeating geometric pattern across a dresser front
- Use metallic paint for the stencil to add glamour and shine
- Stencil just the drawer fronts for a subtle, sophisticated touch
- Mix stenciling with a chalk paint base for a vintage boho vibe
5. Distressed and Vintage Weathered Finishes
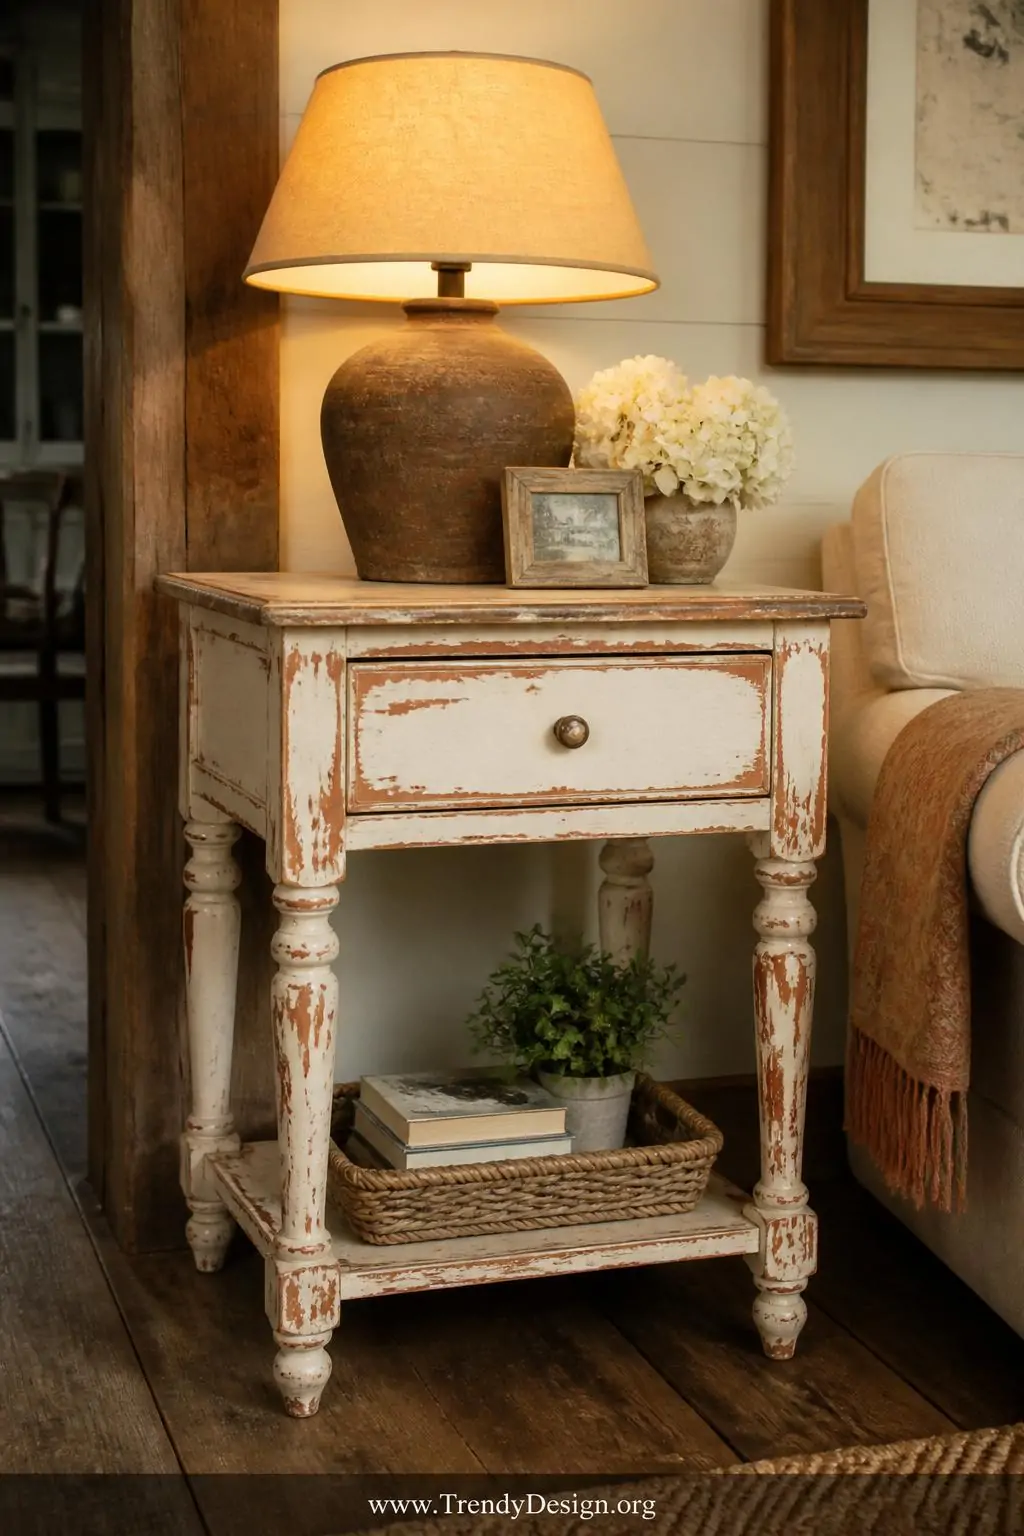
There’s something so charming about a piece of furniture that looks like it has a story to tell. Distressing is a painting technique that mimics natural wear and aging, giving furniture that cozy, lived-in farmhouse feel. The best part? You literally sand away your paint on purpose, so perfection is never the goal here.
Paint your piece in a base color, let it dry, then add a top coat in a contrasting color. Once everything is dry, use sandpaper to rub away the top layer at edges, corners, and raised details anywhere that would naturally wear over time. Honestly, the more imperfect it looks, the better it turns out.
What You’ll Need
- Two contrasting paint colors (lighter base, darker top coat works great)
- Medium and fine grit sandpaper
- A clear sealer to protect the finished piece
- A dry cloth to wipe away dust between steps
There you have it five fantastic furniture painting ideas that can take any tired, forgotten piece from drab to absolutely fabulous. Whether you go bold with color blocking or romantic with a distressed finish, the beauty of painting furniture is that there are no real rules. Grab a brush, pick a technique that excites you, and remember that the “wrong” stroke is usually just the beginning of something unexpectedly beautiful. Your home is your canvas now go make something amazing!
Leave a Reply