Your planner is basically a second brain so why does it look like a grocery list from 2019? Washi tape is the tiny, colorful game-changer you didn’t know you needed, and once you start, there’s genuinely no going back.
1. Create Color-Coded Weekly Dividers

Stop squinting at your planner trying to figure out where Monday ends and Tuesday begins. A single strip of washi tape across the top of each day instantly creates a clean, visual boundary that your brain will actually thank you for.
Pick a different color or pattern for each day of the week and watch your planning sessions become weirdly satisfying. Consistency is the secret sauce here once your eyes recognize the pattern, flipping to the right day becomes automatic.
- Use bold, contrasting colors for weekdays and softer tones for weekends
- Try striped tape for high-priority days like Mondays or meeting-heavy days
- Layer a thin strip on top of a wider one for extra visual punch
2. Build Gorgeous Monthly Habit Trackers
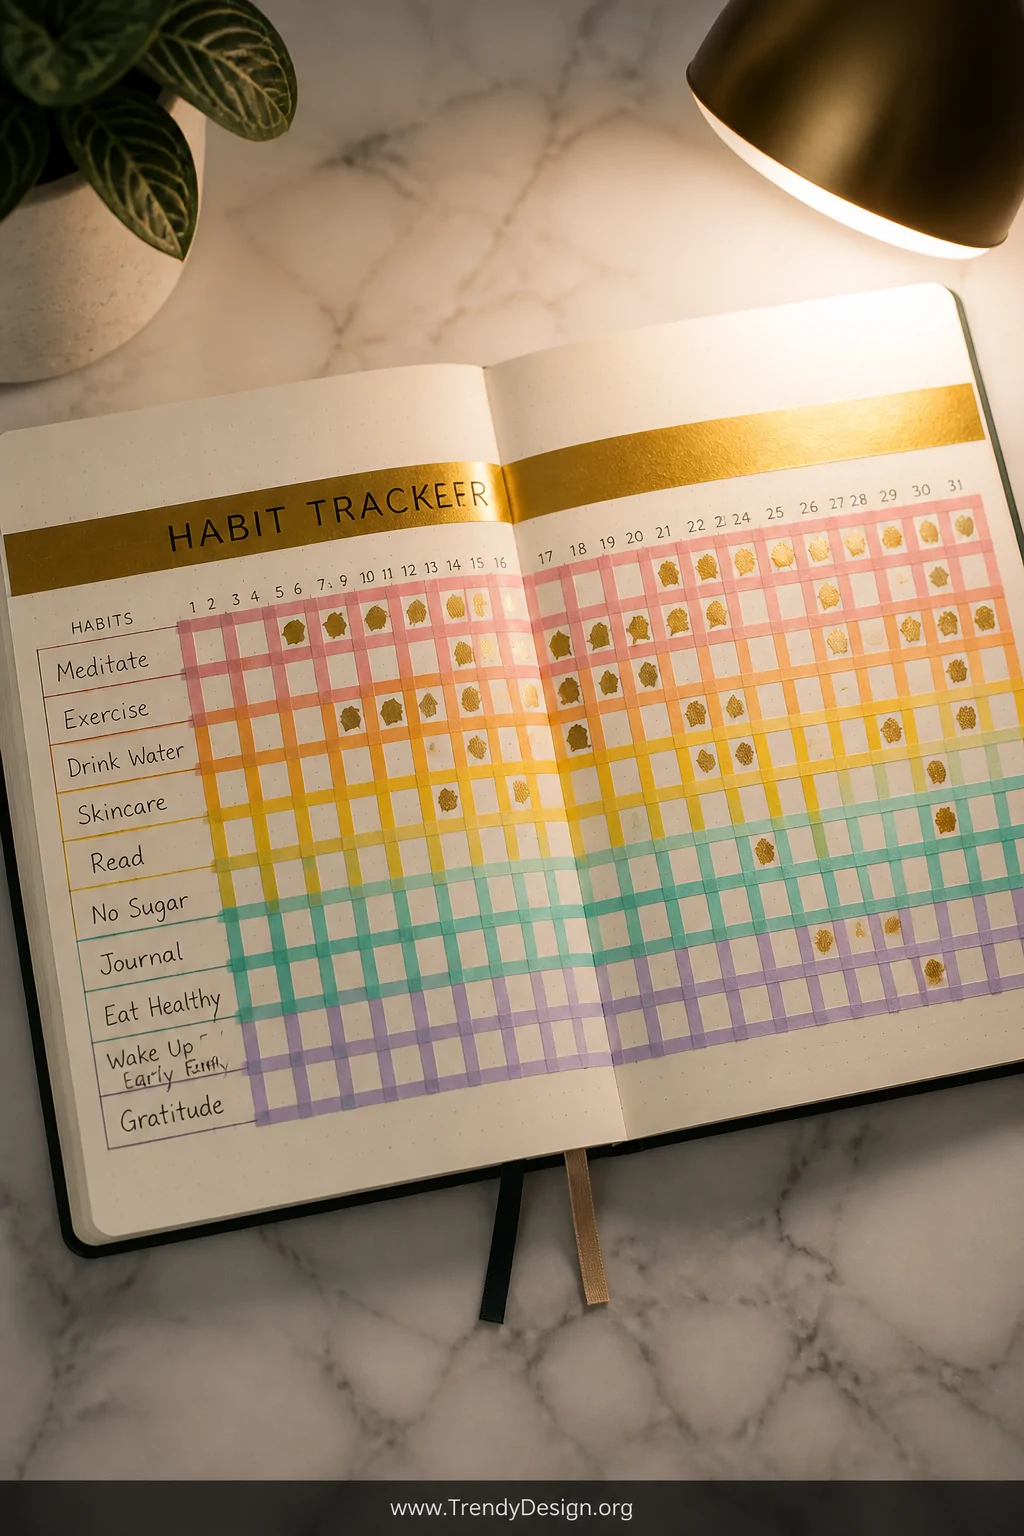
Habit trackers are everywhere right now, and honestly, they hit different when they look beautiful. Use washi tape to create the grid structure instead of drawing wonky lines with a ruler it’s faster, cleaner, and way more satisfying.
Tear small squares of tape to mark completed habits or use a full strip as a header bar above your tracker grid. The tactile element of peeling and placing tape also makes the whole ritual feel more intentional, which weirdly makes you more likely to actually stick to your habits.
- Create a rainbow gradient by using different colored tapes for each habit row
- Use metallic washi tape for your most important non-negotiable habits
- Leave the tape slightly raised at the edge so you can peel and reuse the section
3. Flag Important Dates and Deadlines
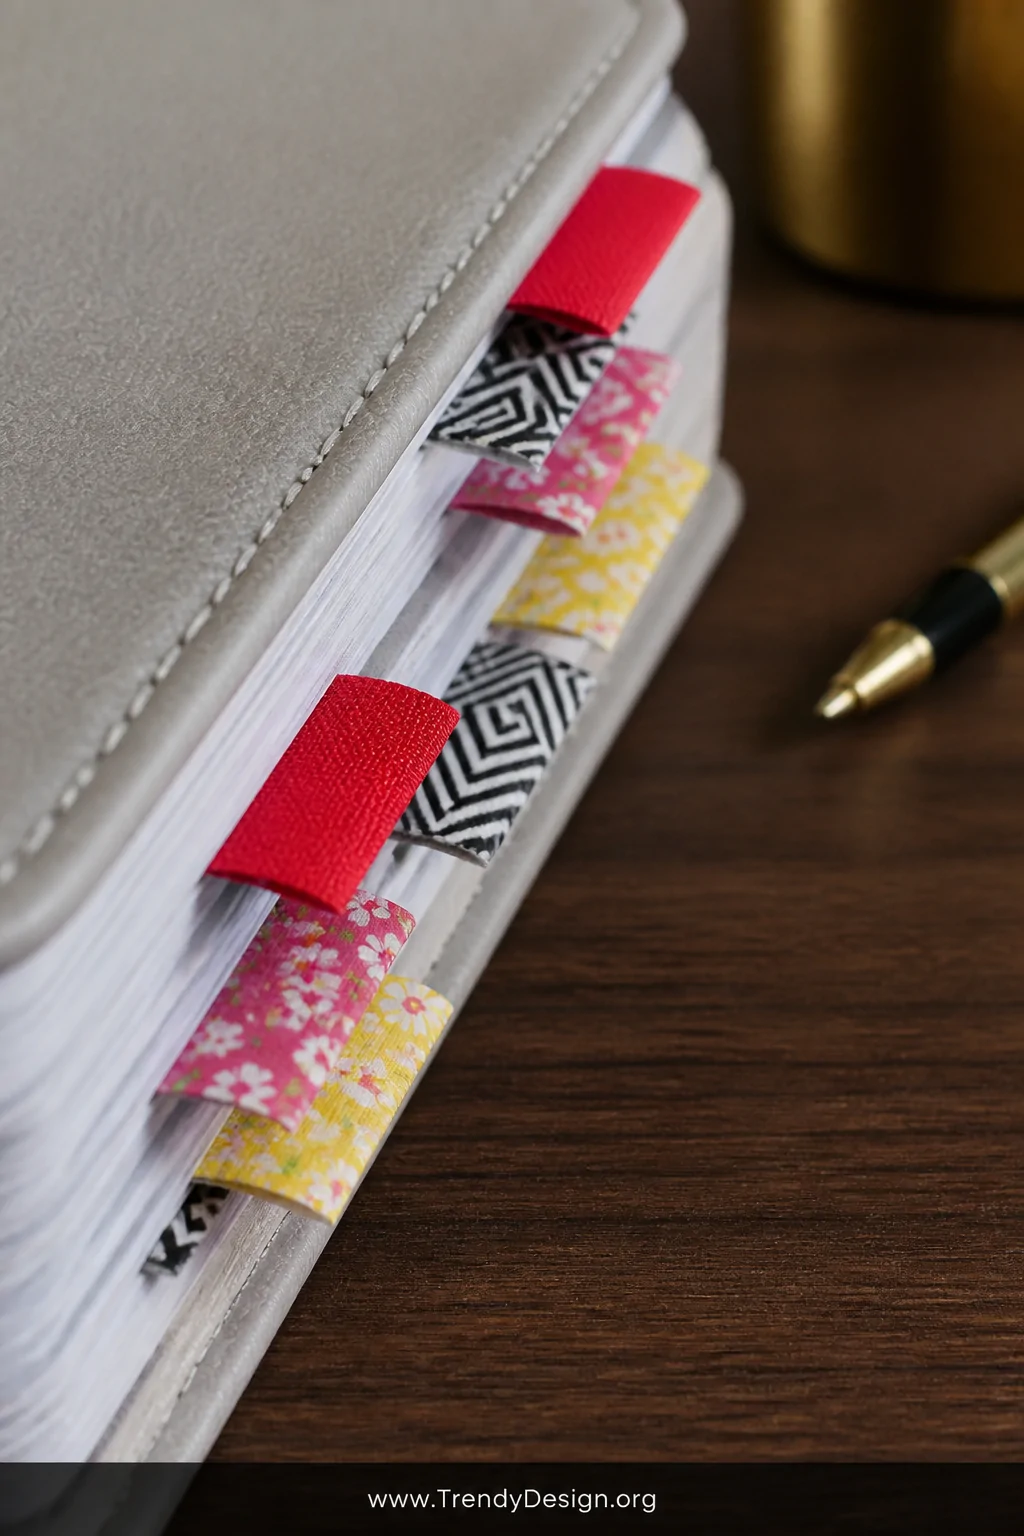
Post-it notes are great until they fall off at 2 AM and you find them stuck to your cat three weeks later. Washi tape flags stick directly into your planner pages and stay exactly where you put them no rogue reminders, no chaos.
Fold a small piece of tape over the edge of a page to create a color-coded tab system for birthdays, bill due dates, or big project deadlines. FYI, this works especially well when you assign specific tape patterns to specific life categories one pattern for work, one for personal, one for birthdays.
Quick Flag System to Try
- Red or bright tape = urgent deadlines that need immediate attention
- Floral or festive patterns = birthdays, anniversaries, and celebrations
- Neutral geometric tape = recurring monthly tasks like bills or subscriptions
4. Design Custom Sticky Note Pockets
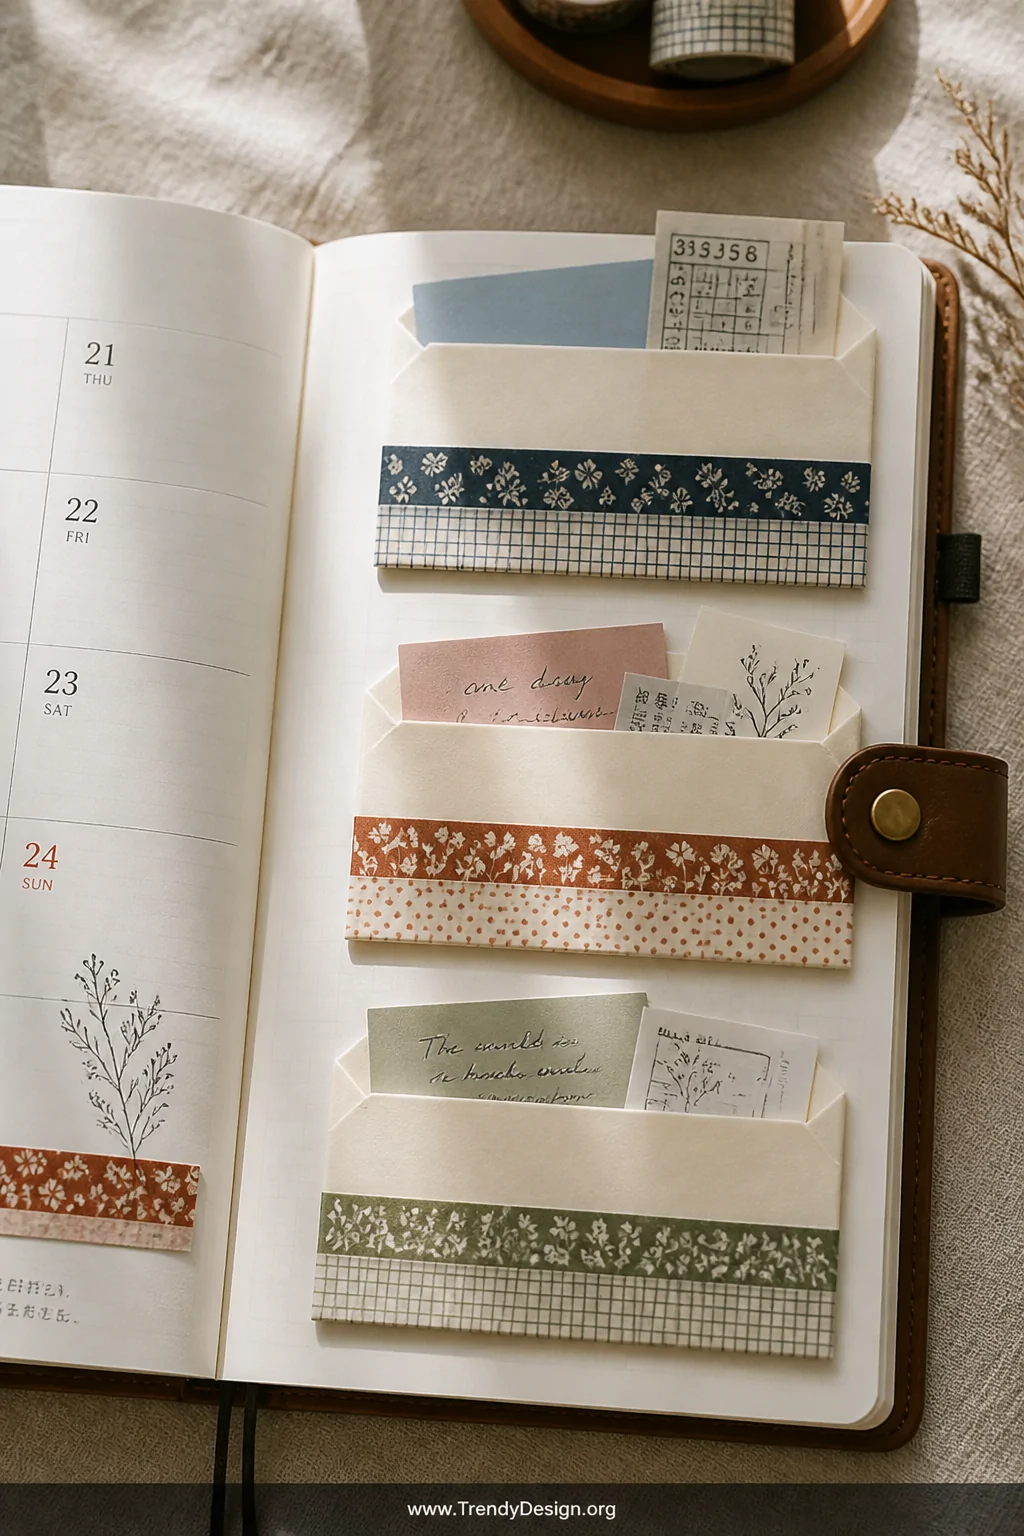
This one is genuinely clever and people will absolutely ask you about it. Use washi tape to attach a small folded piece of cardstock or an envelope directly onto a planner page, creating a pocket for sticky notes, receipts, or loose to-do lists.
Run tape along three sides of a small folded paper, press it firmly onto your planner page, and leave the top open for easy access. It sounds almost too simple, but this little pocket system keeps all those random bits of paper from floating around your bag like sad little confetti pieces.
- Use double-layered tape strips on the sides for a more secure hold
- Decorate the front of the pocket with complementary tape patterns
- Create multiple pockets on a single page for sorting different project notes
5. Add Decorative Borders and Mood-Setting Frames
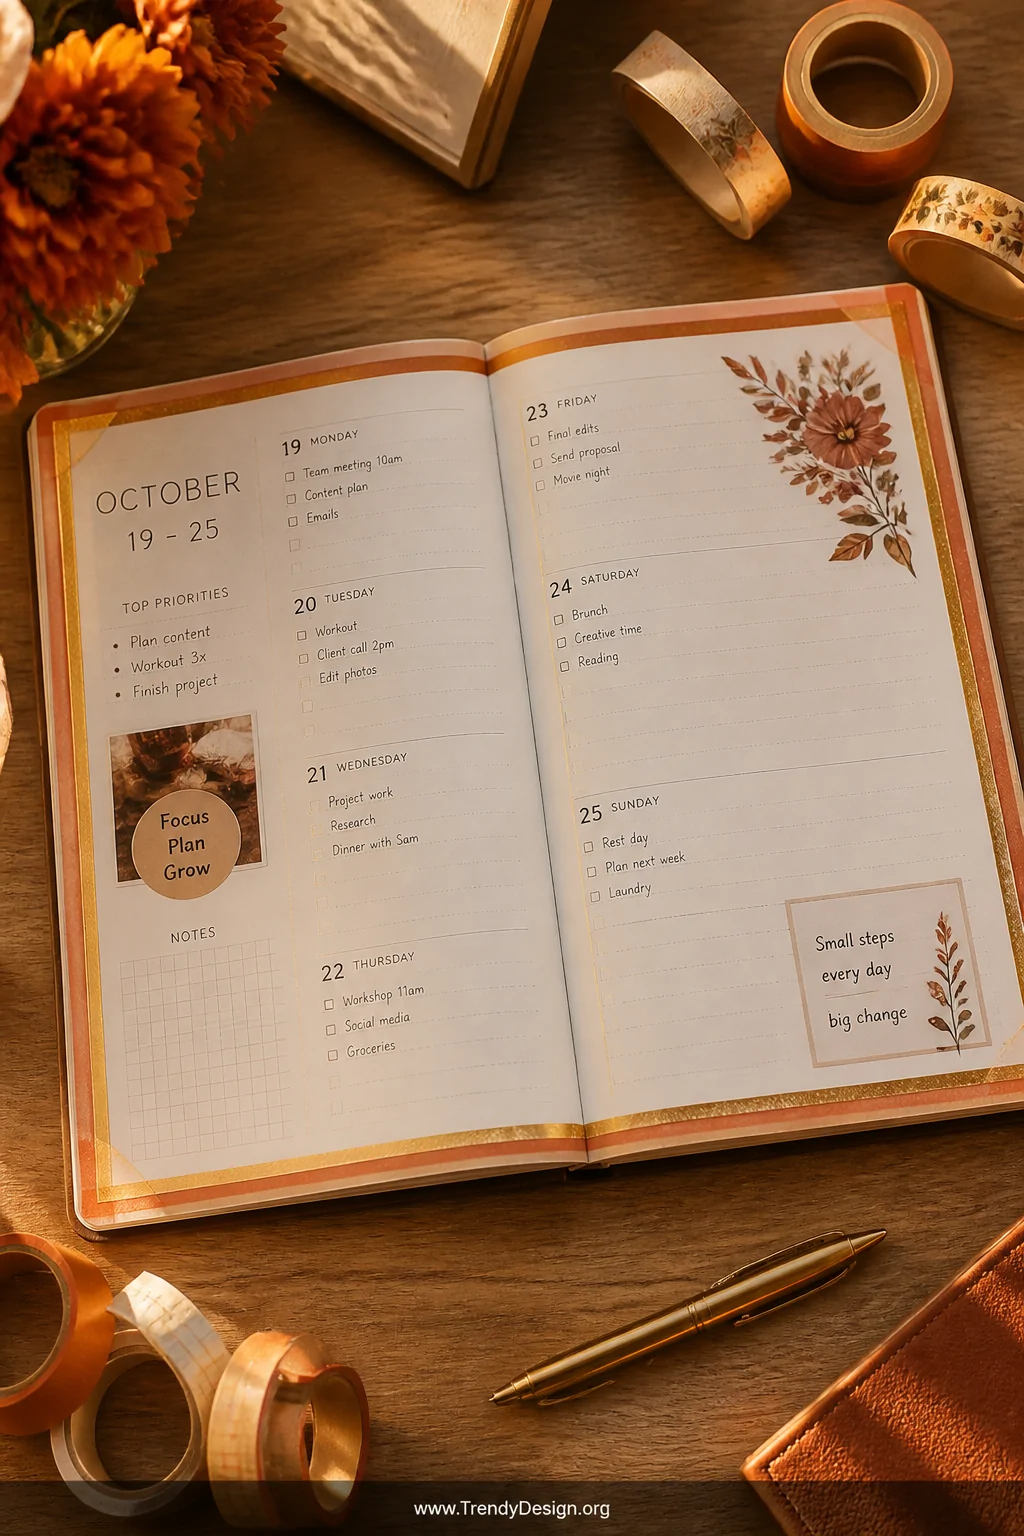
IMO, this is where creative washi tape use really shines turning a plain weekly spread into something that actually excites you to open. Run tape along the outer edge of a weekly or monthly spread to create a defined border that frames your entire layout.
Mix a wider tape on the outside with a thinner complementary tape just inside it for a layered frame effect. This trick makes your planner feel less like a task list and more like a curated space you actually want to spend time in and when your planner feels good, you use it more consistently.
- Match your tape colors to seasonal palettes warm oranges in fall, pastels in spring
- Use translucent washi tape over photos or printed images for a dreamy overlay effect
- Try running tape diagonally across a corner for a modern, editorial look
Your planner doesn’t have to be a boring productivity tool it can be the most visually inspiring thing you touch every single day. Washi tape costs almost nothing, takes up zero space, and completely transforms how you interact with your planning system. Start with one roll, one technique, and watch yourself get completely, happily obsessed.
“`
Leave a Reply