If you’ve been scrolling through Pinterest lately, chances are you’ve stumbled across those mesmerizing, swirly, colorful canvases that look like they belong in a modern art gallery. Guess what? Those are acrylic pour paintings, and you can absolutely make them yourself. Whether you’re a total beginner or someone who just wants a fun weekend project, these ideas will have you reaching for a canvas and some paint in no time.
The beauty of acrylic pour painting is that happy accidents are basically the whole point. You mix, you pour, you tilt — and the paint does most of the magic for you. So grab your apron (or an old shirt you don’t mind ruining), and let’s dive into nine gorgeous ideas that’ll make your home décor look seriously elevated.
1. The Classic Dutch Pour Technique
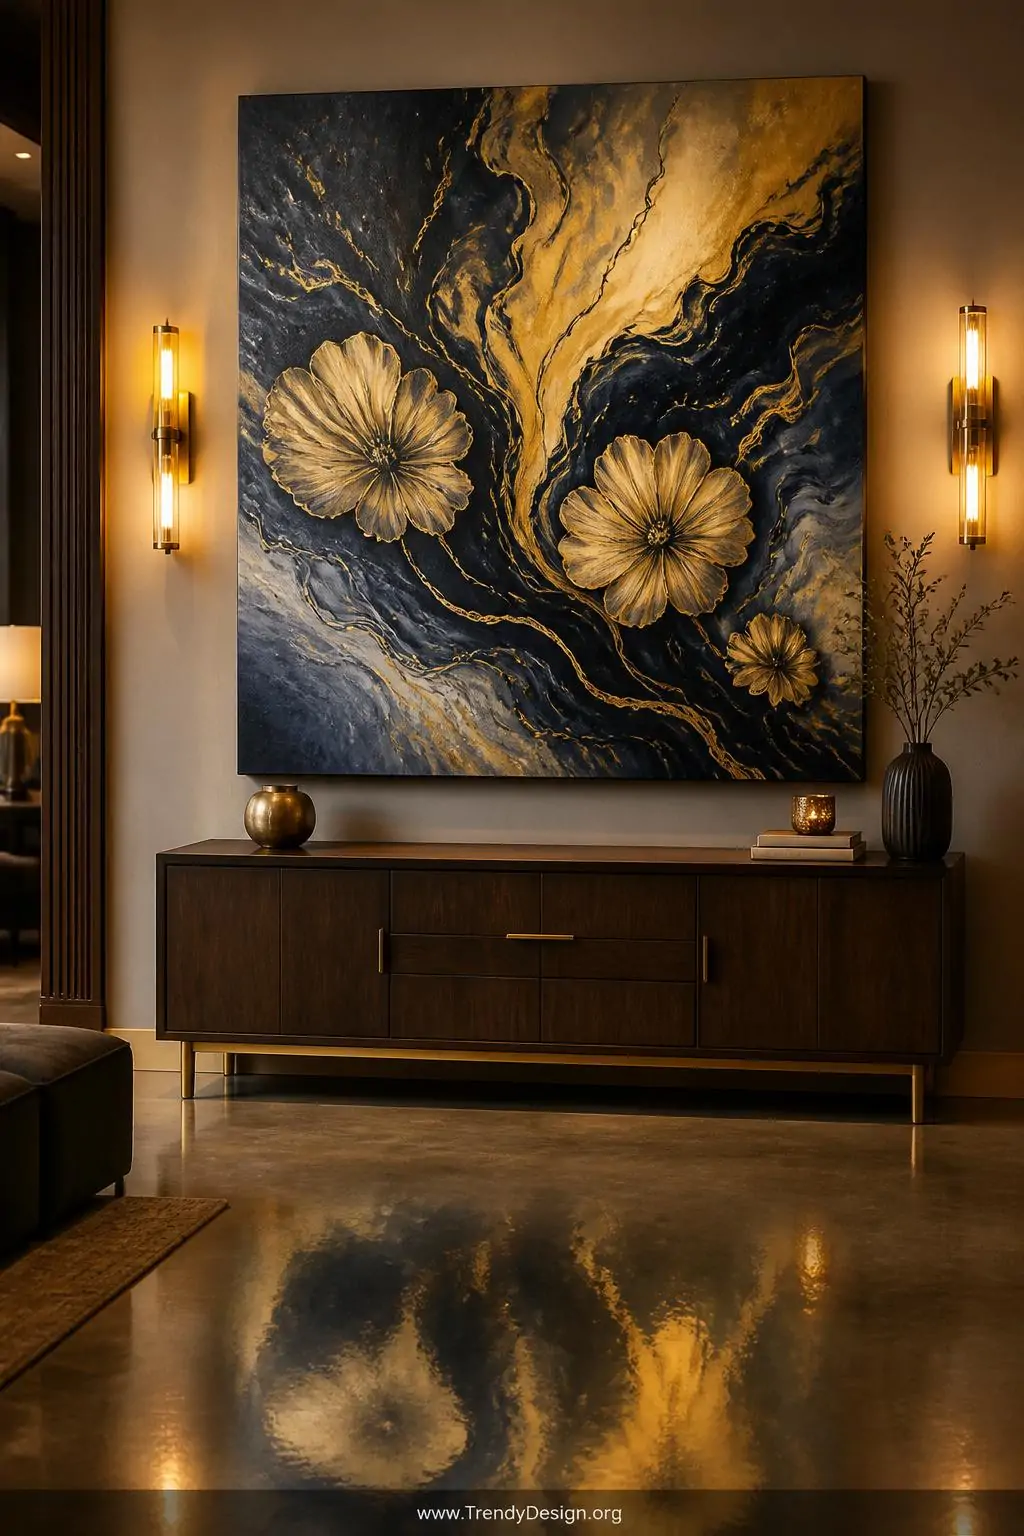
The Dutch pour is one of the most beginner-friendly acrylic pour painting ideas out there, and the results are absolutely stunning. You pour your colors onto the canvas and then use a hairdryer or straw to blow the paint into beautiful, flower-like patterns and wispy tendrils.
The trick here is to use a pouring medium mixed with your acrylic paints to get that silky, fluid consistency. IMO, the Dutch pour gives you the most dramatic results with the least amount of stress — which is basically the dream combination for any DIY project.
- Use contrasting colors like navy and gold for a bold statement piece
- Try soft pastels for a dreamy, bedroom-friendly vibe
- A lower hairdryer setting gives you more control over the design
2. Stunning Cell Lacing With Silicone Oil
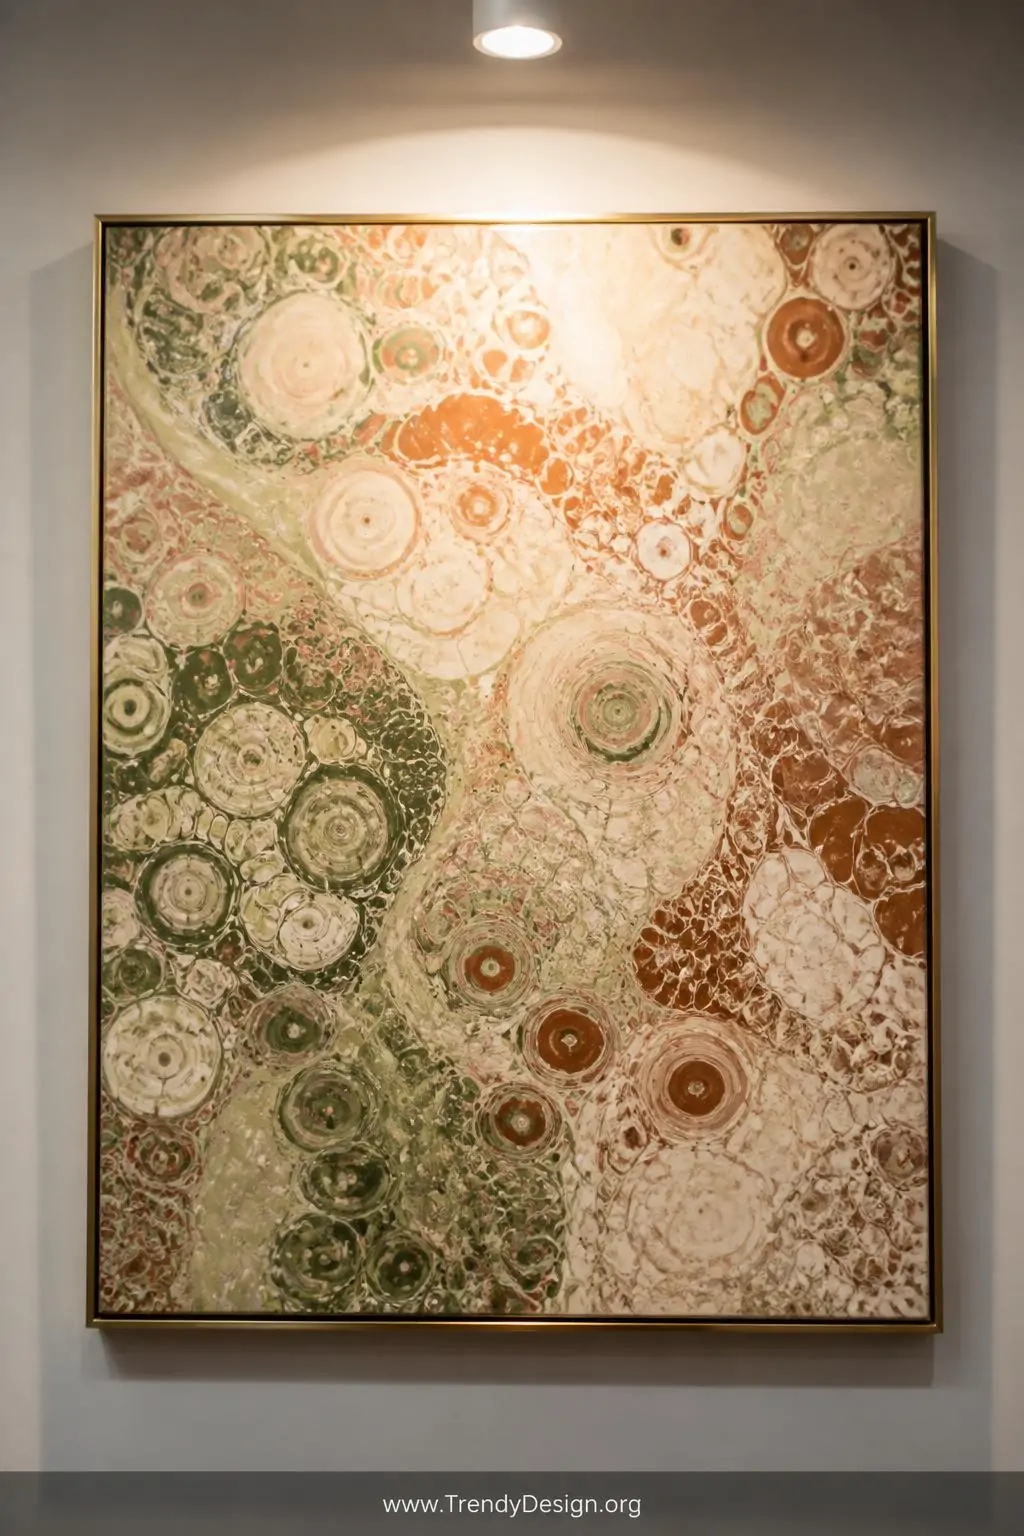
If you’ve ever seen those gorgeous pour paintings with tons of tiny circular cells and lacy patterns, silicone oil is the secret ingredient behind that magic. Just add a few drops to your paint mixture before pouring and watch those beautiful cells bloom as the paint separates.
The silicone creates a reaction between the layers of paint, causing them to push apart and form those iconic circular patterns. Cell lacing is one of the most visually impressive techniques in the world of acrylic pour painting, and people will genuinely think you hired a professional artist.
Quick Tips for Better Cells
- Lighter colors tend to rise to the surface more easily
- Torch the surface gently with a kitchen torch to pop bubbles and encourage cells
- Don’t over-mix your paint after adding silicone oil
3. Fluid Ocean Wave Painting
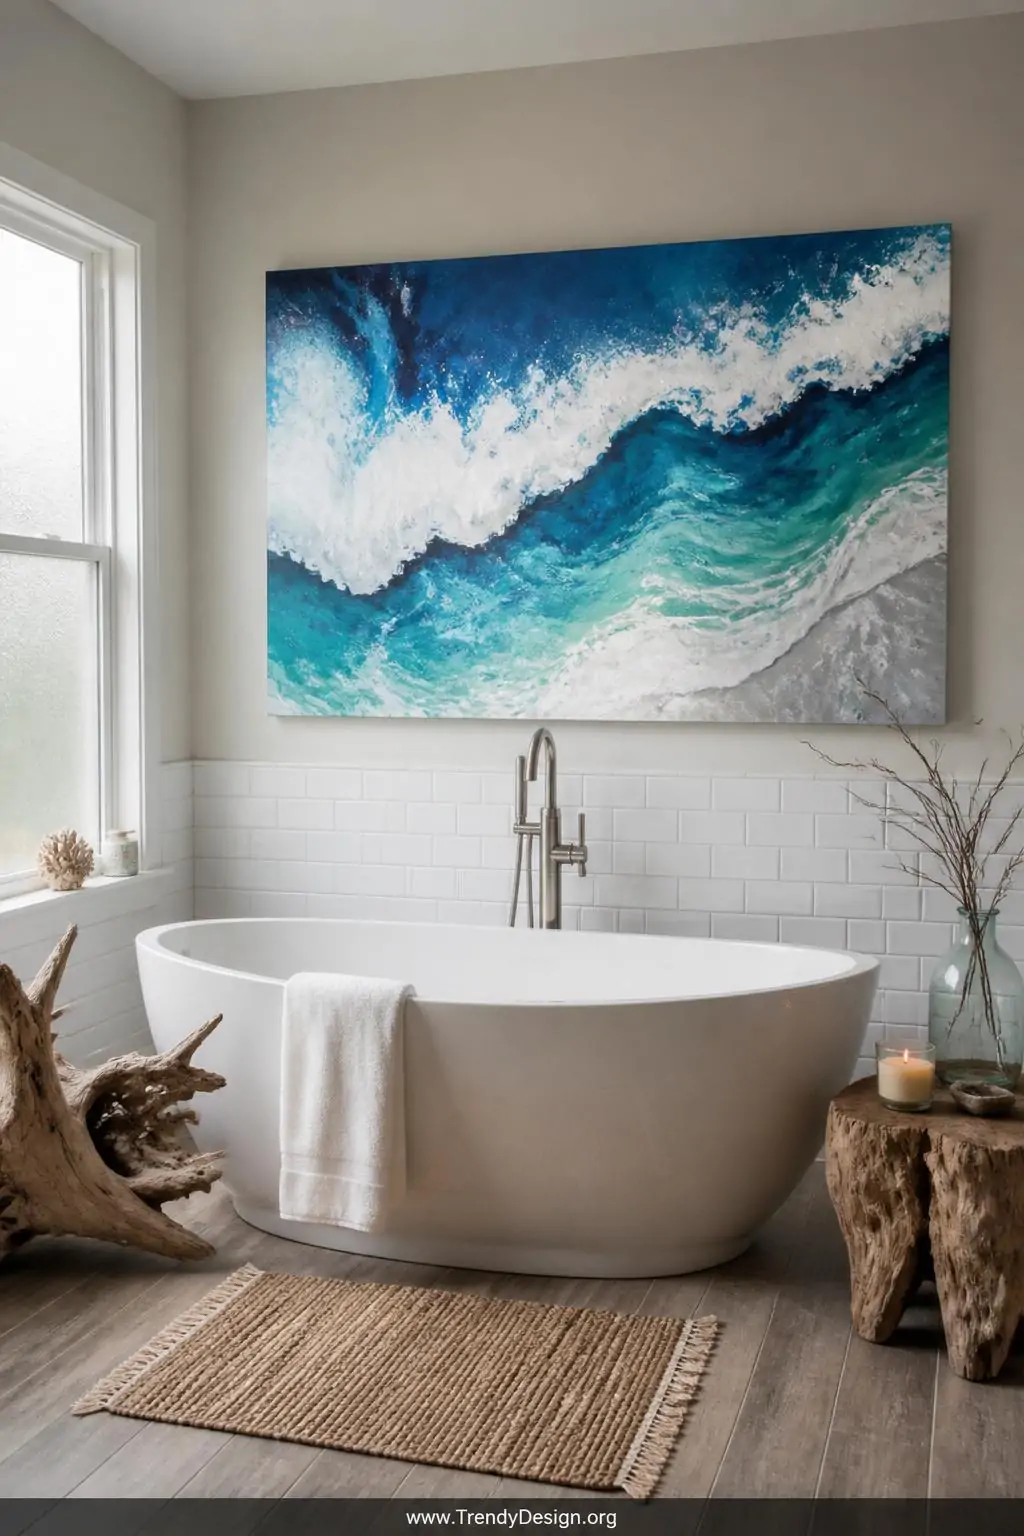
Ocean wave paintings are having a major moment in home décor right now, and honestly, they’re one of the most satisfying acrylic pour painting ideas to execute. You layer shades of blue, green, teal, and white on your canvas, then tilt it to create rolling wave formations that look almost hypnotic.
The key is to add your white paint last and let it crash through the other colors like a real wave would. Hang the finished piece in a bathroom, bedroom, or living room and suddenly your whole space feels like a coastal retreat.
4. The Mesmerizing Ring Pour
The ring pour technique involves stacking multiple cups of different colored paints and pouring them in one spot to create gorgeous concentric ring patterns. As the paint spreads outward, it forms beautiful layered circles that almost look like a cross-section of a gemstone.
This technique gives you incredible control over where colors appear in your final painting, which is great when you want something that coordinates with a specific room’s color palette. You can also tilt the canvas after your ring pour to turn those circles into dreamy, stretched shapes.
- Pour slowly for more defined rings
- Use 5-7 colors minimum for the most impressive effect
- Metallic paints in the mix add an extra luxurious touch
5. Swipe Technique for a Marble Effect
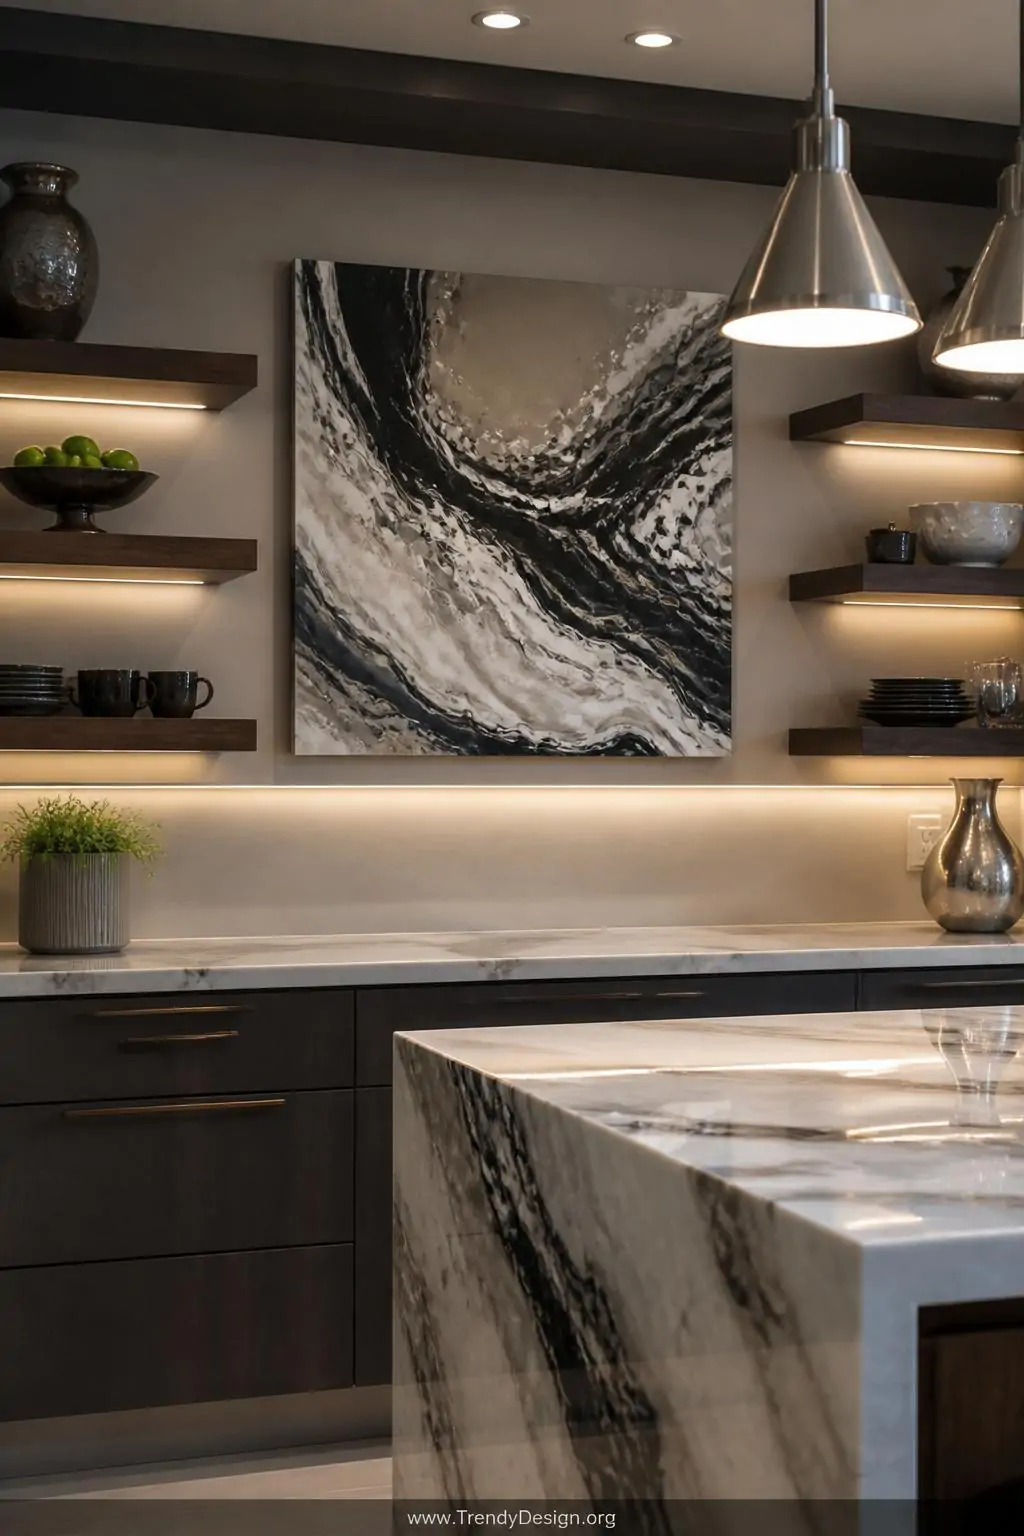
If you’re obsessed with the look of marble countertops but definitely not the price tag, the swipe technique in acrylic pour painting is about to become your new best friend. You pour your base colors onto the canvas, then drag a palette knife, card, or piece of paper across the surface to create those gorgeous marble-like veins.
Adding white or black as your swipe color over other paint colors creates that classic sophisticated marble look that works beautifully in kitchens, bathrooms, and office spaces. FYI, adding just a little silicone oil to your swipe color takes this technique from pretty to absolutely breathtaking.
6. Dirty Pour for Maximum Color Drama
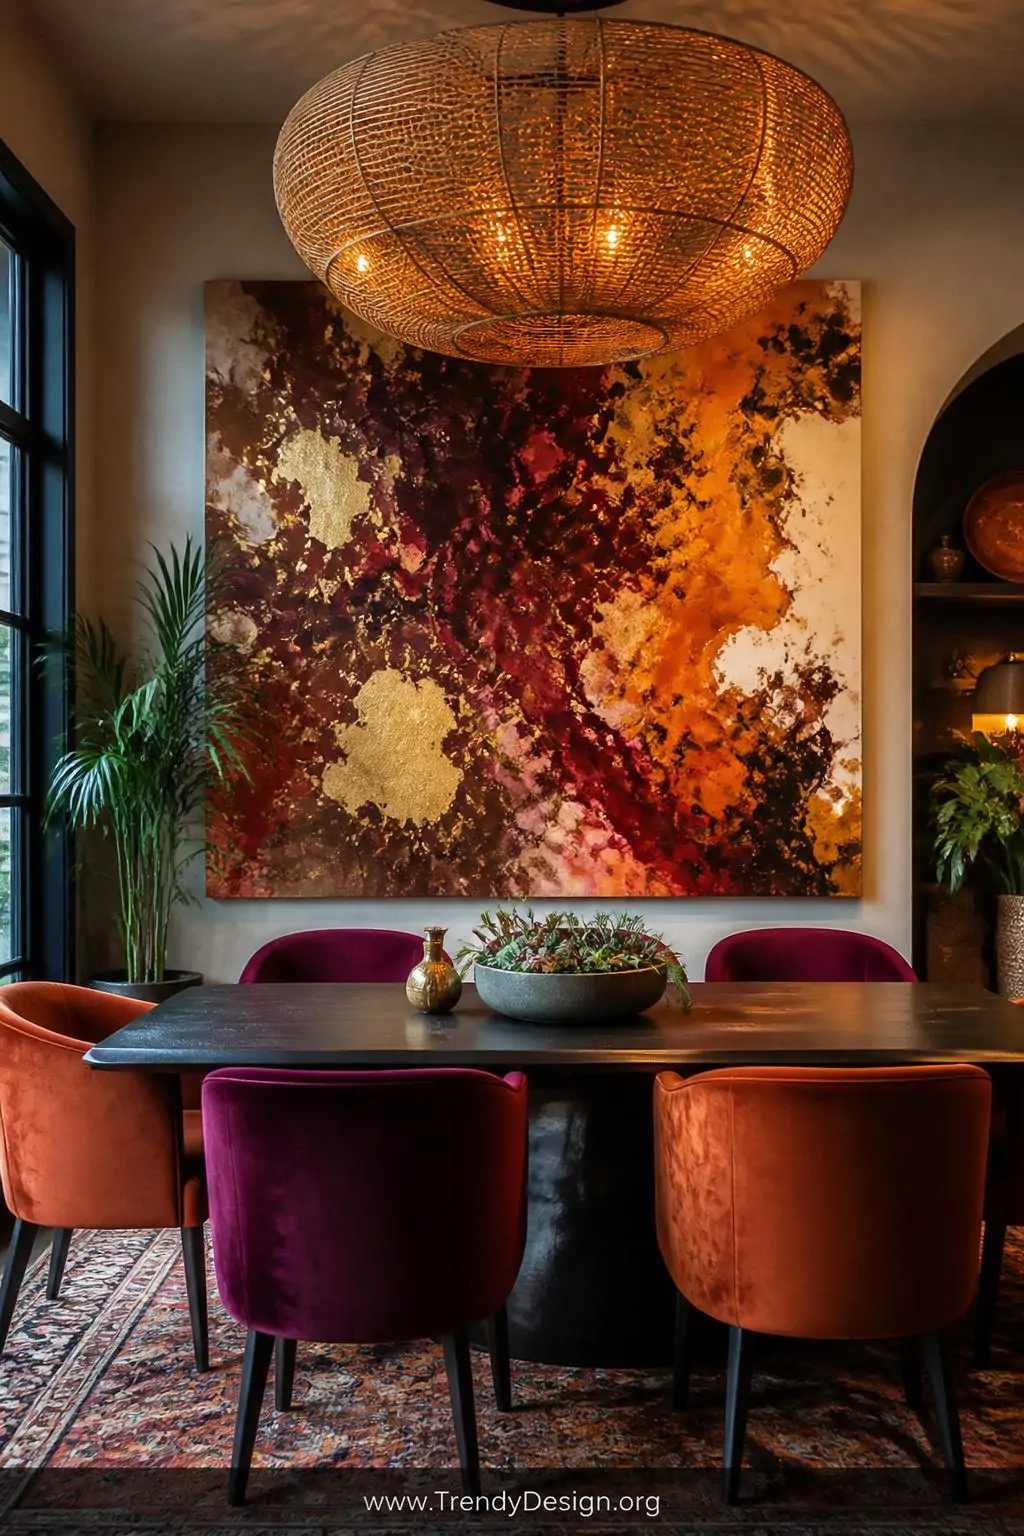
The dirty pour is probably the most well-known of all the acrylic pour painting ideas floating around the internet, and it’s popular for a very good reason. You layer all your paint colors into one single cup, then flip the whole cup onto the canvas in one satisfying, dramatic move.
What you get is a wild, colorful explosion of pigment that spreads across your canvas in ways you never could have planned or predicted. The unpredictability is literally the whole point, which makes every single dirty pour painting completely one-of-a-kind and totally unique to your space.
Color Combinations That Always Look Amazing
- Burgundy, burnt orange, and gold for a warm autumn feel
- Purple, teal, and silver for a moody, luxurious look
- Pink, peach, and white for a soft, romantic bedroom vibe
- Black, white, and red for something bold and graphic
7. Tree Ring or Geode Painting
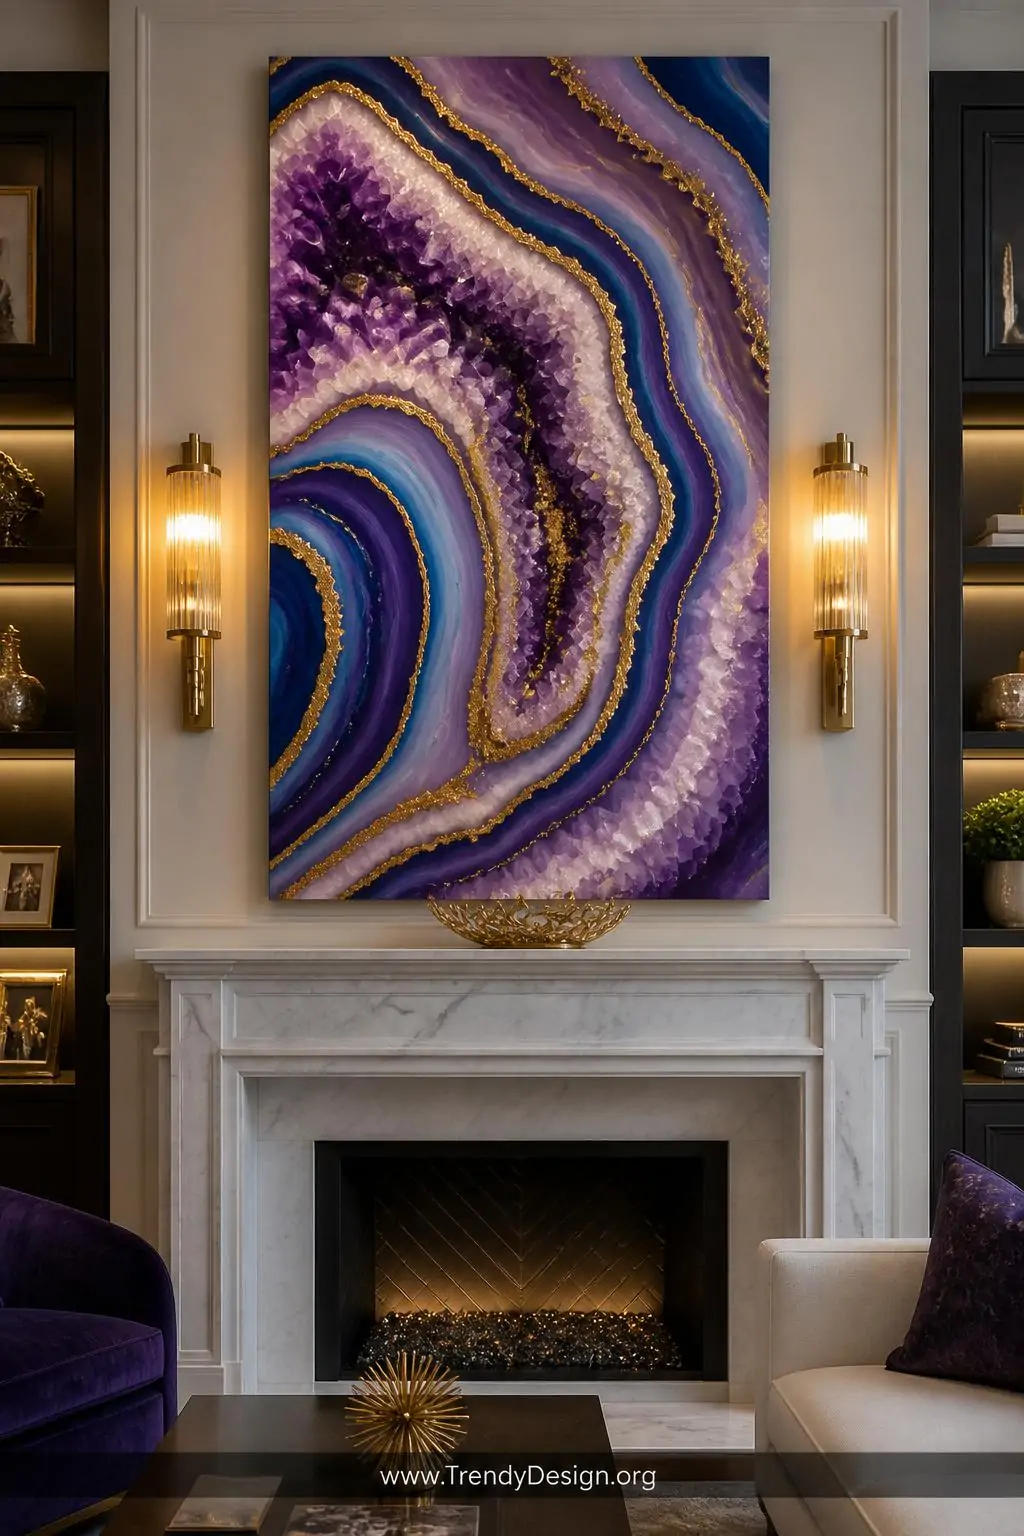
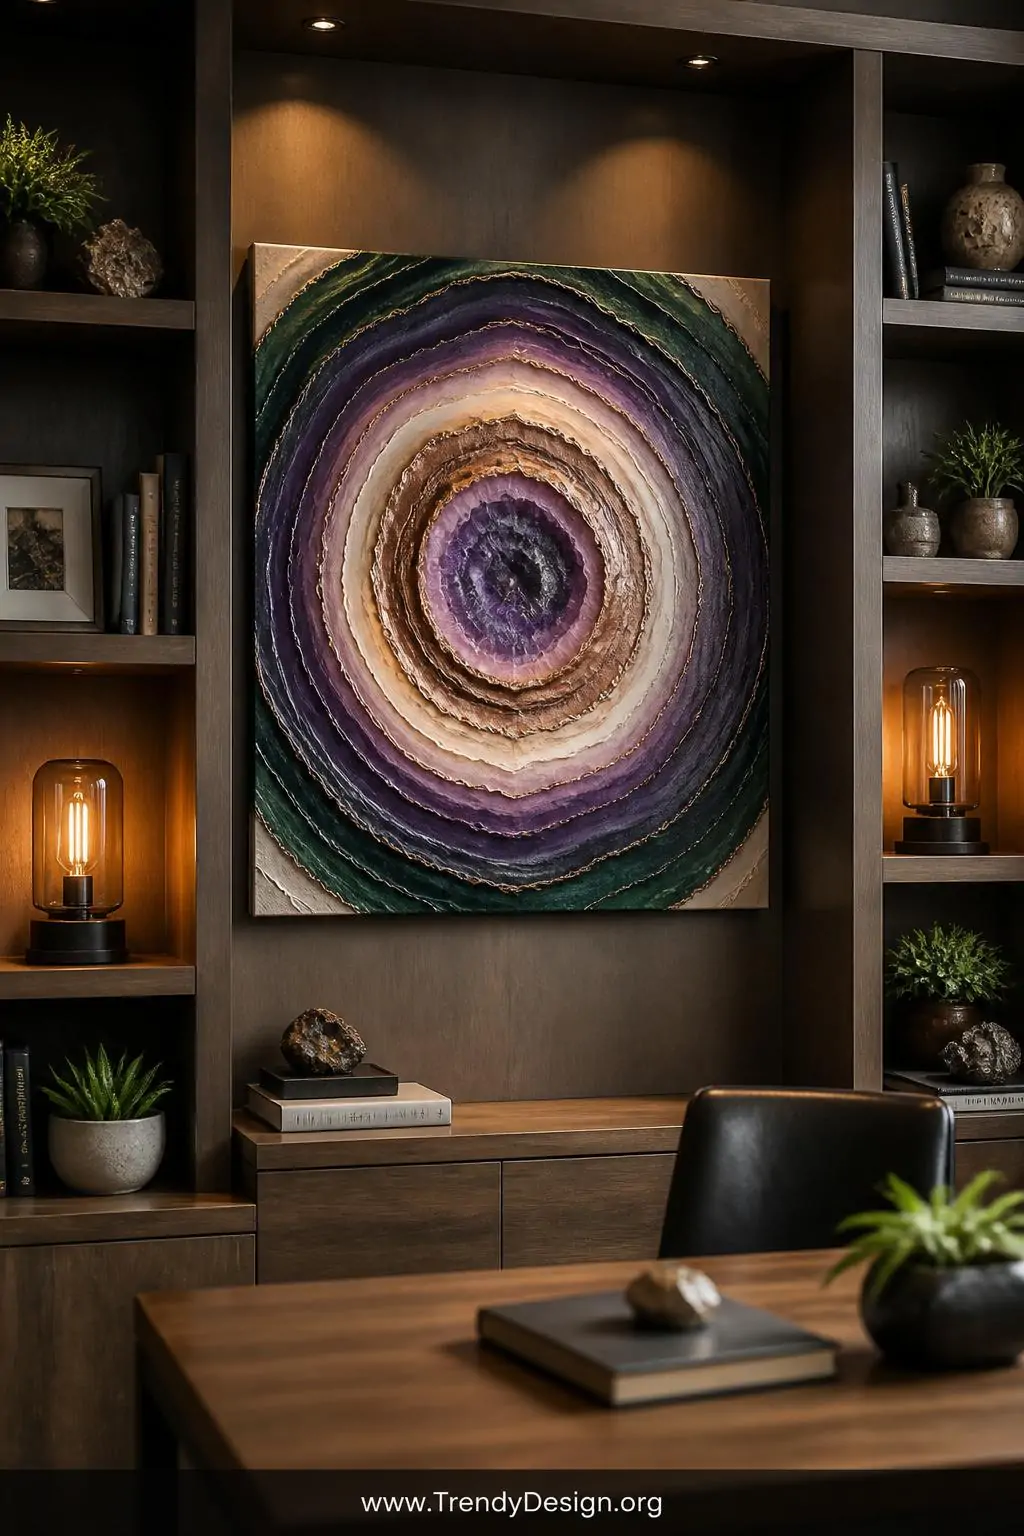
Geode paintings look like slices of gorgeous crystals and semi-precious stones, and they’ve been popping up in interior design magazines everywhere lately. You build up layers of jewel-toned colors in curved, organic shapes, often using gold or silver paint to outline the “crystal” sections.
This is one of those acrylic pour painting ideas that requires a tiny bit more planning than others, but the payoff is absolutely worth it. The finished result looks like a piece you’d find in a high-end gallery, and it makes an incredible focal point above a fireplace or behind a sofa.
- Amethyst tones (purples and lavenders) are perennial favorites
- Use gold leaf or metallic paint for the borders between sections
- Larger canvases really let the geode design shine
8. Negative Space Pour With Tape
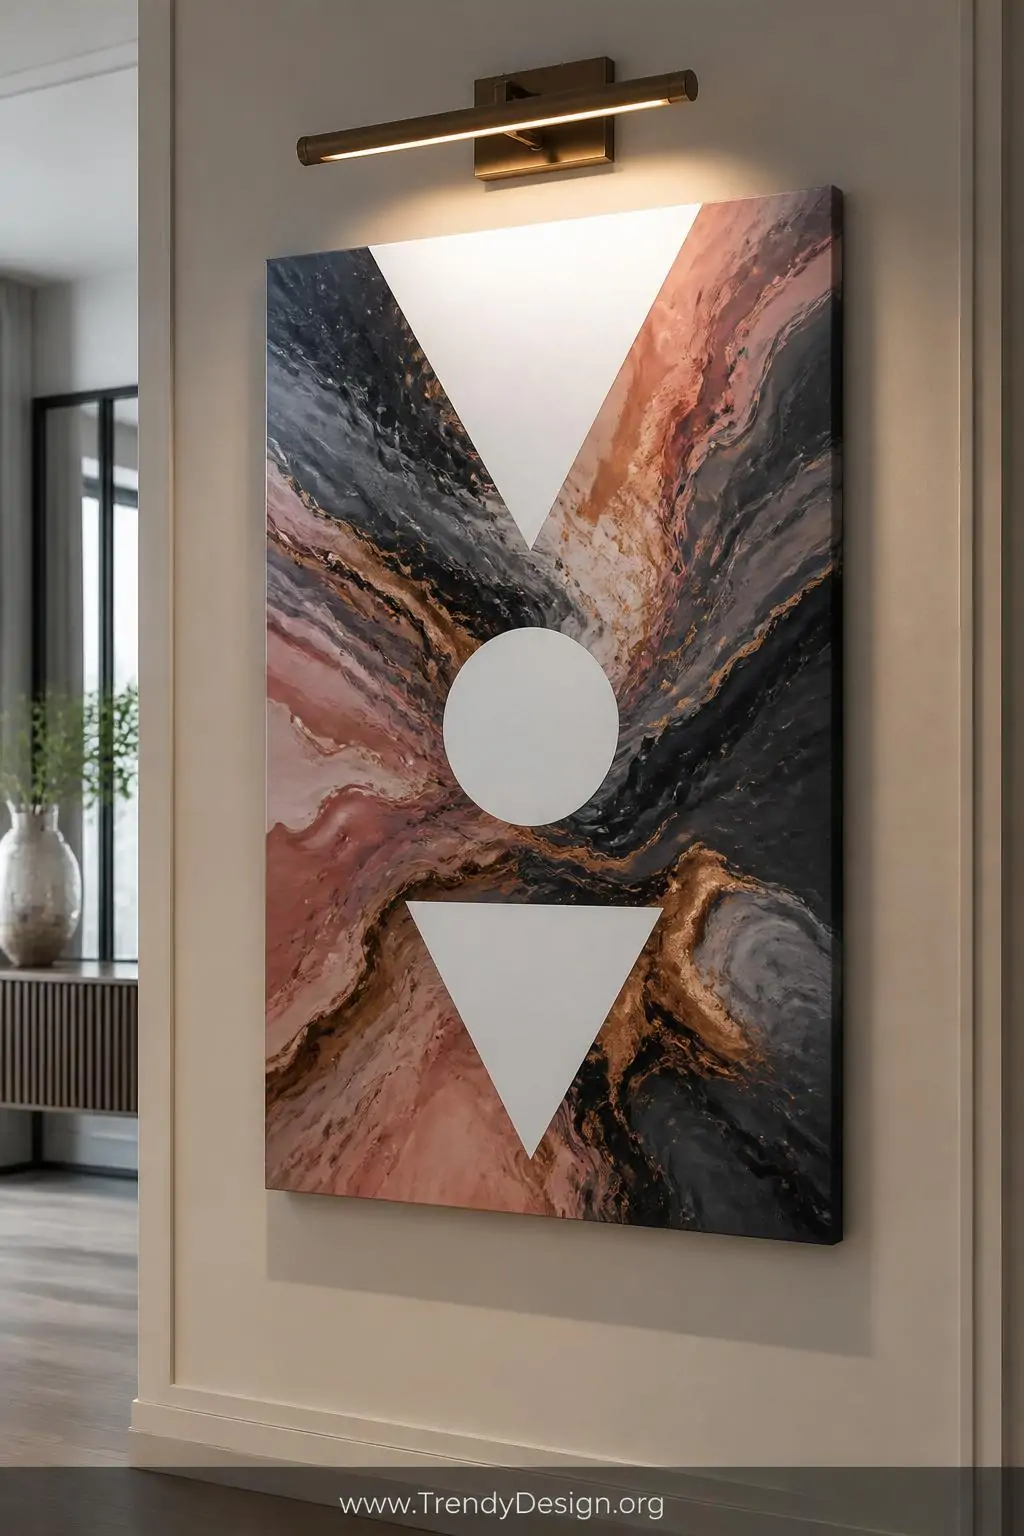
Here’s a fun little trick that takes your pour paintings to a whole new level — tape off sections of your canvas before you start pouring. When you peel the tape away after the paint dries, you’re left with crisp, clean negative space shapes like geometric forms, letters, or silhouettes.
Combining the organic fluidity of pour painting with clean geometric lines creates a really modern, gallery-worthy contrast that interior designers absolutely love. Try taping off a simple triangle or circle in the center of your canvas for a stunning minimalist effect.
9. Resin-Topped Pour Painting for a Glass Finish
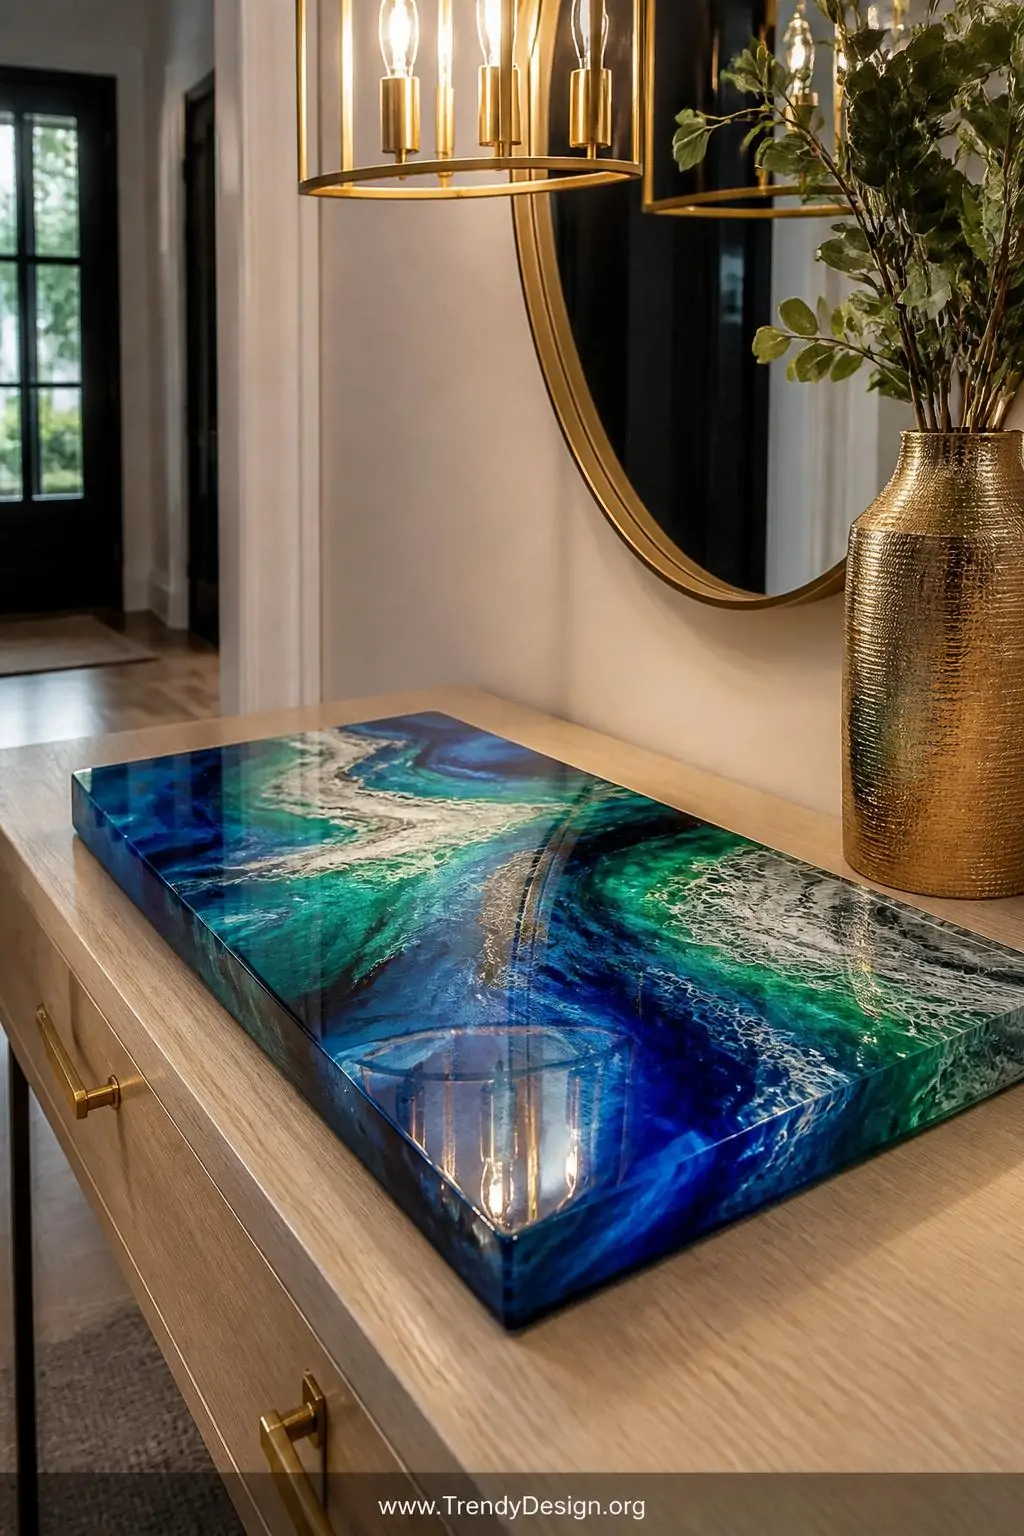
Want to take your pour paintings from beautiful to absolutely professional-looking? Pour a thin layer of clear epoxy resin over your finished, dried painting and watch it transform into something that looks like it belongs in a luxury hotel lobby. The resin creates a glassy, high-gloss finish that makes the colors pop like nothing else.
FYI, working with resin requires proper ventilation and gloves, so do your homework before diving in. But once you see that mirror-like finish sitting on top of your acrylic pour painting, you’ll understand completely why people get obsessed with this finishing technique and never go back.
- Use a self-leveling epoxy for the smoothest results
- Make sure your painting is completely dry before applying resin
- Torch any bubbles that appear within the first 20 minutes
There you have it — nine incredible acrylic pour painting ideas that range from beginner-friendly to seriously impressive. The best part about this art form is that there are truly no mistakes, only unexpected design choices. Pick up some cheap canvases, grab a pouring medium, choose your favorite colors, and just go for it. Your walls have been bare long enough, and honestly, your home deserves a little handmade magic.
Leave a Reply