Planning a wedding is equal parts thrilling and overwhelming, but one thing you absolutely get to have fun with is your save the dates. And honestly, nothing beats the feeling of handing someone a gorgeous, handcrafted card knowing you made it yourself. If you own a Cricut machine, you are sitting on a goldmine of creative possibilities let’s dig in together.
These DIY save the dates with Cricut ideas are perfect whether you’re planning an intimate backyard celebration or a full-blown ballroom affair. From foil finishes to custom vinyl designs, your Cricut can do things that will genuinely make your guests stop scrolling and actually read their mail. Yes, physical mail. We’re bringing it back.
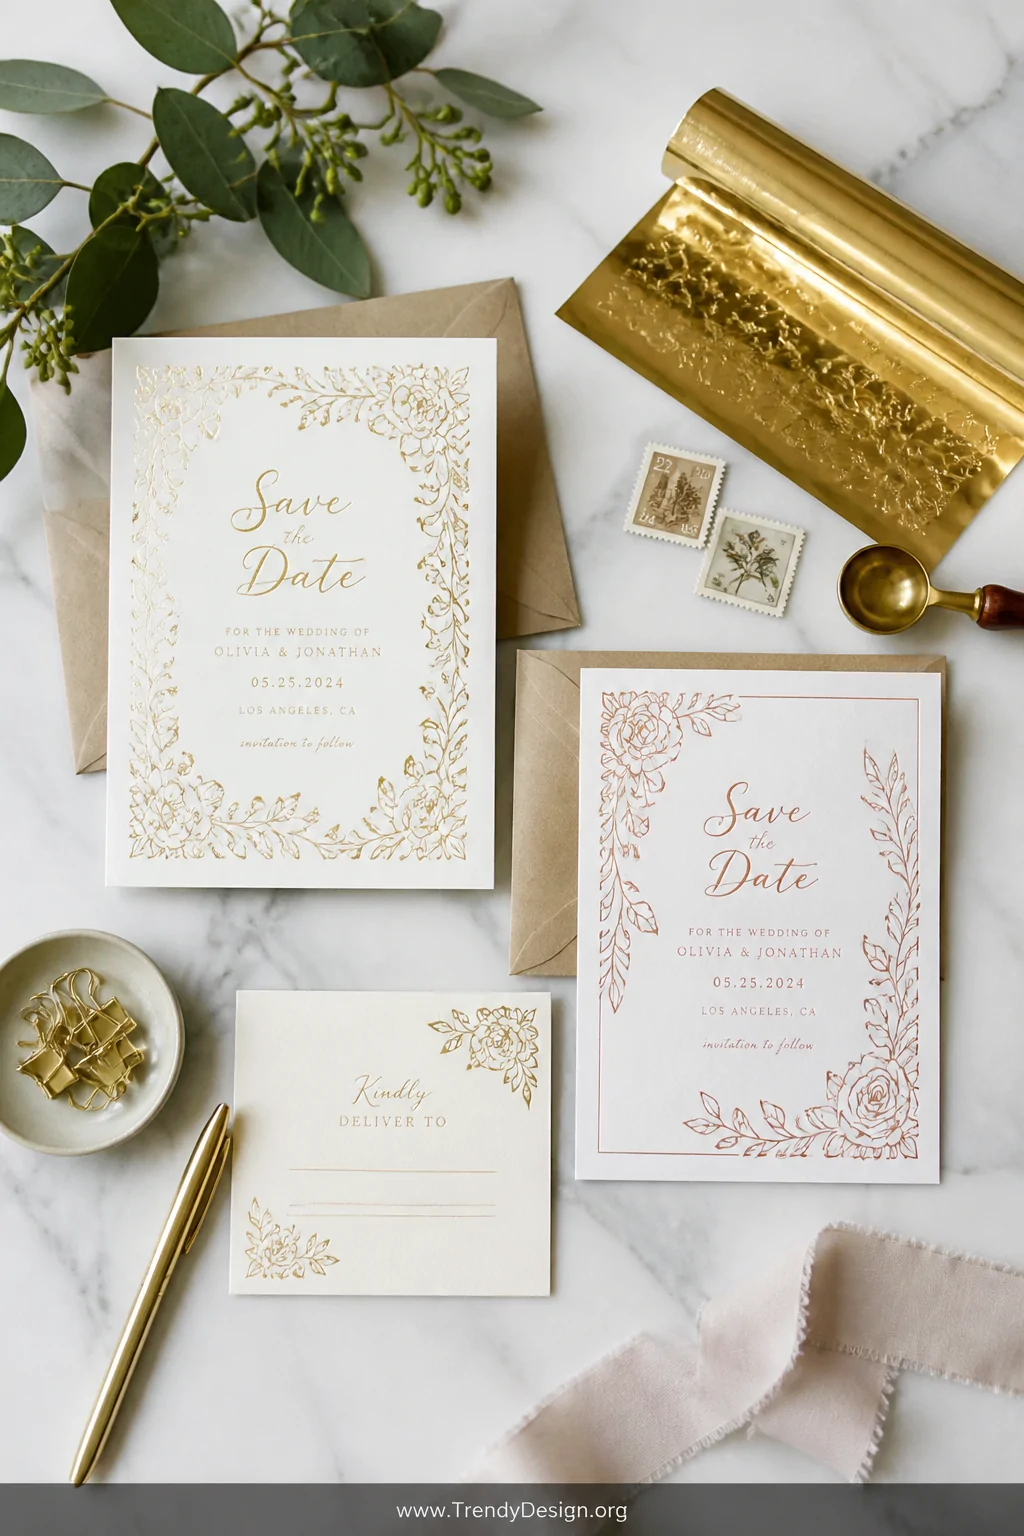
1. Classic Foil Press Cards That Look Straight Off a Designer’s Desk
As an Amazon Associate I earn from qualifying purchases.
If you have a Cricut Maker 3 or a Cricut Joy Xtra with the Foil Transfer tool, congratulations you’re about to feel like a professional stationery designer. The foil press technique creates shimmery, reflective text and borders that genuinely look like something you’d pay $6 a card for at a boutique shop.
Choose a simple cardstock base in white, ivory, or a dusty sage green, and let the foil do all the talking. Gold and rose gold foils are trending right now, and they photograph beautifully for those inevitable flat-lay Instagram shots your bridal party will take.
- Use Cricut’s own foil transfer sheets for best results
- Keep your font clean and readable script looks stunning in foil
- Add a foil border or botanical element to frame your text
- Pair with a kraft paper envelope for that luxe-meets-rustic vibe
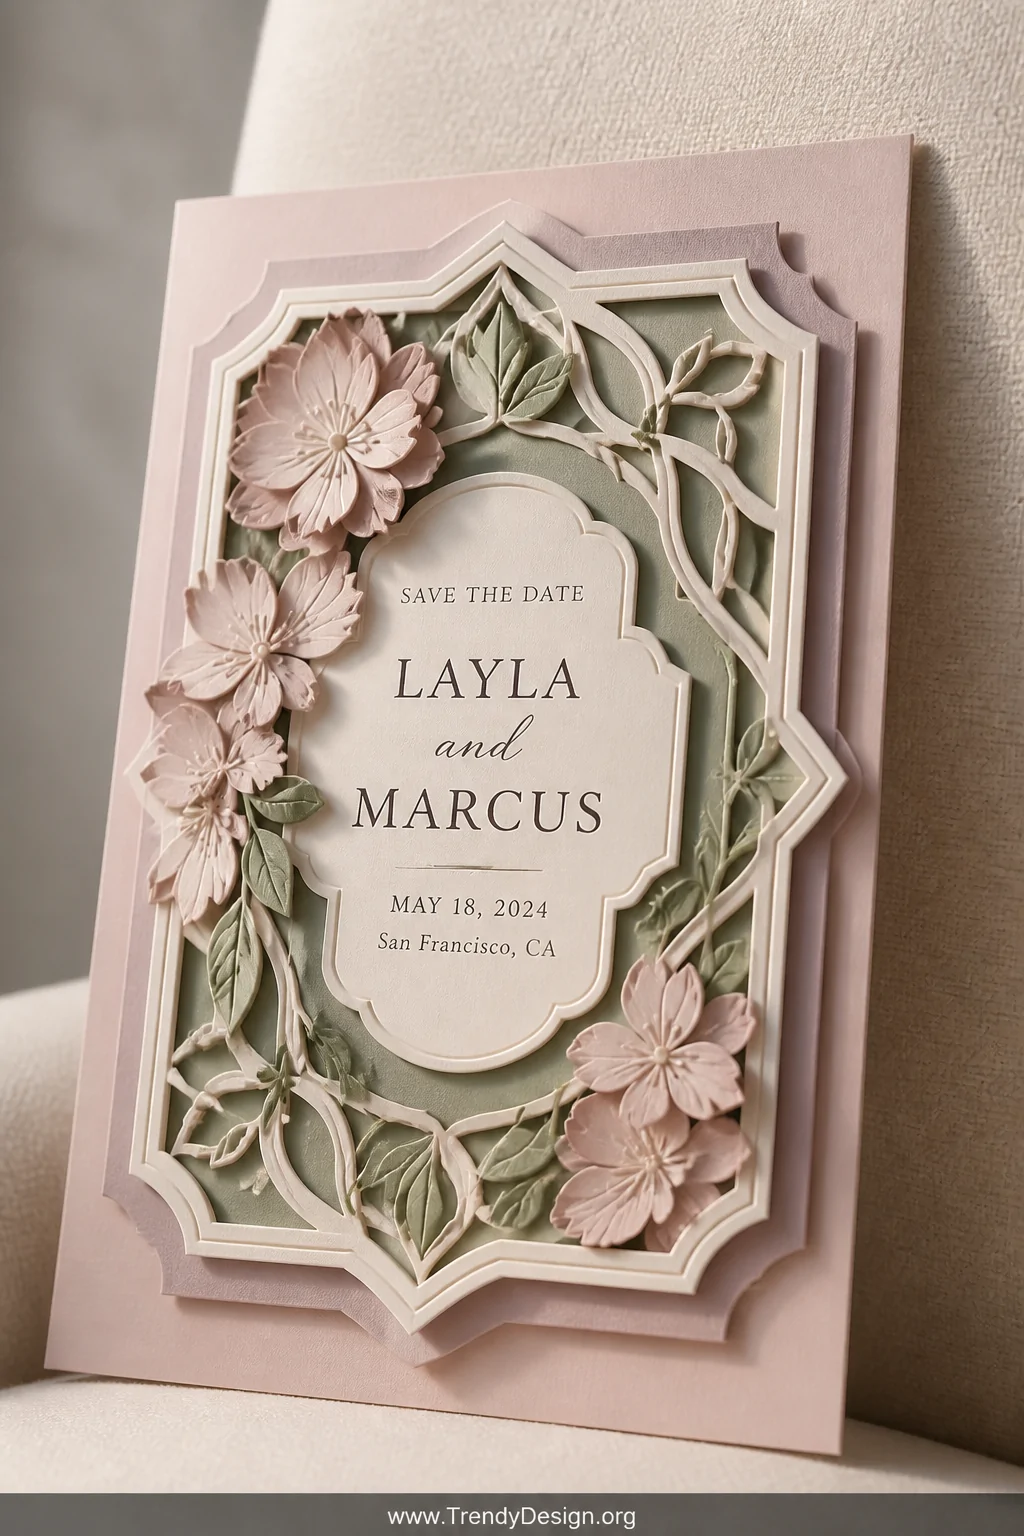
2. Layered Cardstock Designs With Gorgeous Dimensional Texture
As an Amazon Associate I earn from qualifying purchases.
One of the most satisfying things you can create with your Cricut is a layered cardstock save the date that adds genuine depth and texture. Cut three or four layers of coordinating colored cardstock, stack them with foam adhesive squares, and watch a flat card transform into something that looks almost sculptural.
Florals, geometric shapes, and even little illustrated cityscapes work beautifully for this technique. Pick colors that match your wedding palette and you’ve got an instant keepsake that guests will stick on their fridge rather than toss in a drawer.
Tips for Perfect Layering
- Cut your layers from slightly different sizes so each one peeks through
- Use Cricut’s Design Space to align your cuts precisely every single time
- Foam mounting squares add the best dimension without bulk
- Matte cardstock layers look more intentional than mixing finishes
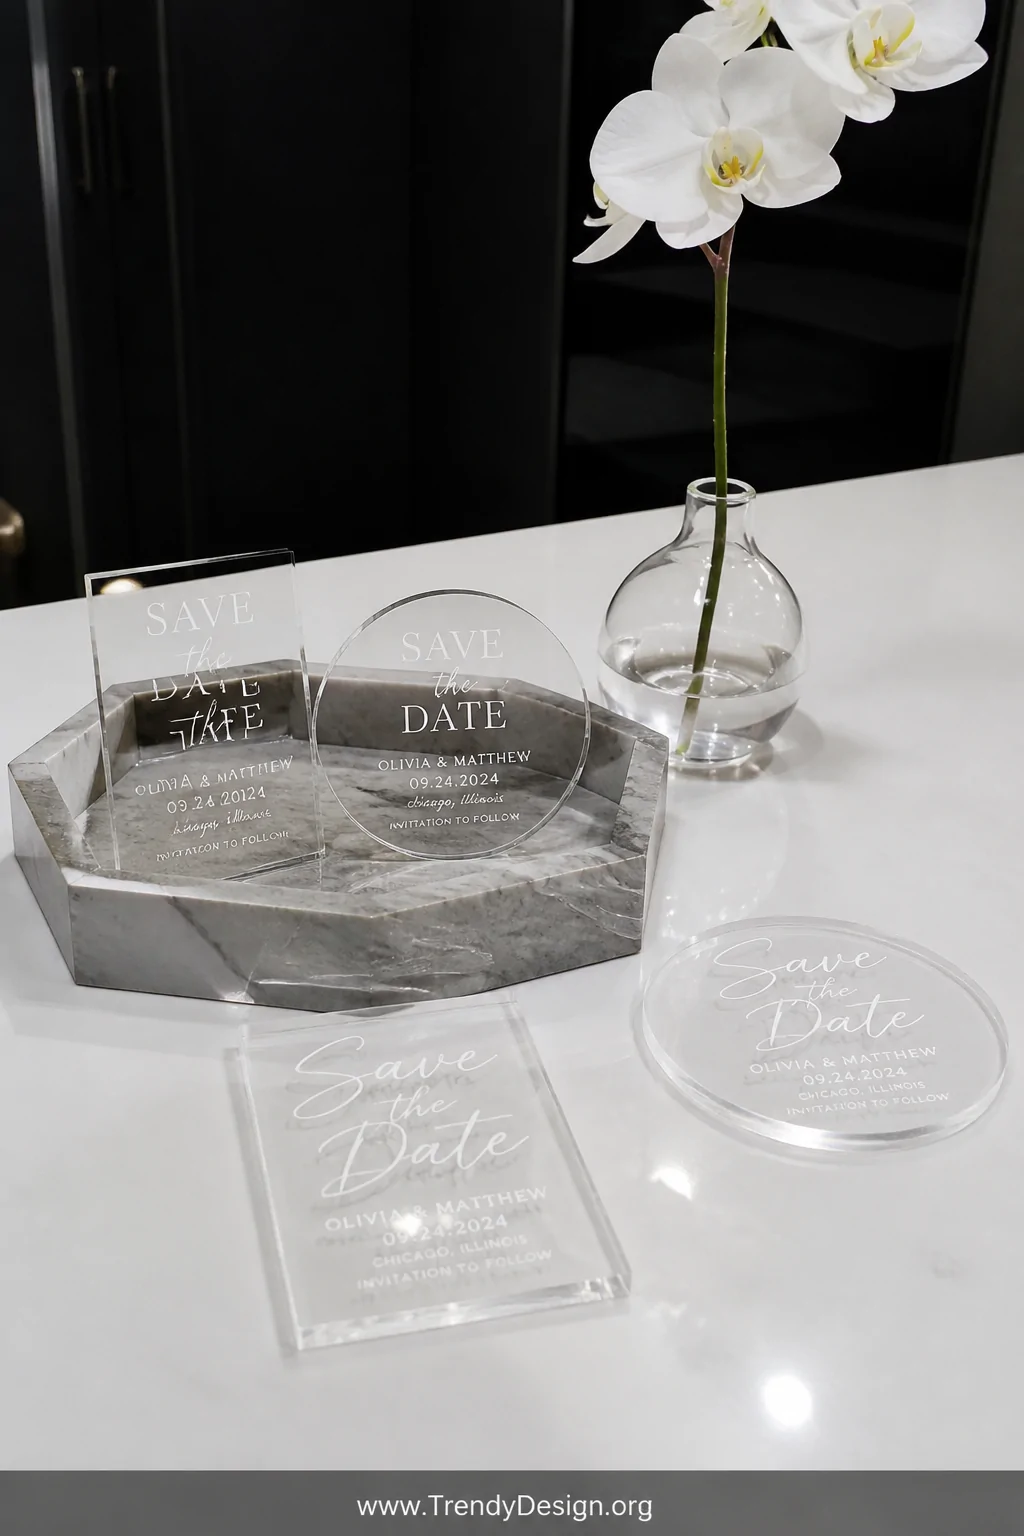
3. Vinyl Decal Cards on Acrylic for That Modern Minimalist Look
As an Amazon Associate I earn from qualifying purchases.
If your wedding aesthetic leans modern, minimalist, or a little bit trendy, acrylic save the dates with vinyl lettering are your new best friend. Small acrylic rectangles or circles paired with Cricut-cut vinyl text create a card that feels genuinely luxurious and unique.
FYI, acrylic cards are surprisingly affordable when you buy them in bulk online. You can cut custom vinyl in any color or even use white vinyl for that frosted glass effect. The finished product looks like something from a high-end wedding blog, and your guests will be absolutely puzzled that you made them yourself.
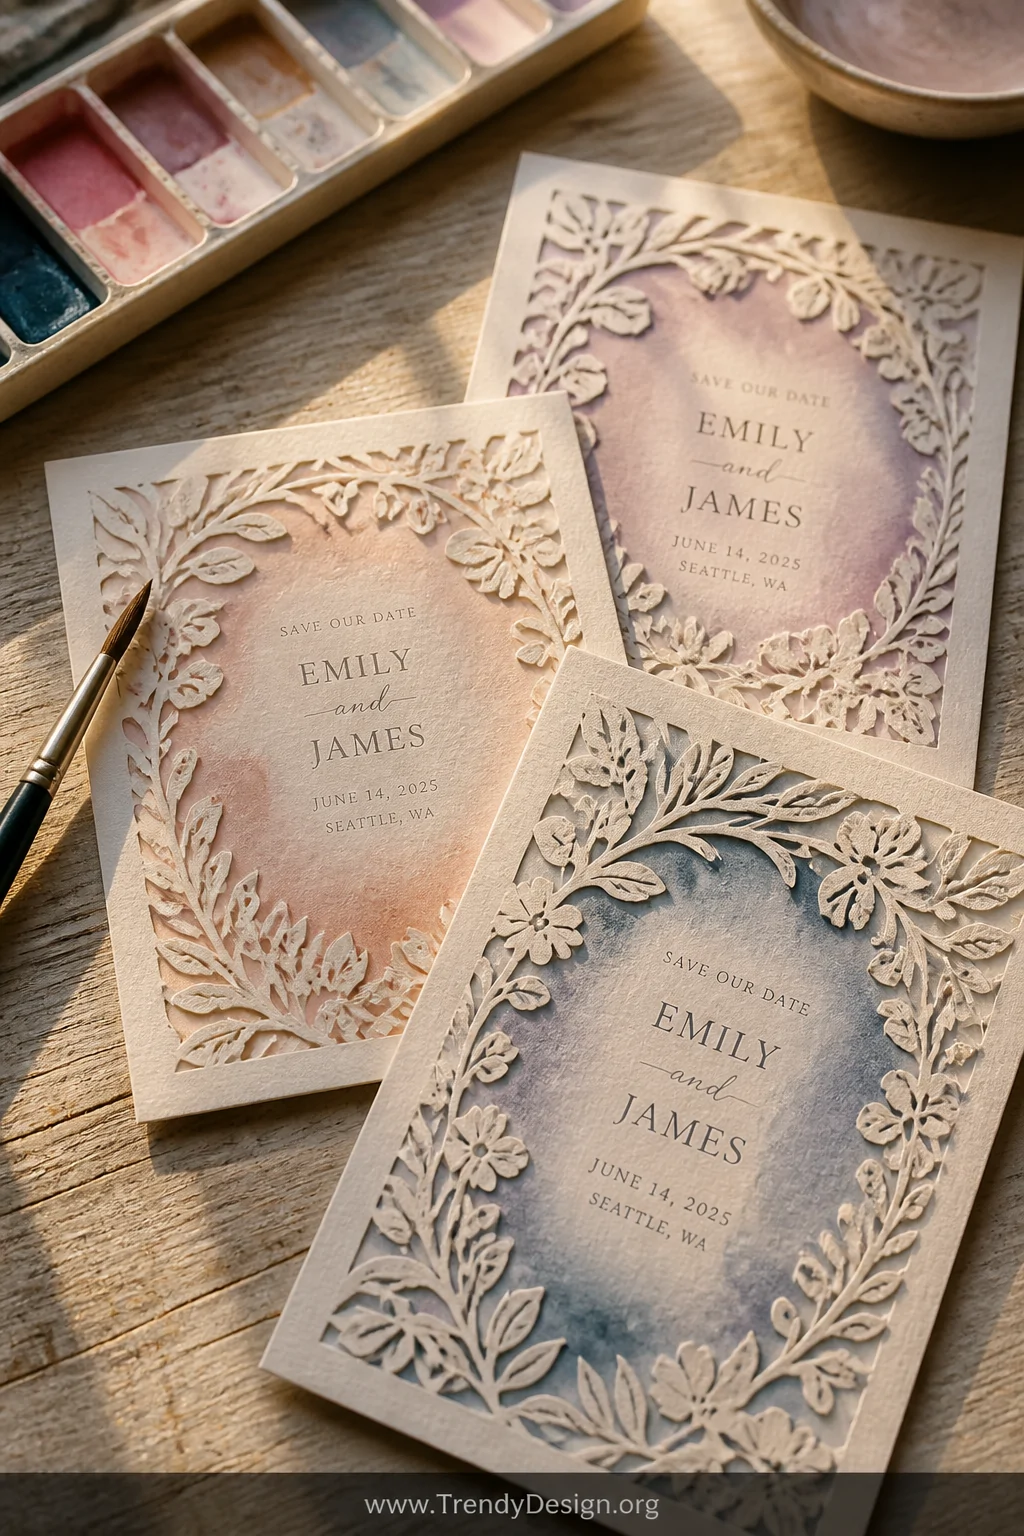
4. Watercolor-Washed Cards With Cricut-Cut Overlays
As an Amazon Associate I earn from qualifying purchases.
Here’s a technique that combines two crafty loves into one gorgeous project. Start by watercolor washing your cardstock in soft, dreamy hues think blush, lavender, or dusty blue and let it dry completely. Then use your Cricut to cut a delicate lace-like overlay or botanical frame and layer it right on top.
The contrast between the soft painted background and the precise, crisp Cricut-cut design is genuinely stunning. This look photographs especially well, and it gives your save the dates that artistic, one-of-a-kind energy that store-bought cards simply cannot replicate.
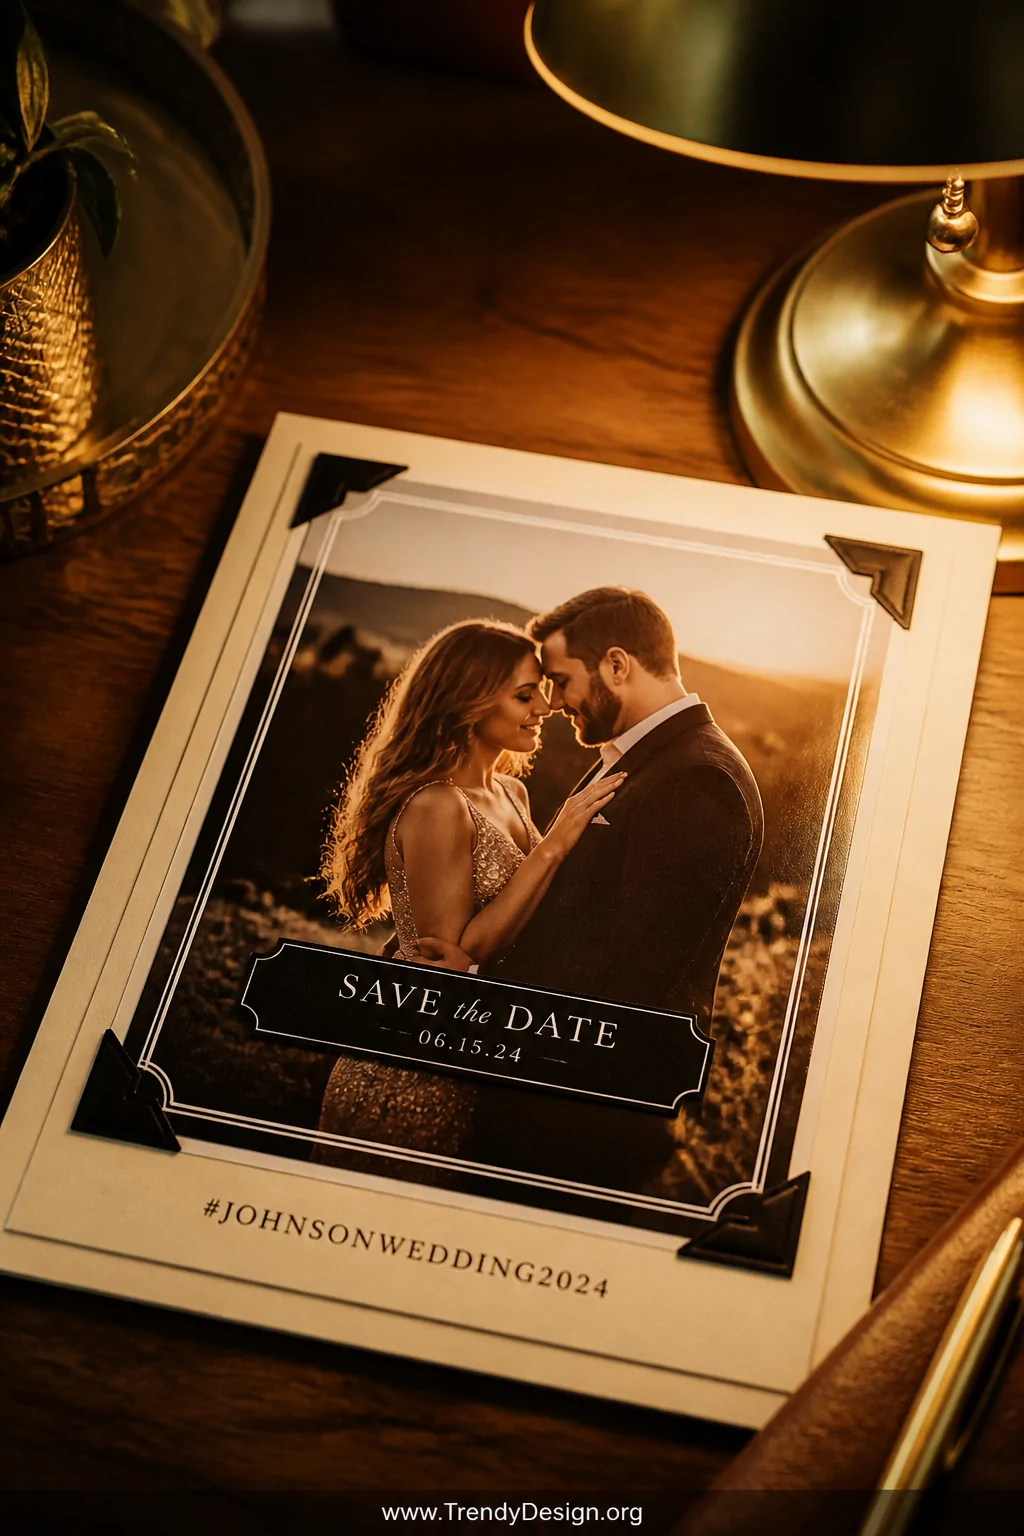
5. Photo Save the Dates With Custom Vinyl Framing
As an Amazon Associate I earn from qualifying purchases.
Everyone loves a good engagement photo, so why not make it the star of your save the date? Print your favorite engagement shot at home or at a print shop, then use your Cricut to cut a custom vinyl frame, corner accents, or decorative border to overlay directly onto the photo card.
You can also cut a separate cardstock mat with your wedding date and names, then attach the photo on top for a layered, framed look. IMO, this is one of the most personal and sentimental versions of DIY save the dates with Cricut because it truly tells your story from the very first envelope opening.
- Use Cricut’s Print Then Cut feature for seamless photo integration
- Black or white vinyl framing accents look sharp on any photo
- Add your wedding hashtag in small vinyl text along the bottom
- Keep the overall card size mailing-friendly to avoid extra postage fees
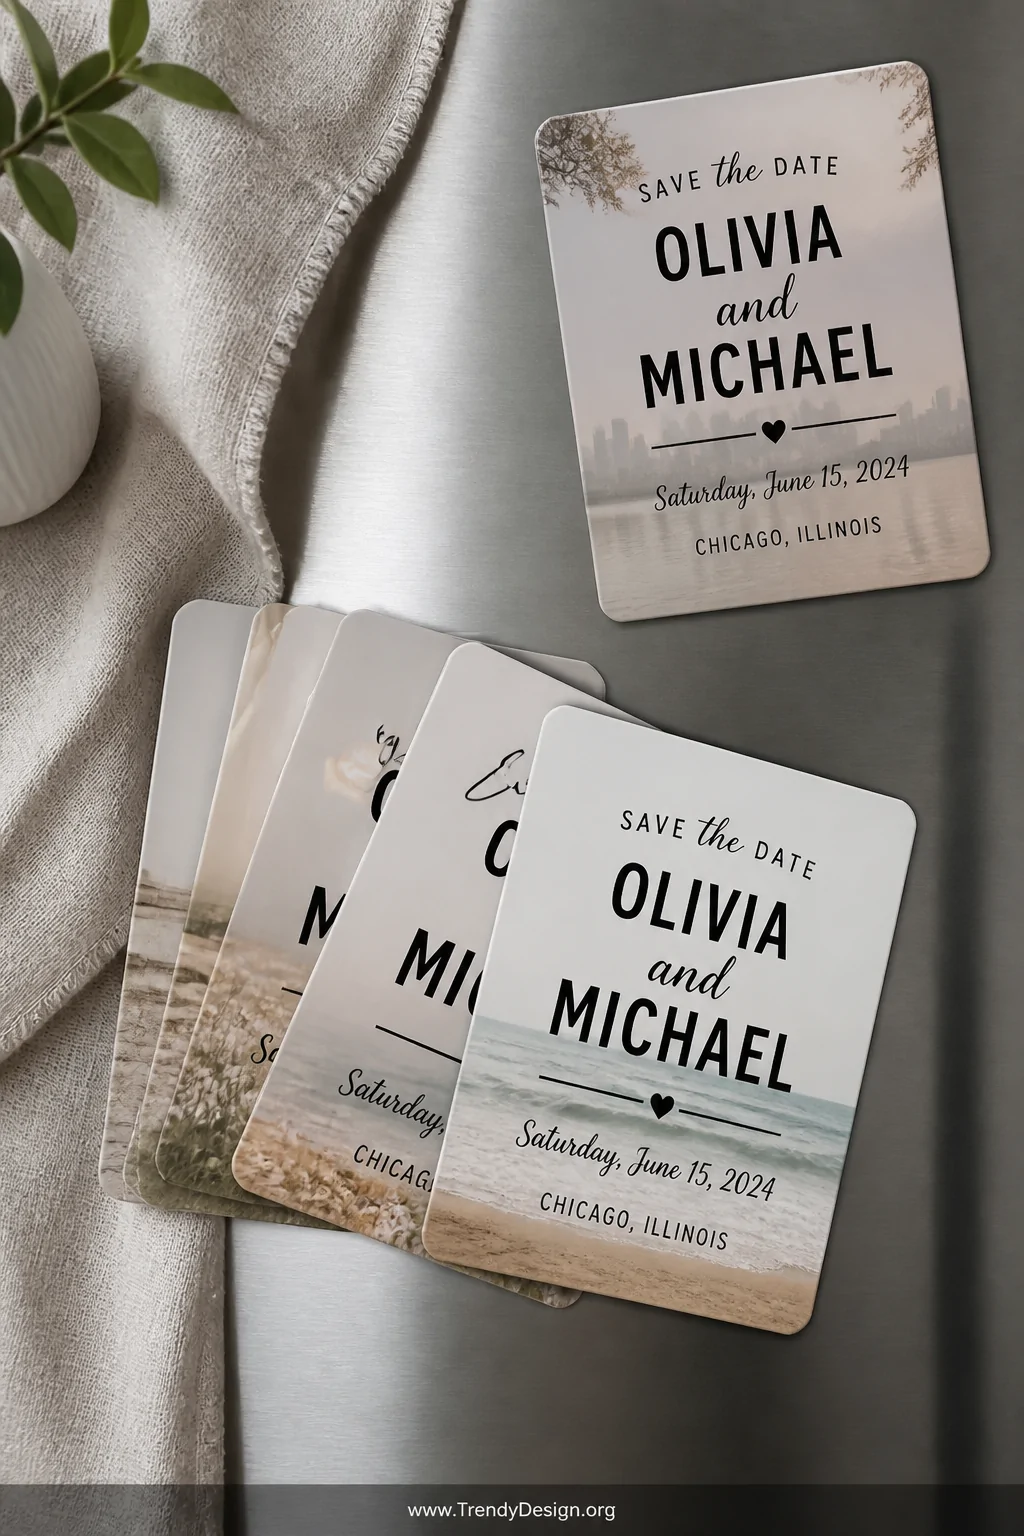
6. Magnetic Save the Dates With Custom Vinyl Text
As an Amazon Associate I earn from qualifying purchases.
Here’s a practical and wildly popular option that guests genuinely appreciate magnetic save the dates. Use printable magnet sheets that run right through your home printer, then overlay Cricut-cut vinyl text, decorative elements, or even a foil accent for a polished finish.
Magnets stay on the fridge for months, which means your wedding date stays top of mind without any effort from your guests. They’re also incredibly durable during mailing, so you don’t have to stress about bent corners or creased corners arriving at Aunt Martha’s door.
What to Include on Your Magnetic Card
- Your names and wedding date in a bold, readable font
- City or venue name to give guests a geographic heads-up
- A simple “formal invitation to follow” line
- Your wedding website URL if you have one set up
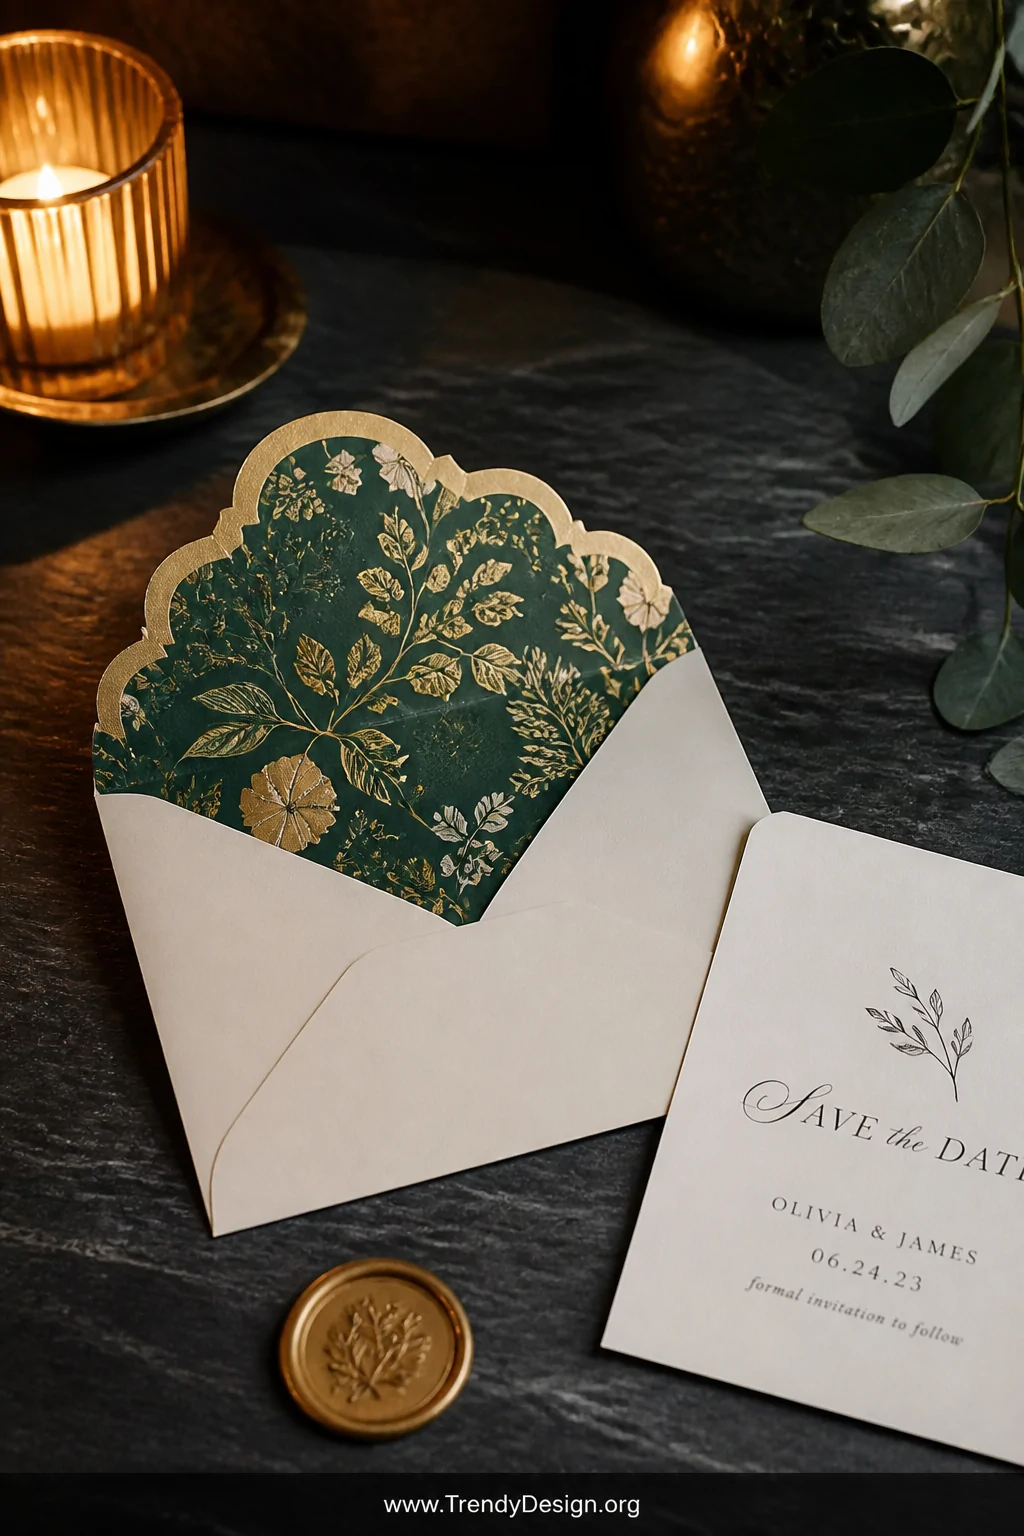
7. Envelope Liner Magic That Makes Opening the Mail Extra Special
As an Amazon Associate I earn from qualifying purchases.
Here’s a secret weapon that elevates even a simple save the date into a full experience custom Cricut-cut envelope liners. Use patterned paper, foil sheets, or even coordinating cardstock to line the inside of your mailing envelopes, and watch people’s faces light up the moment they slice that envelope open.
Your Cricut can cut envelope liner templates perfectly sized for A2 or A6 envelopes in seconds. Pair a simple card with a stunning liner and suddenly the entire package feels cohesive, intentional, and absolutely elevated. This small detail makes a massive impression without adding much time or cost to your project.
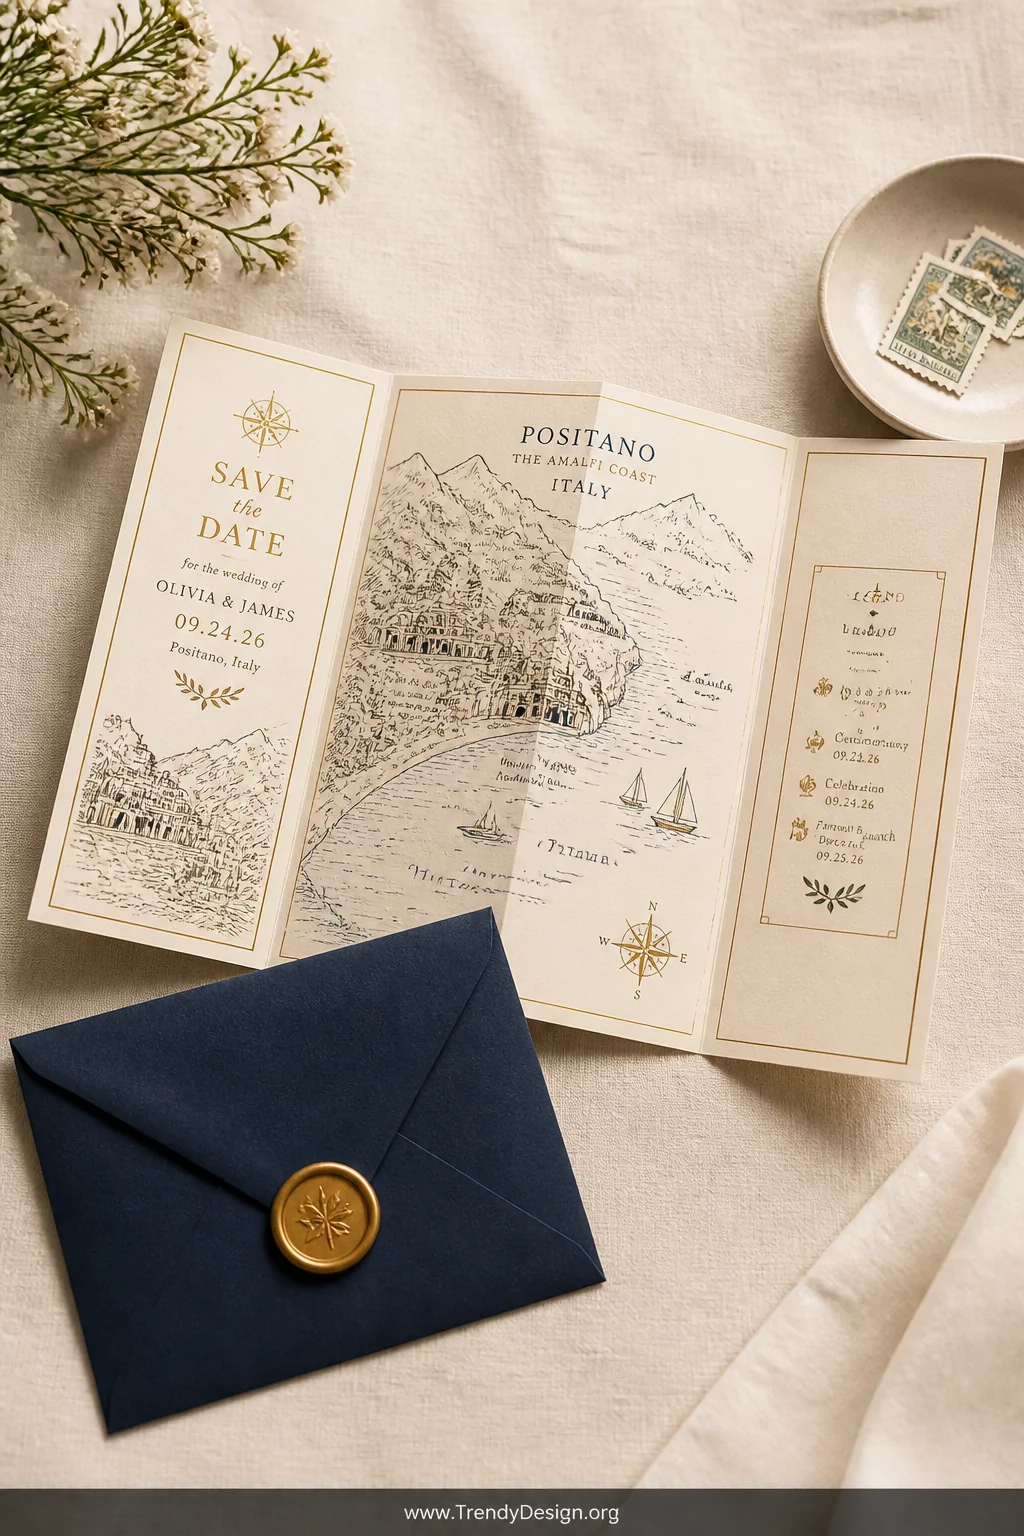
8. Destination Wedding Maps Cut and Scored for Fold-Out Fun
As an Amazon Associate I earn from qualifying purchases.
For the travel lovers and adventurous couples, a custom illustrated map save the date is pure magic. Use Cricut’s scoring wheel to create a beautifully folded card that opens up to reveal a hand-drawn-style map of your destination, your wedding venue location, or even a fun illustrated version of how you two met.
Design your map artwork in Cricut Design Space or import a graphic you’ve created elsewhere, then let your machine score the fold lines precisely and cut the outer shape cleanly. This format works especially well for destination weddings, elopements, or couples who love a good storytelling moment. Your guests will genuinely keep these forever.
- Score fold lines first before cutting the outer shape for clean results
- Include a small legend with key details like date, location, and website
- Use a heavier cardstock so the map feels substantial and premium
- A coordinating wax seal on the envelope makes the whole thing feel like a treasure
There you have it eight wonderful ways to create stunning DIY save the dates with Cricut that genuinely reflect your personality and set the tone for your entire wedding. Whether you go full glam with foil or keep it soft and romantic with watercolors, your Cricut machine is ready to help you make something truly memorable. Now go open that Design Space and start playing your guests are going to absolutely love what arrives in their mailbox.
Leave a Reply