So you just finished a gorgeous quilt. Hours of cutting, pinning, and sewing — and it’s absolutely beautiful. But here’s the thing: a quilt without a label is like a book without a title page. It tells no story, claims no maker, and leaves future generations completely in the dark. That’s where homemade quilt label ideas come in, and honestly, making your own label is way more fun than you’d think.
Whether you’re gifting this masterpiece or keeping it for yourself, a handmade label adds heart, history, and a little bit of you to every stitch. Let’s explore five creative ways to make a label that’s just as special as the quilt itself.
1. The Handwritten Fabric Marker Label

As an Amazon Associate I earn from qualifying purchases.
This is the simplest and most personal homemade quilt label idea you can try, and it requires almost nothing to get started. Grab a piece of muslin or a plain cotton fabric scrap, heat-set a fabric marker, and just… write. Your handwriting is uniquely yours, and that imperfection is exactly what makes it beautiful.
You can include the quilt’s name, the date it was made, who made it, and who it was made for. Future quilt detectives will thank you. FYI, fabric markers come in tons of colors now, so you’re not stuck with boring black if that’s not your vibe.
- Use a ruler to lightly pencil your lines before writing so things stay straight
- Iron the fabric before writing to remove wrinkles
- Heat-set the ink with an iron after writing to make it permanent
- Choose a fine-tip permanent fabric marker for the cleanest results
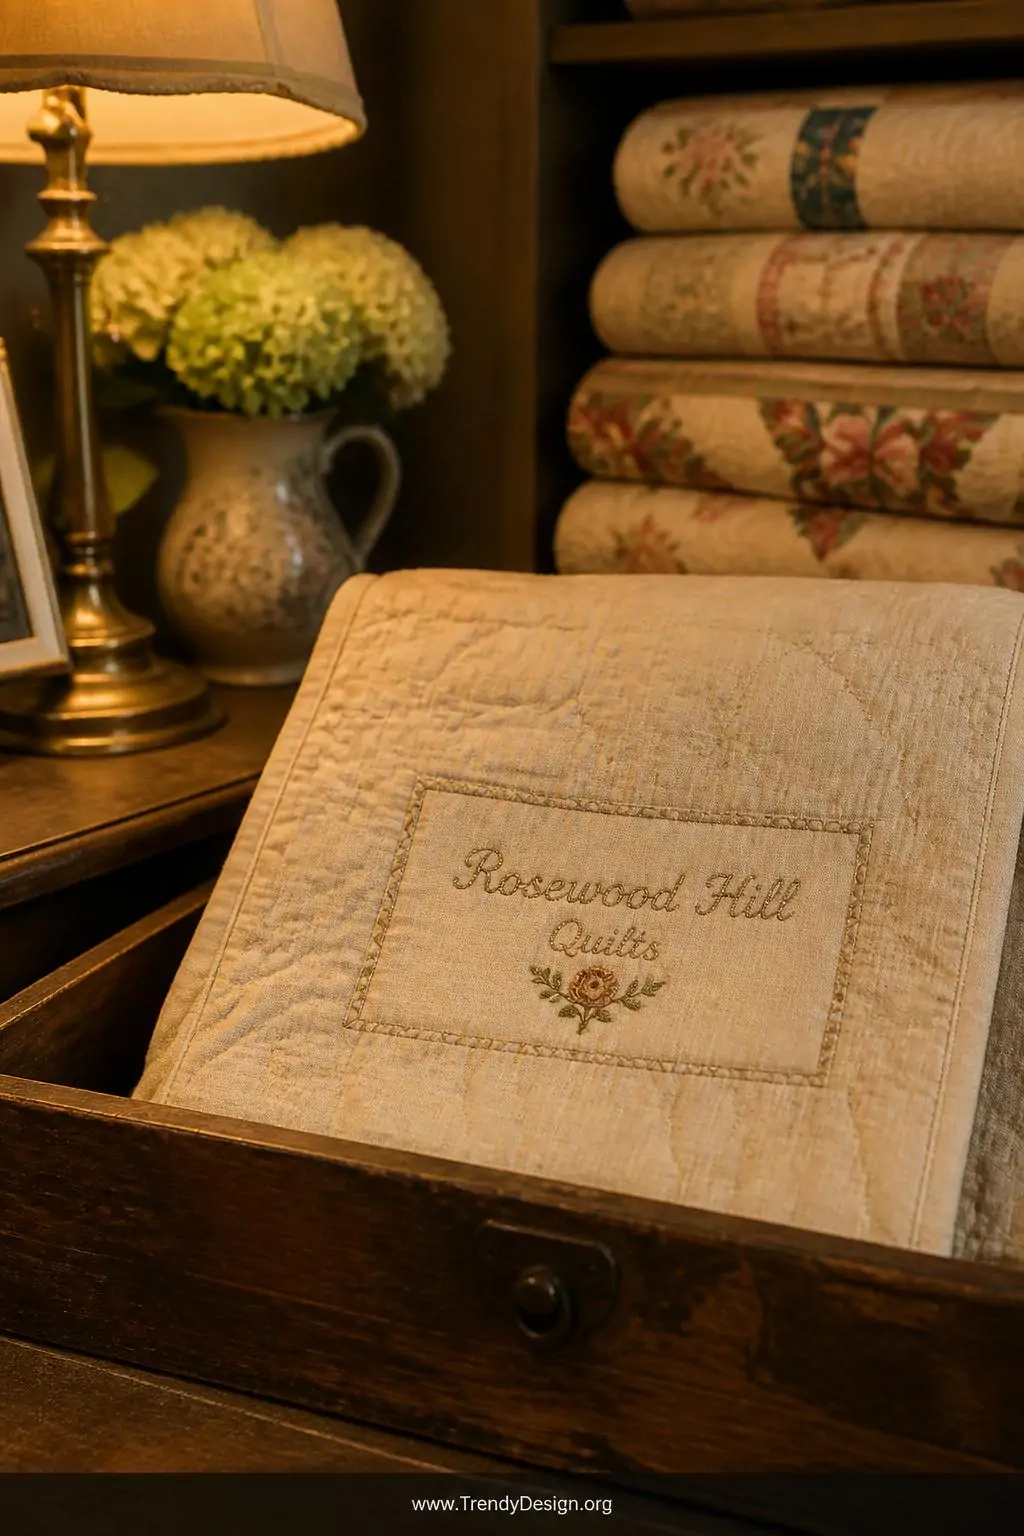
2. The Embroidered Cloth Label
As an Amazon Associate I earn from qualifying purchases.
If you want your homemade quilt label to feel truly heirloom-worthy, an embroidered cloth label is the way to go. There’s something incredibly touching about a label stitched by hand — it echoes the same love and effort that went into the quilt itself. Even basic embroidery stitches like backstitch or satin stitch look stunning on a small label.
You don’t need to be an embroidery expert here. A simple name, date, and maybe a tiny flower or heart is more than enough. IMO, keeping it simple actually makes it look more elegant anyway.
What to Stitch on Your Embroidered Label
- The quilt maker’s name and the year completed
- A short meaningful quote or phrase
- A small motif that matches the quilt’s theme
- The recipient’s name if it’s a gift
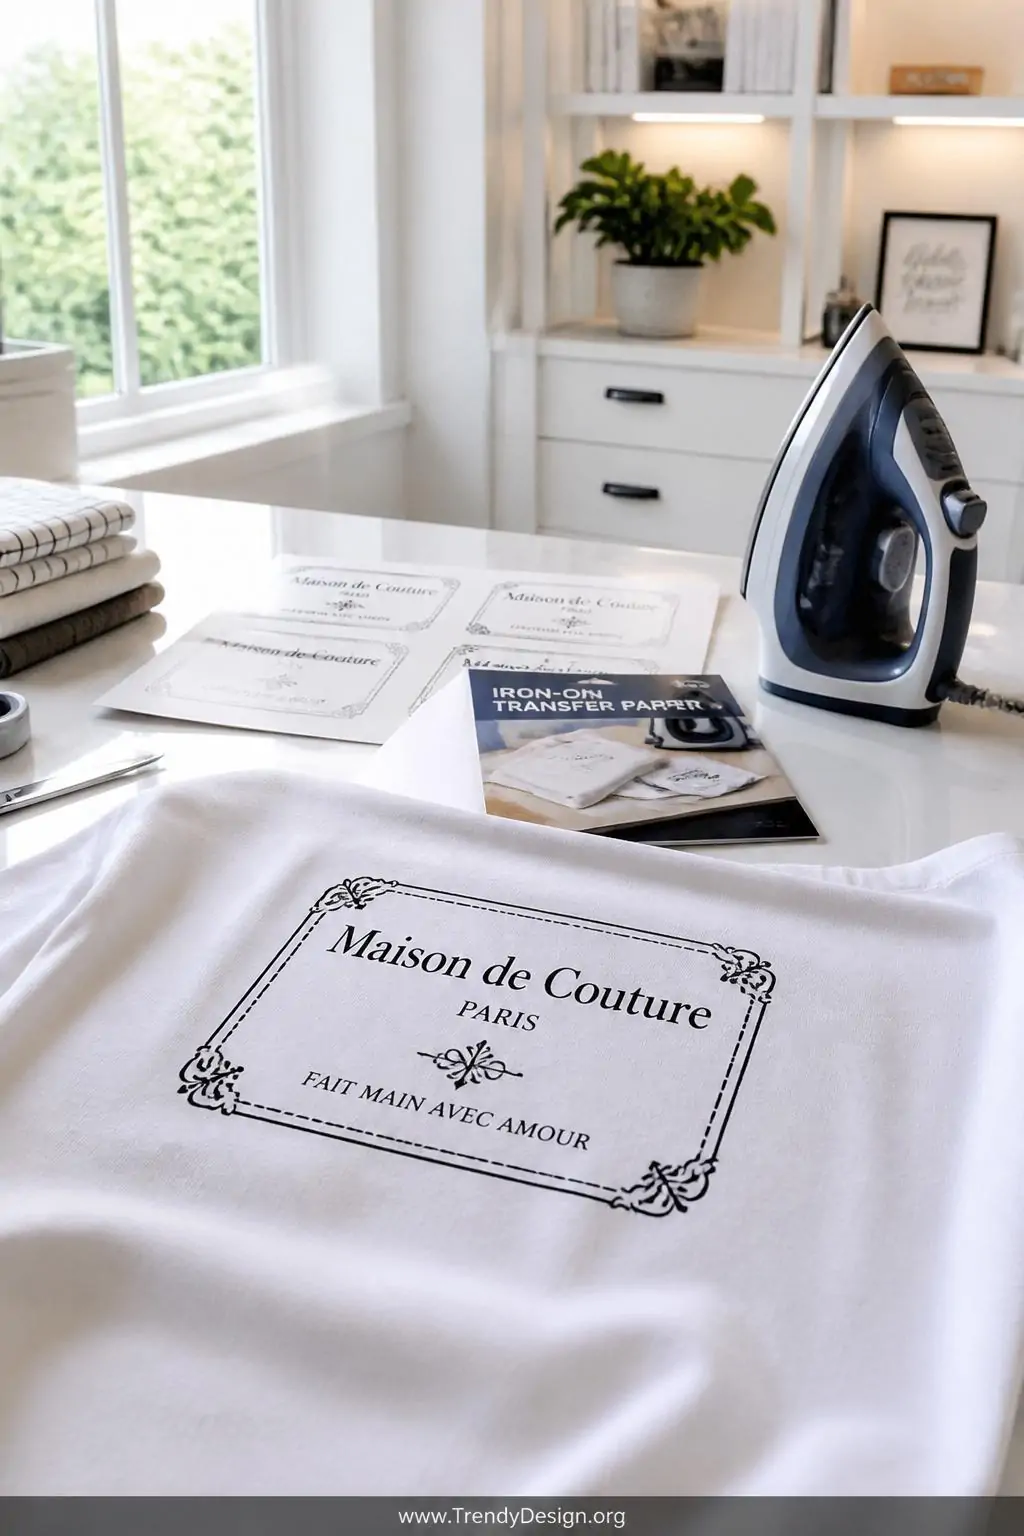
3. The Printed Iron-On Transfer Label
As an Amazon Associate I earn from qualifying purchases.
For those who love a polished, professional-looking finish without spending hours at a craft table, the printed iron-on transfer label is your new best friend. You design your label on your computer, print it onto iron-on transfer paper, and press it right onto fabric. Done. It’s fast, customizable, and looks genuinely impressive.
You can play with fonts, add borders, include a photo, or even use your own digital artwork. This method is perfect for quilters who make multiple quilts and want a consistent branded label each time. Just make sure you mirror your design before printing — ask me how I learned that lesson the hard way.
Once transferred, you can even add a few hand-stitched details around the edges to blend the printed label beautifully into the overall quilt aesthetic. It’s a lovely combo of digital and handmade.
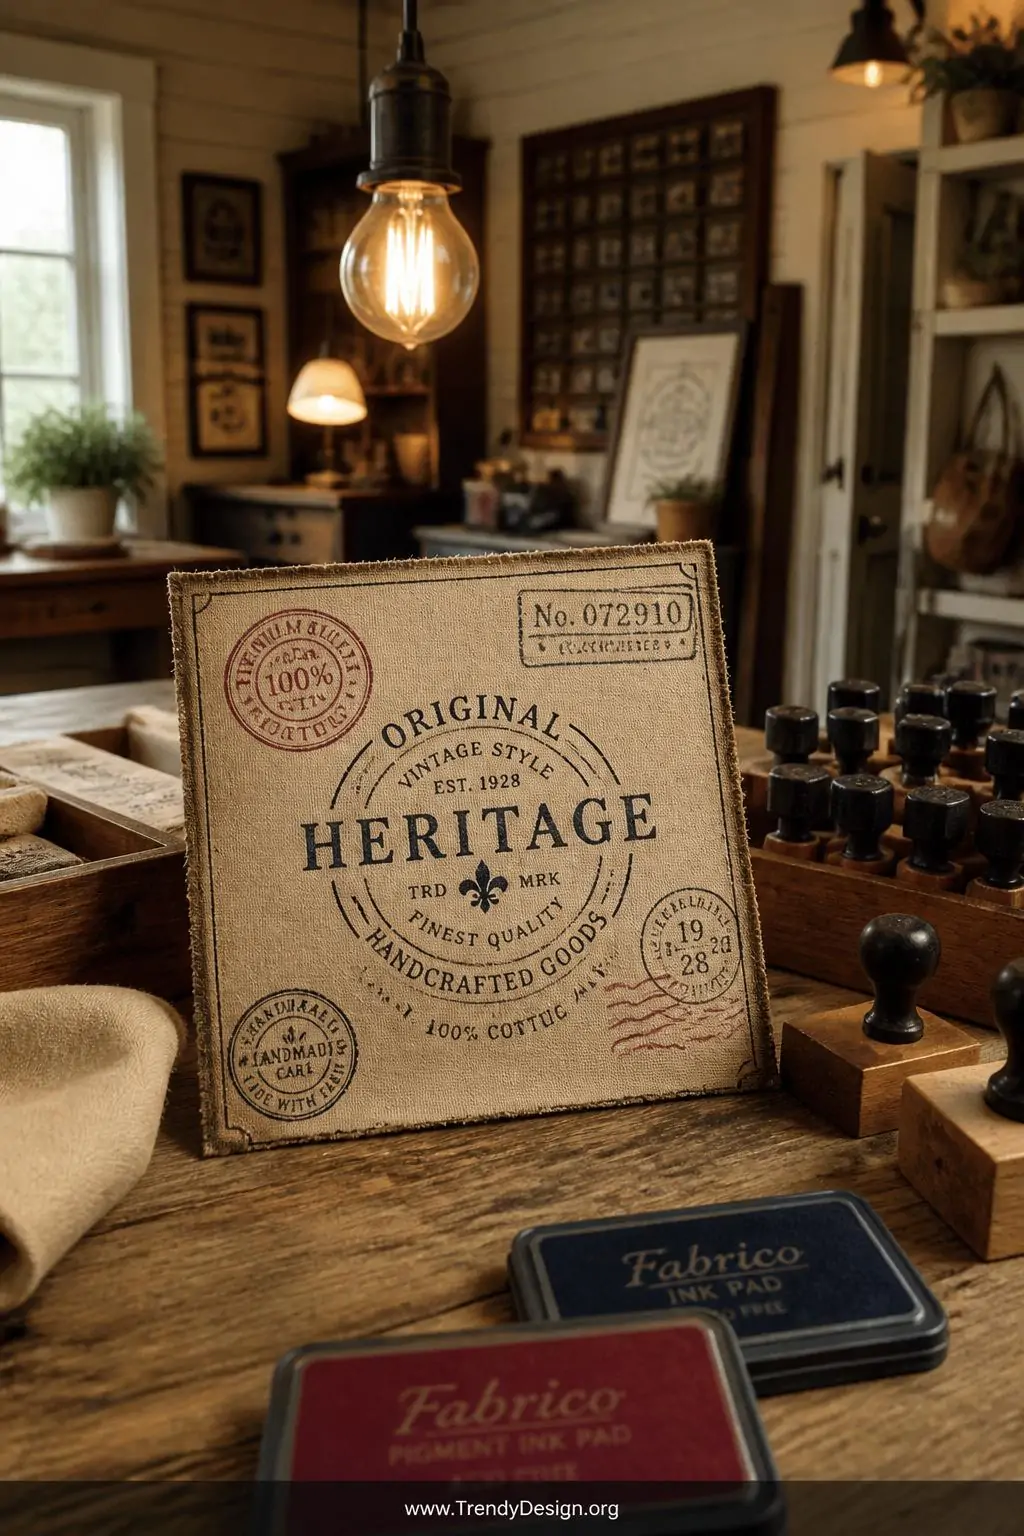
4. The Rubber Stamp and Ink Label
As an Amazon Associate I earn from qualifying purchases.
Here’s a homemade quilt label idea that feels like an absolute craft party — the rubber stamp and ink method. You simply stamp your design, name, or message onto a piece of fabric using fabric-safe ink pads, and you’ve got a charming, repeatable label in seconds. Rubber stamps come in every imaginable style, from vintage to modern to whimsical.
This technique works wonderfully if you give quilts regularly and want something quick but still handmade. You can combine multiple stamps to create a layered design, or keep it clean with just one bold stamp. Honestly, once you start stamping on fabric, it’s genuinely hard to stop.
- Always use fabric-specific ink pads, not regular craft ink
- Heat-set the stamped design with an iron once dry
- Try stamping on tea-dyed muslin for a beautiful vintage effect
- Leave space to handwrite additional details around your stamped image
5. The Fabric Photo Transfer Label

As an Amazon Associate I earn from qualifying purchases.
Want to completely blow someone’s mind with your quilt label? Try a fabric photo transfer label. Using photo transfer paper or a gel medium technique, you can print an actual photograph directly onto fabric and sew it right onto the back of your quilt. Imagine a baby quilt with the recipient’s newborn photo on the label — absolutely priceless.
This method creates an incredibly sentimental keepsake that goes far beyond just identifying who made the quilt. It tells a whole story in one small square of fabric. Future generations will treasure this kind of label in ways that a simple handwritten note never could.
The Bottom Line
Your quilt deserves to be claimed, celebrated, and remembered — and these homemade quilt label ideas make that incredibly easy and fun. Whether you grab a fabric marker for a five-minute label or spend an evening embroidering something beautiful, every quilt label you add becomes part of the story.
Pick the method that fits your personality and your skill level, and just go for it. The best quilt label is the one that actually gets made — so start simple, have fun, and let your creativity do the talking.
Leave a Reply