There’s something incredibly satisfying about grabbing an old t-shirt, a pair of scissors, and going absolutely wild with it. DIY punk rock t-shirt cutting is one of those rare creative outlets that costs almost nothing but delivers maximum style impact. Whether you’re prepping for a concert, a themed party, or just want to shake up your everyday wardrobe, these ideas are about to become your new obsession.
You don’t need to be a fashion designer or even particularly crafty to pull these off. Honestly, the messier and more imperfect the cuts look, the more authentically punk rock the result feels. Grab your scissors, dig out those forgotten tees from the back of your closet, and let’s get into it.
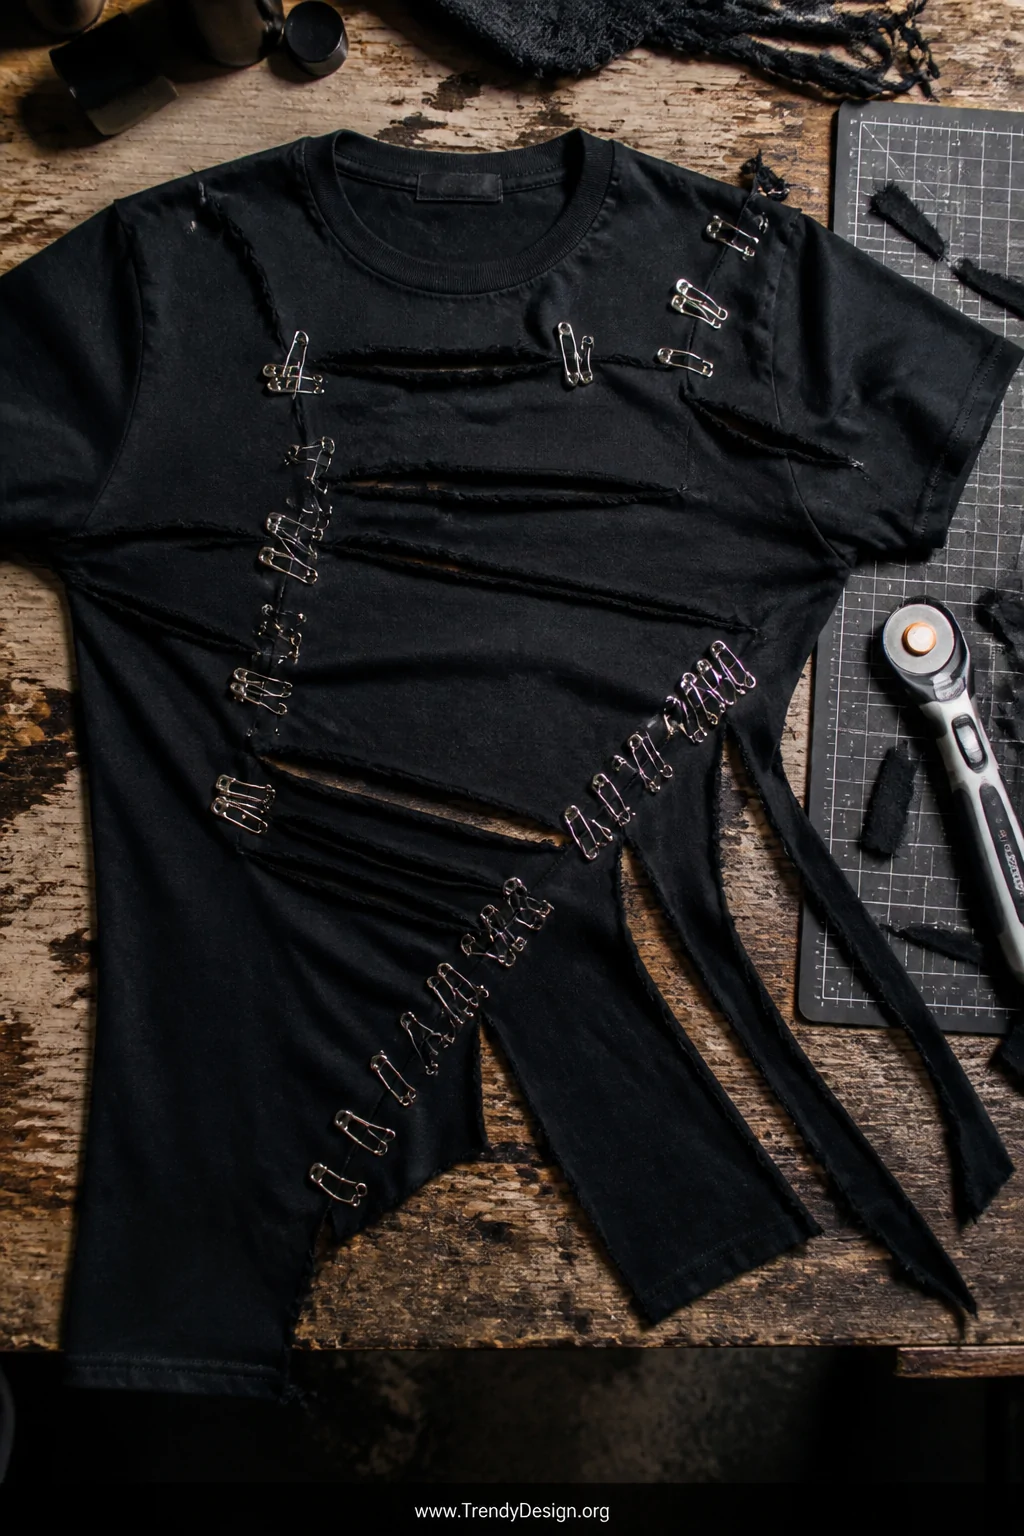
1. The Classic Slash-and-Safety-Pin Reconstruction
As an Amazon Associate I earn from qualifying purchases.
This is the original punk rock move that started it all back in the 1970s, and it still hits just as hard today. You strategically slash horizontal or diagonal cuts across the shirt, then pull the fabric edges apart and reconnect them with chunky silver safety pins. The result looks like your shirt lived a very interesting life, and that’s exactly the point.
Start by laying your shirt flat and using chalk to lightly mark where you want your cuts. You can go symmetrical or totally chaotic both work beautifully for this aesthetic. Layer multiple safety pins close together for extra drama, or spread them out for a more minimalist punk vibe.
- Use a rotary cutter for cleaner lines if scissors feel too wobbly
- Mix large and small safety pins for visual texture
- Thread beads or charms onto the pins before closing them for extra personality
- Work over a cutting mat to protect your table surface
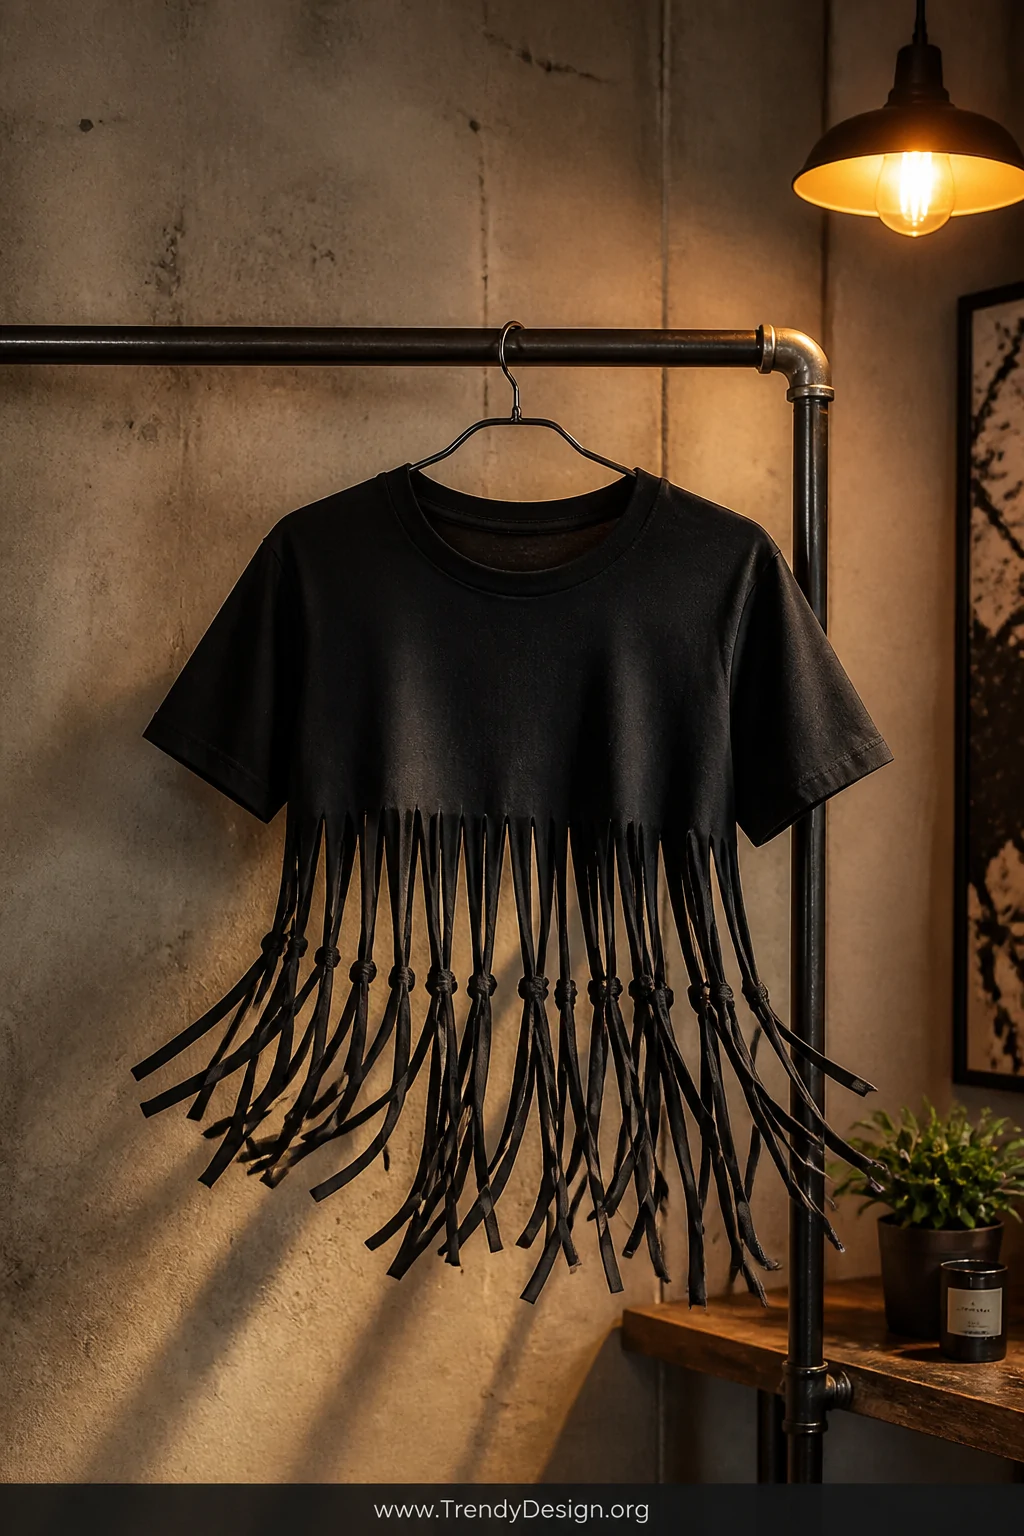
2. The Raw-Edge Crop and Fringe Combo
As an Amazon Associate I earn from qualifying purchases.
Cropping a t-shirt is classic, but adding fringe takes your DIY punk rock t-shirt cutting game to a completely different level. Cut the hem off your shirt first to establish your crop length, then cut upward vertical strips about half an inch wide along the bottom edge. The raw, unfinished look is absolutely intentional and gloriously punk.
FYI, jersey cotton fabric naturally curls when cut, which makes the fringe look even more textured and wild over time. The more you wear and wash it, the cooler it gets. Don’t overthink the spacing between your fringe cuts slight variations make it look handmade and authentic rather than factory-produced.
Pro Tips for Perfect Fringe
- Cut fringe strips between half an inch and one inch wide
- Make them at least three inches long so they move when you walk
- Tie alternating strips together for a knotted fringe variation
- Stretch each strip gently after cutting to encourage the curl
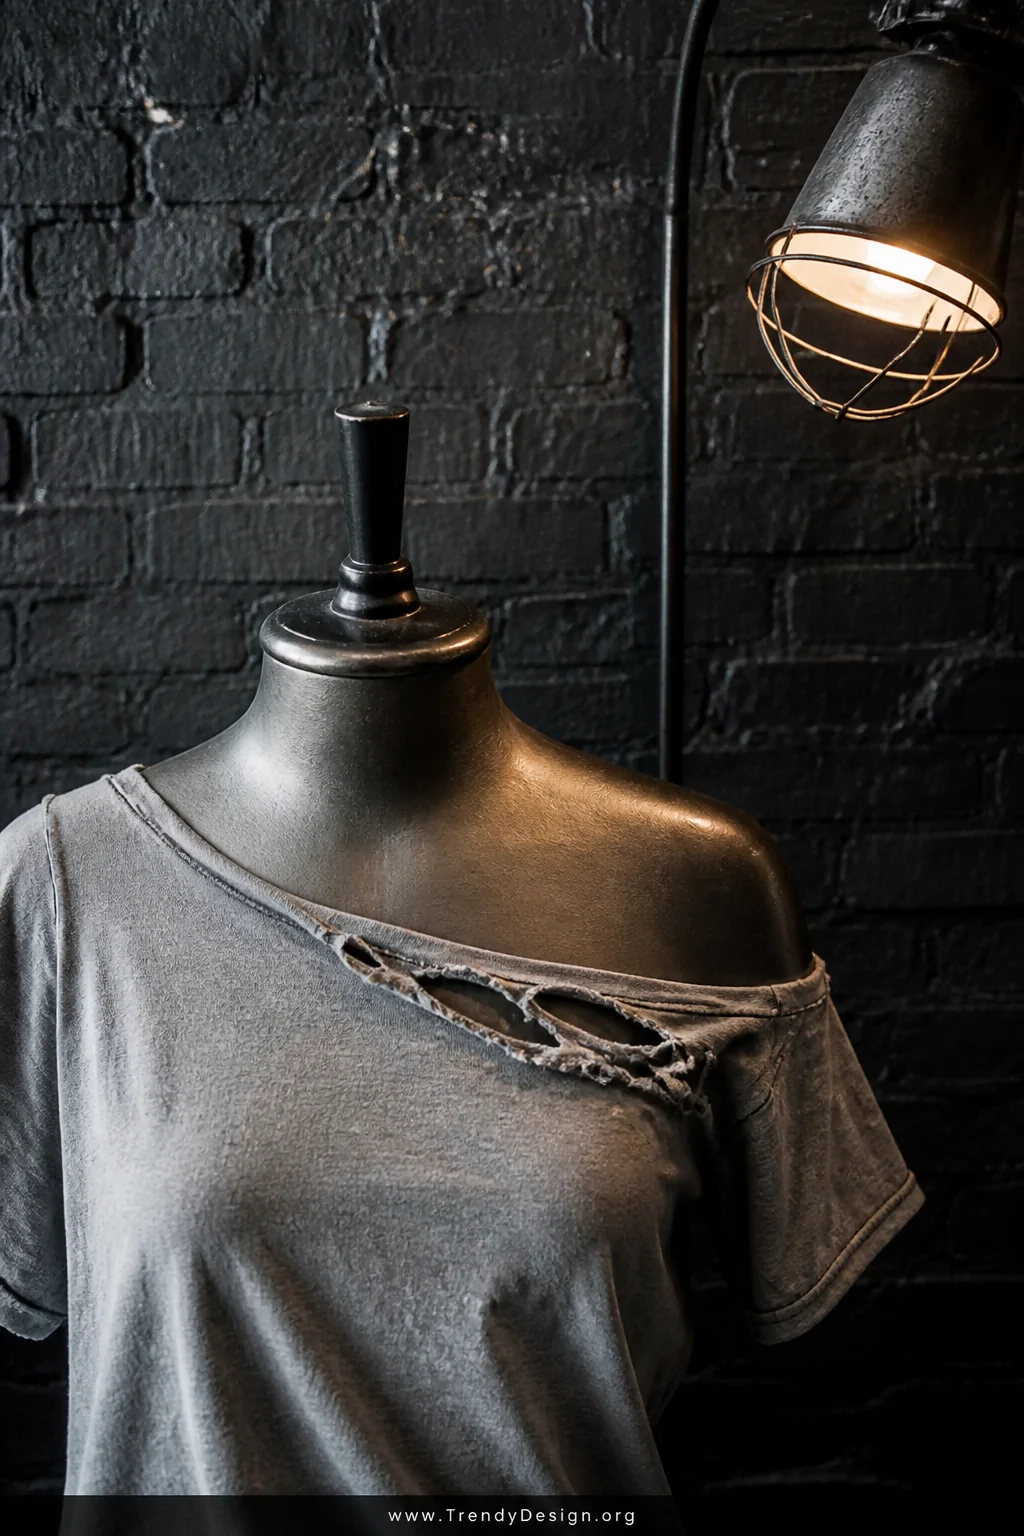
3. The Off-Shoulder Ripped Neckline Transformation
As an Amazon Associate I earn from qualifying purchases.
Cutting the neckline off a t-shirt completely changes its personality, and nobody does dramatic necklines like punk fashion. Cut several inches below the original collar in a wide scooping motion, then use your fingers to stretch and distress the new edge. You can go one-shoulder, both shoulders exposed, or cut an asymmetrical neckline that dips lower on one side.
IMO, this is the easiest DIY punk rock t-shirt cutting technique for absolute beginners because there’s truly no wrong way to do it. Add some intentional small tears near the neckline edges using a seam ripper or the tip of your scissors for extra texture. The distressed, pulled-apart look is exactly what you’re going for here.
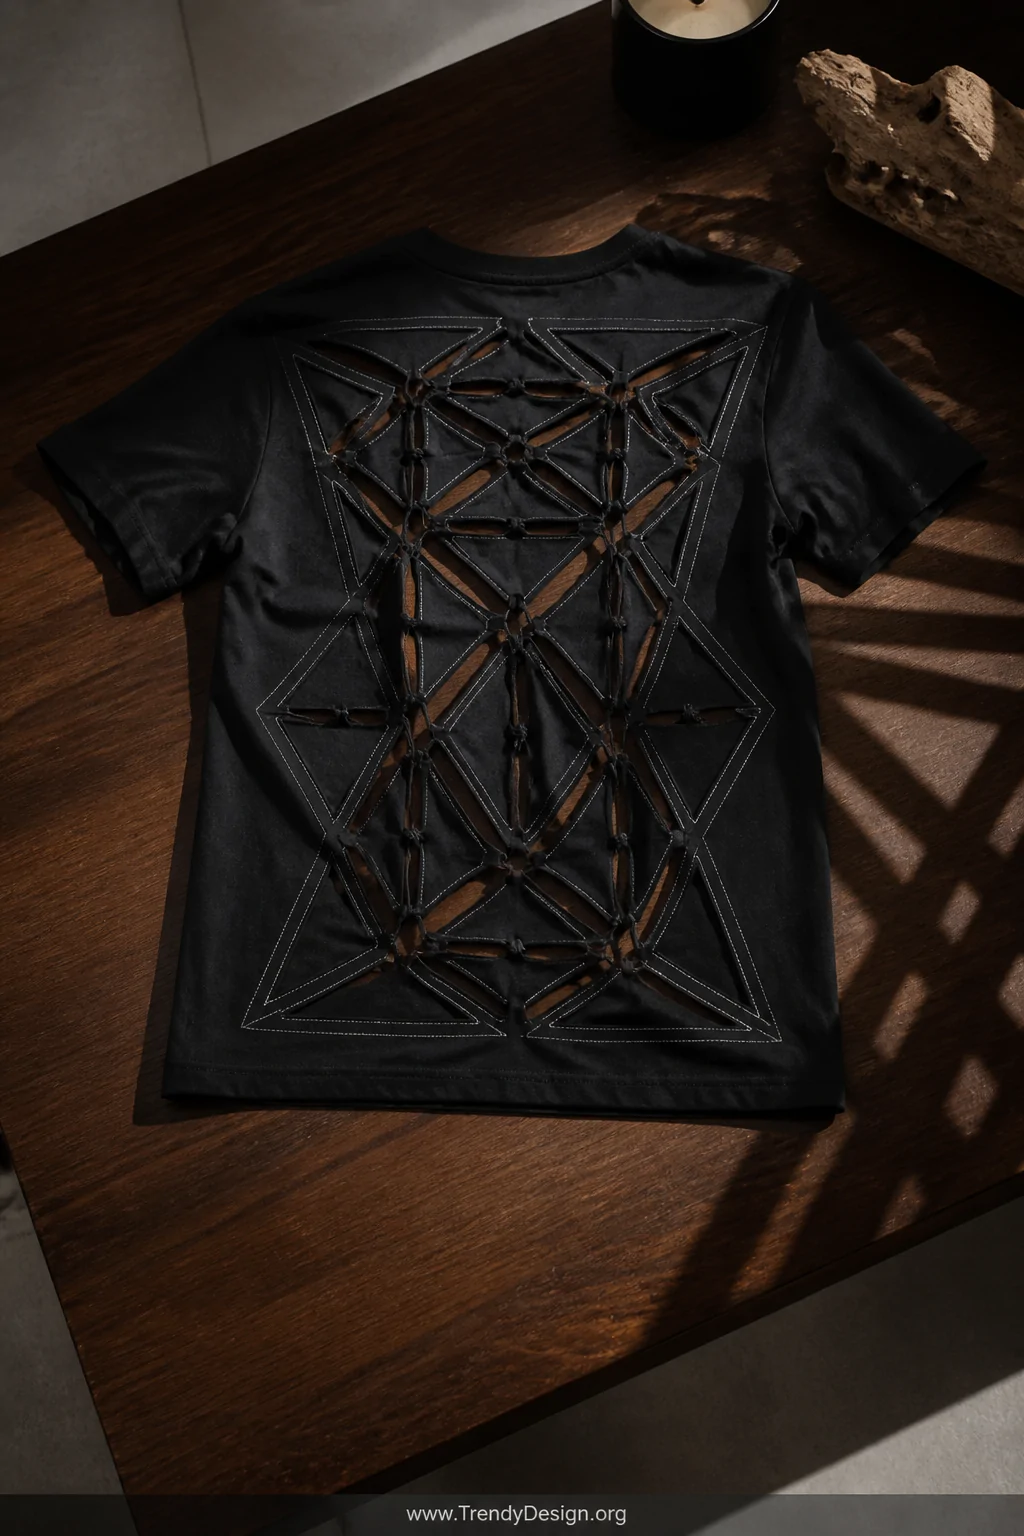
4. The Cutout Web and Geometric Back Panel
As an Amazon Associate I earn from qualifying purchases.
The back of your shirt is basically a blank canvas, and this technique turns it into genuine wearable art. You’ll cut away sections of fabric in geometric shapes triangles, diamonds, or a web-like lattice pattern that reveal skin underneath. Geometric cutouts look incredibly intentional and sophisticated while still screaming punk rock energy.
Fold the back of your shirt in half vertically before cutting to help create symmetrical designs without measuring everything precisely. Start with simple triangle cutouts along the spine, then get more ambitious as your confidence grows. You can also weave ribbon or leather cord through the cut edges to add color and hold the shape slightly together.
- Use sharp fabric scissors to prevent jagged edges on geometric cuts
- Draw your pattern lightly with tailor’s chalk before committing
- Keep cutout shapes consistent in size for a cleaner overall look
- Smaller cutouts create a delicate effect, larger ones go full rock rebel
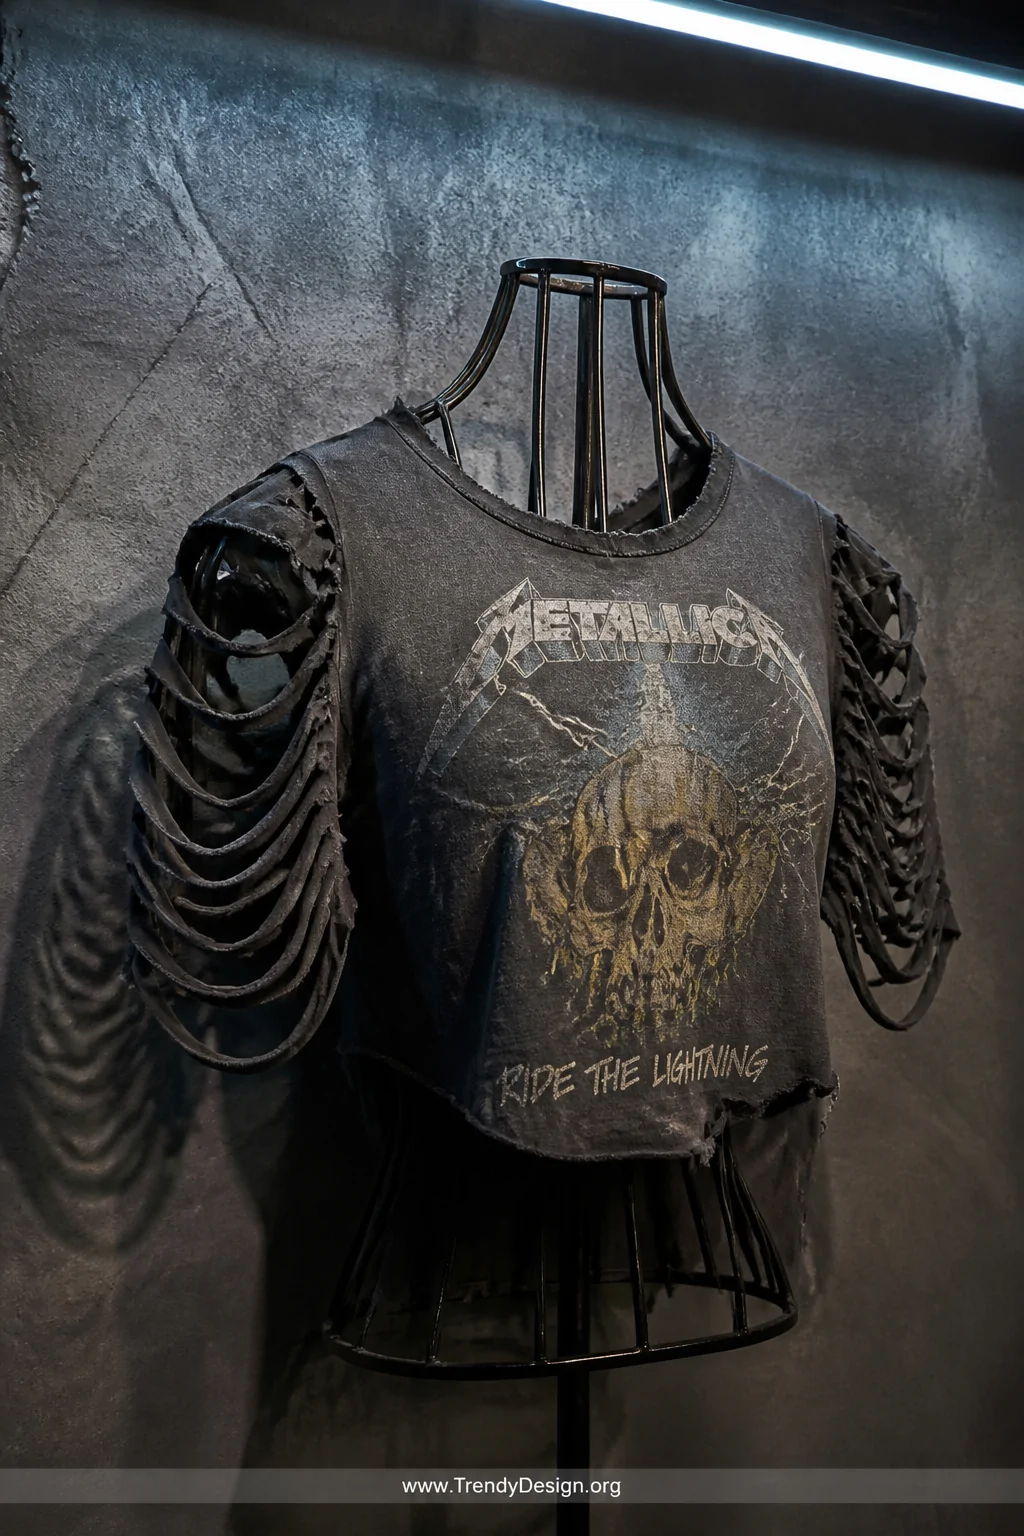
5. The Shredded Sleeves and Layered Strips Look
As an Amazon Associate I earn from qualifying purchases.
This technique focuses entirely on the sleeves and creates that beautifully destroyed band tee aesthetic that looks like you’ve been moshing for twenty years. Cut the sleeves into thin parallel strips from the cuff up toward the shoulder seam, leaving the last inch near the seam intact. Stretch each strip firmly and it curls into a gorgeous layered ribbon effect.
This works especially well on band tees because the shredded sleeve effect frames the graphic perfectly while adding incredible texture and movement. You can match this technique with a slightly cropped hem and a raw neckline cut for a fully committed DIY punk rock t-shirt cutting transformation from head to hem.
These five techniques are honestly just the starting point for your punk rock wardrobe revolution. Mix and combine multiple cutting ideas on a single shirt once you feel comfortable a cropped fringe hem with shredded sleeves and a dramatic neckline is a perfectly legitimate creative choice. Grab those scissors, embrace the happy accidents, and remember that the whole spirit of punk fashion is doing exactly what you want with zero apologies.
Leave a Reply