Pool floats are basically the glitter of summer they get everywhere, they’re impossible to wrangle, and somehow you always end up with more than you started with. If your garage looks like a flamingo graveyard by August, these DIY pool float storage ideas are about to change your entire season. Let’s fix this mess together.
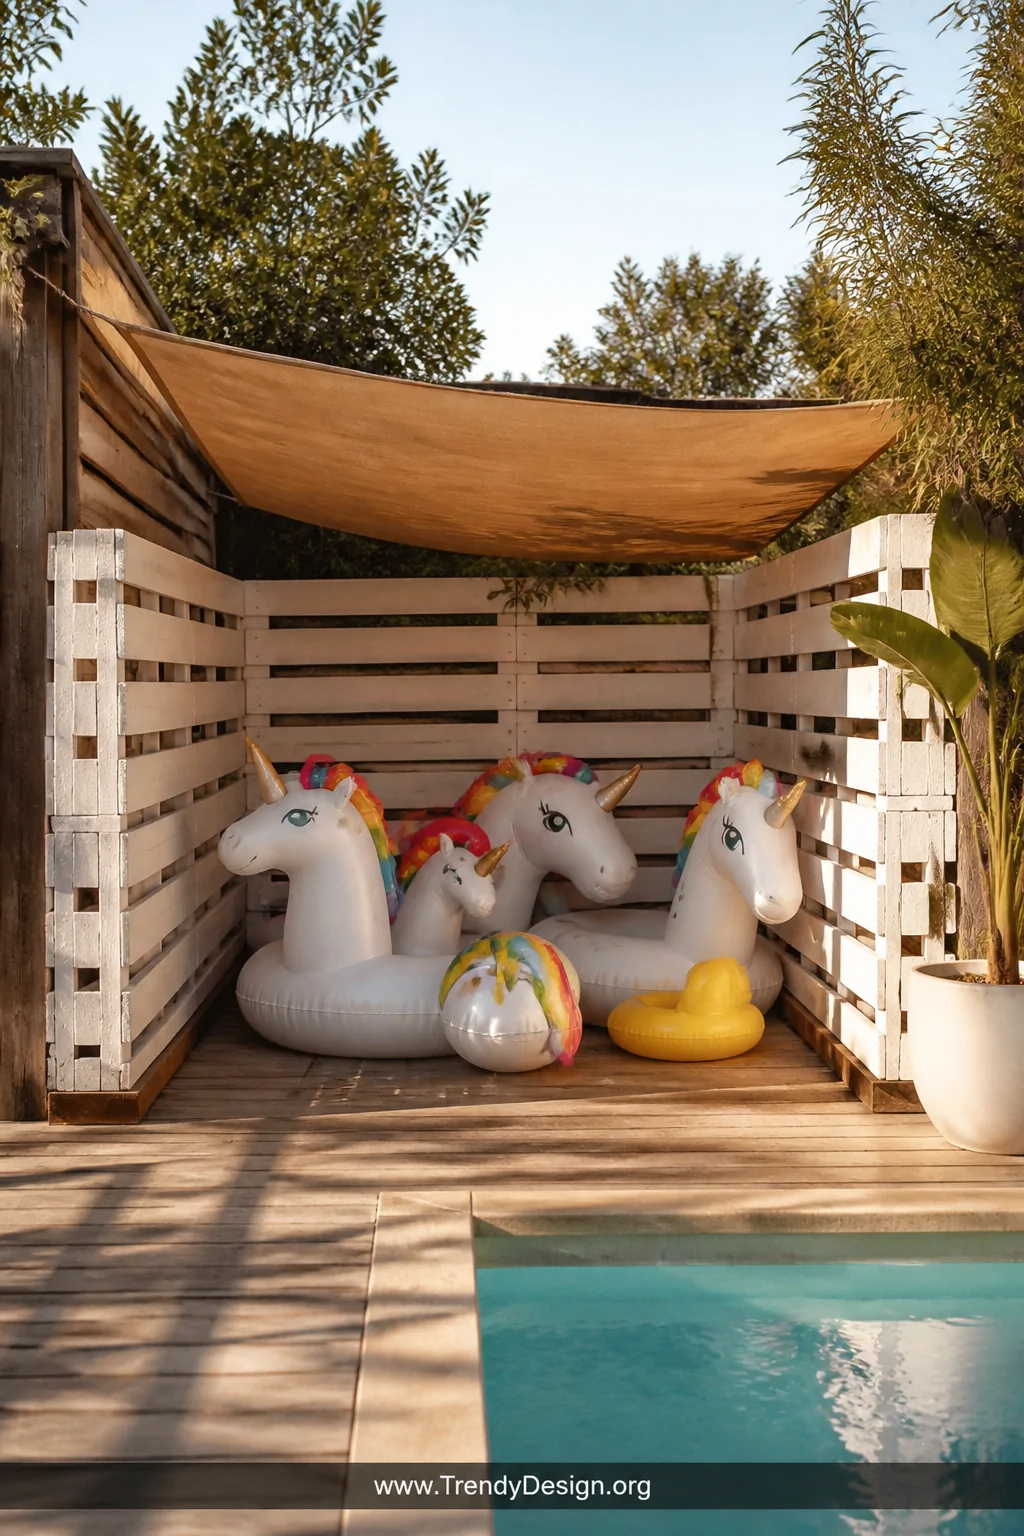
1. Build a Simple Wooden Pallet Corral
As an Amazon Associate I earn from qualifying purchases.
Grab two or three wooden pallets from your local hardware store (often free!) and stand them upright in an L or U shape near your pool area. Secure them together with zip ties or screws, and boom you’ve got a pool float storage corral that corrals even the bulkiest unicorn floats with zero drama.
Sand the edges lightly so nobody gets a splinter mid-summer. You can even paint or stain the pallets to match your outdoor aesthetic, because there’s absolutely no reason your storage solution can’t look cute too.
- Use weather-resistant exterior paint for longevity
- Add a tarp or shade cover on top for UV protection
- Leave one side open for easy grab-and-go access
2. Hang a Mesh Cargo Net on Your Fence

As an Amazon Associate I earn from qualifying purchases.
A heavy-duty mesh cargo net stretched across a fence panel is honestly one of the easiest DIY pool float storage wins you’ll ever score. Hook it to fence posts with bungee cords or carabiners, stuff your floats inside, and let the net hold everything in place while air still circulates to prevent mold and mildew.
This works especially well for smaller inflatables like swim rings and water wings. The see-through mesh also means you can actually find what you’re looking for without digging through a pile of rubber and regret.
- Choose a UV-resistant cargo net rated for outdoor use
- Hang it at chest height for easiest loading and unloading
- Double up two nets side by side if your float collection is out of control
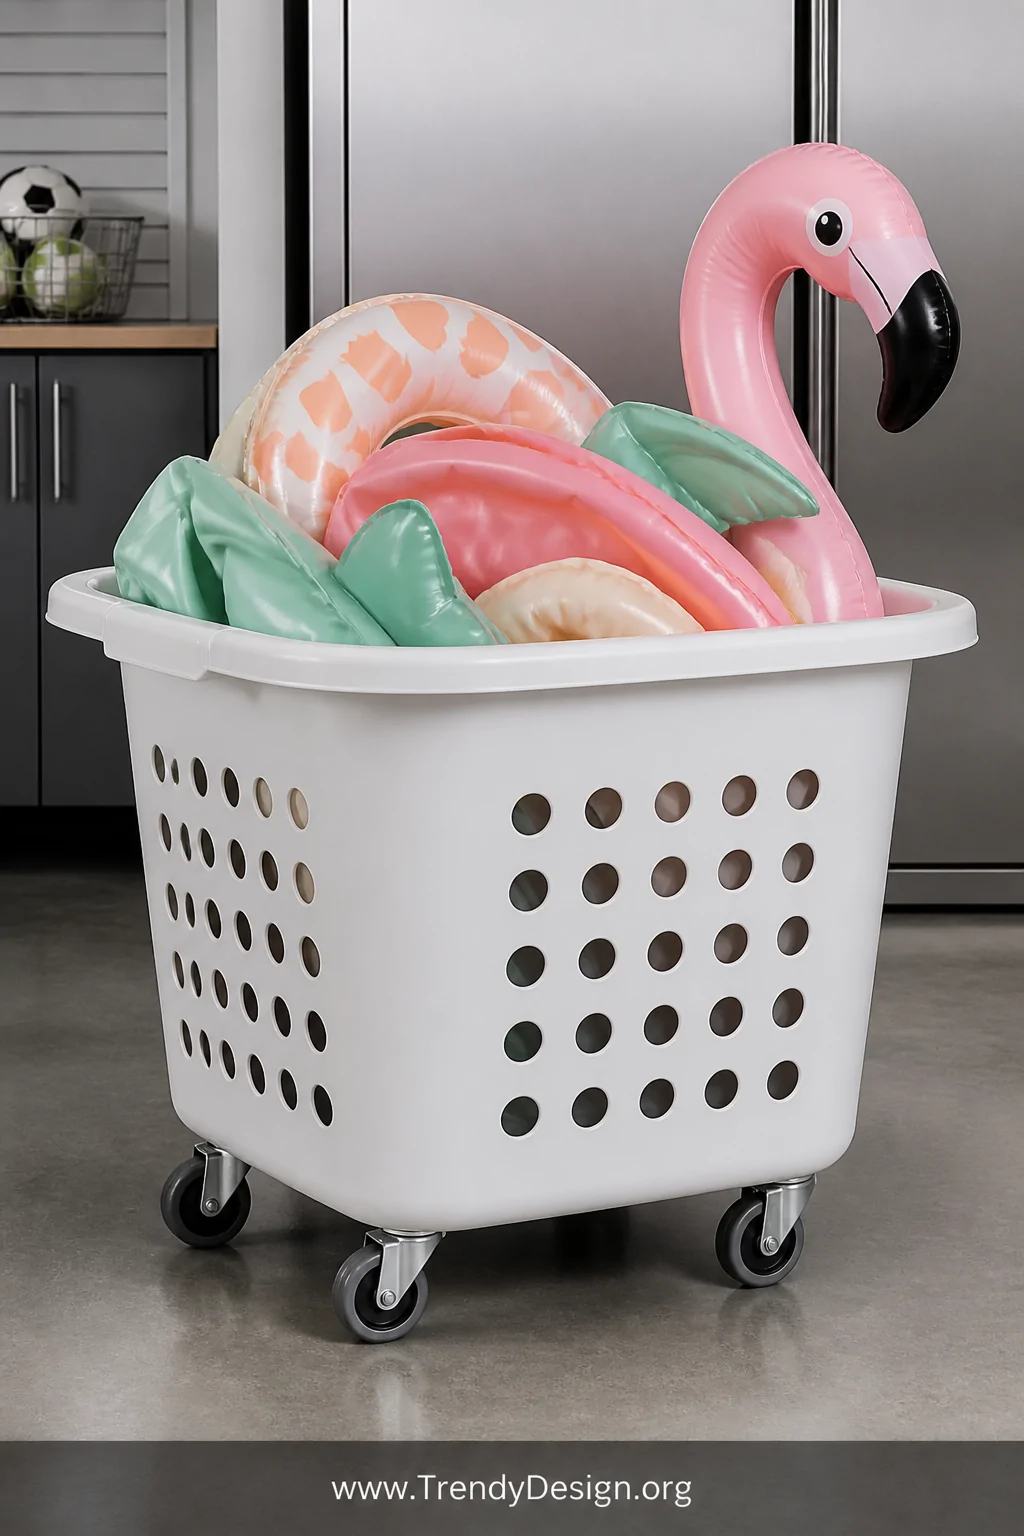
3. Repurpose a Large Laundry Basket With Wheels
As an Amazon Associate I earn from qualifying purchases.
A rolling laundry basket or pop-up hamper is a wildly underrated pool float organizer that most people already have lying around. Toss your deflated or semi-inflated floats inside, roll it to the pool deck, and roll it right back to the garage when swim time is over. Mobility is the secret weapon here.
Look for oversized baskets with ventilation holes they let moisture escape so your floats don’t smell like a wet dog situation by mid-July. IMO, the rolling version beats a stationary bin every single time when you’ve got kids dragging stuff from yard to pool.
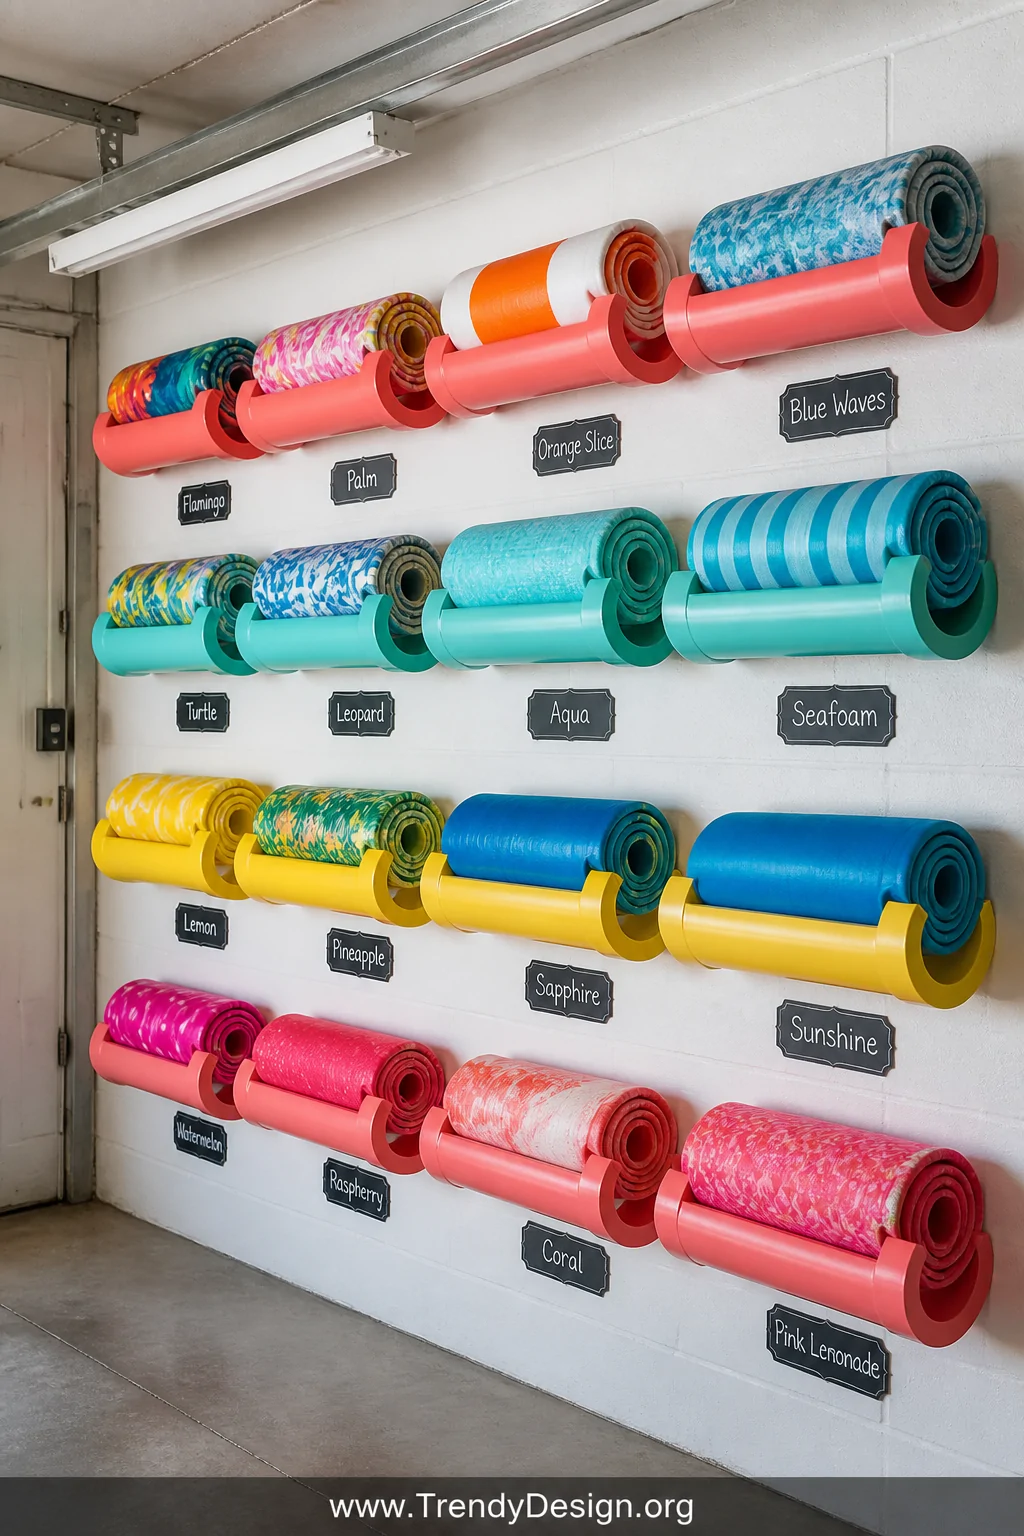
4. Install PVC Pipe Wall Hooks in Your Garage
As an Amazon Associate I earn from qualifying purchases.
Cut PVC pipes into 12-inch sections, cap one end, and mount them horizontally on your garage wall using pipe brackets. Each pipe becomes a sturdy hook that holds rolled or folded floats off the floor and up where they belong. This DIY float storage setup costs under $20 and takes about an hour to build.
Arrange the pipes in staggered rows so even the biggest floats don’t crowd each other. Label each section with chalkboard paint or a marker so the kids actually put things back where they found them wishful thinking, maybe, but worth a shot.
- Use 2-inch diameter PVC for standard floats
- Space pipes at least 10 inches apart vertically
- Paint pipes in fun colors to match your pool vibe
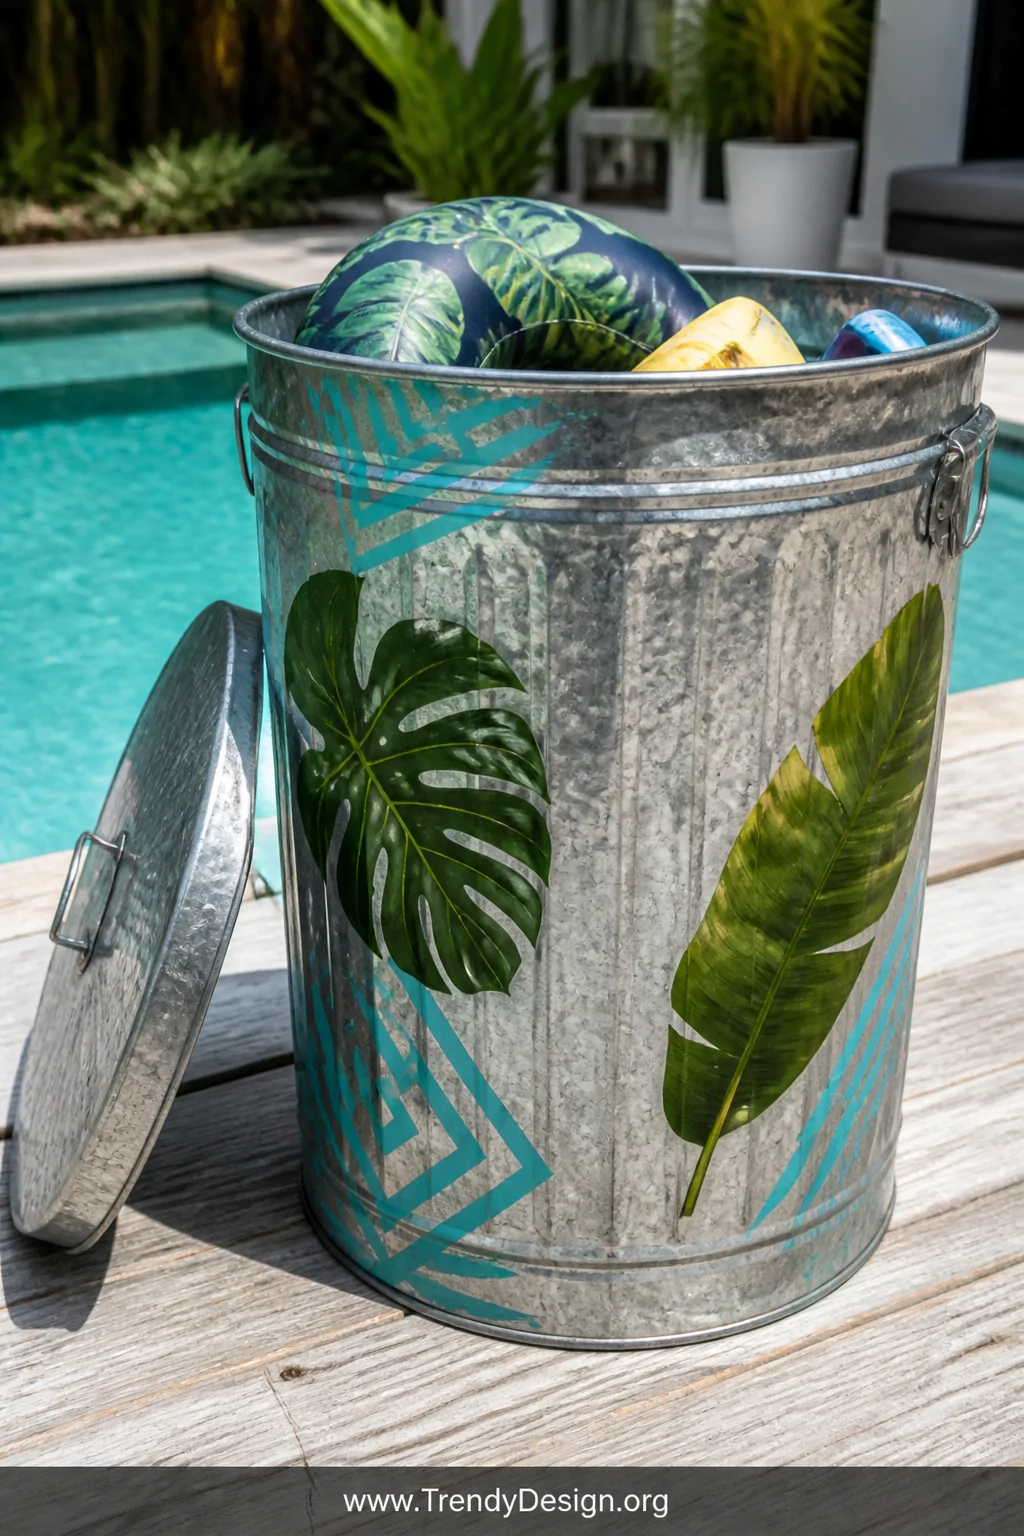
5. Upcycle a Metal Trash Can Into a Float Bin
As an Amazon Associate I earn from qualifying purchases.
A large galvanized metal trash can is basically a pool float storage dream hiding in your hardware store. Stand it upright near the pool, toss deflated floats inside, and snap the lid on when storms roll in. Drill a few holes in the bottom for drainage if it lives outdoors year-round.
Spray paint it with a fun design or add some outdoor stickers to make it feel intentional rather than lazy because there’s a fine line between “rustic chic” and “we gave up.” FYI, the 32-gallon size holds a shocking amount of gear without taking up much real estate on your deck.
Pro Tip for Metal Can Storage
Place a small moisture-absorbing packet at the bottom of the can to keep floats fresh between uses. This is especially helpful in humid climates where mildew loves to crash your pool party uninvited.
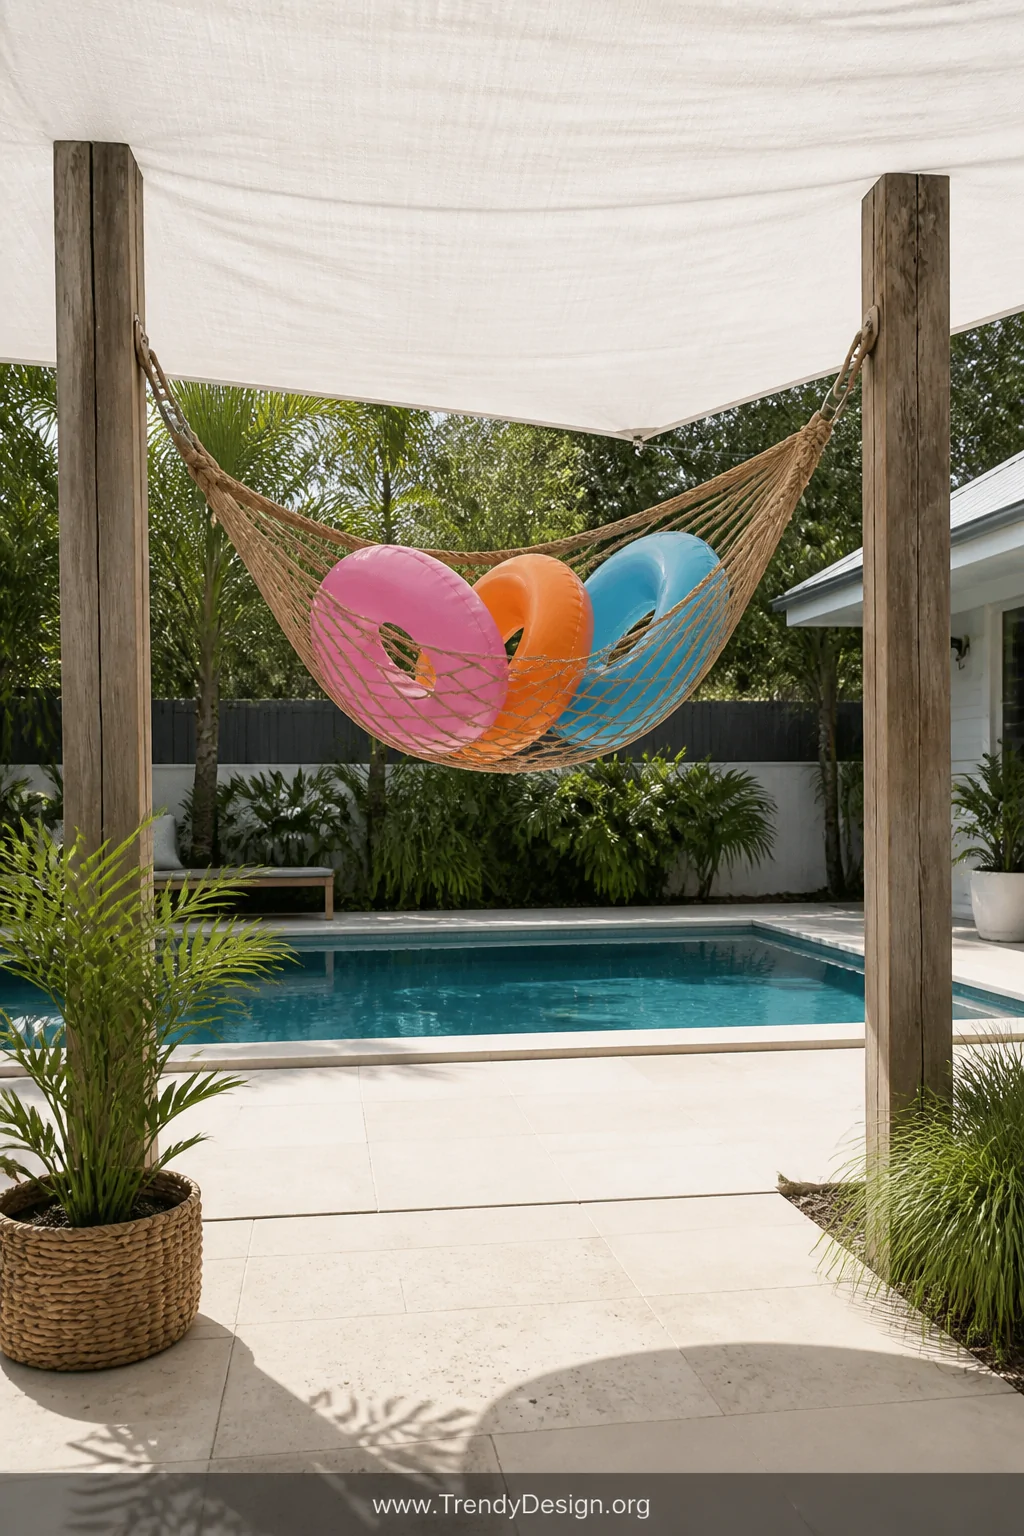
6. String Up an Outdoor Hammock Net Between Two Posts
As an Amazon Associate I earn from qualifying purchases.
Install two 4×4 wooden posts near your pool area and hang a hammock-style cargo net between them at about four feet high. This creates a suspended pool float storage hammock that holds floats while keeping them elevated, airy, and easy to grab. It looks surprisingly stylish for something you built in an afternoon.
The elevated design is a game-changer because floats dry faster when air circulates underneath them. Wet floats stuffed into bins breed mildew faster than you’d believe, and nobody wants to sniff that on a hot Tuesday afternoon.
- Sink posts in concrete for maximum stability
- Use weather-treated lumber rated for ground contact
- Add a waterproof tarp overhead for shade and rain protection
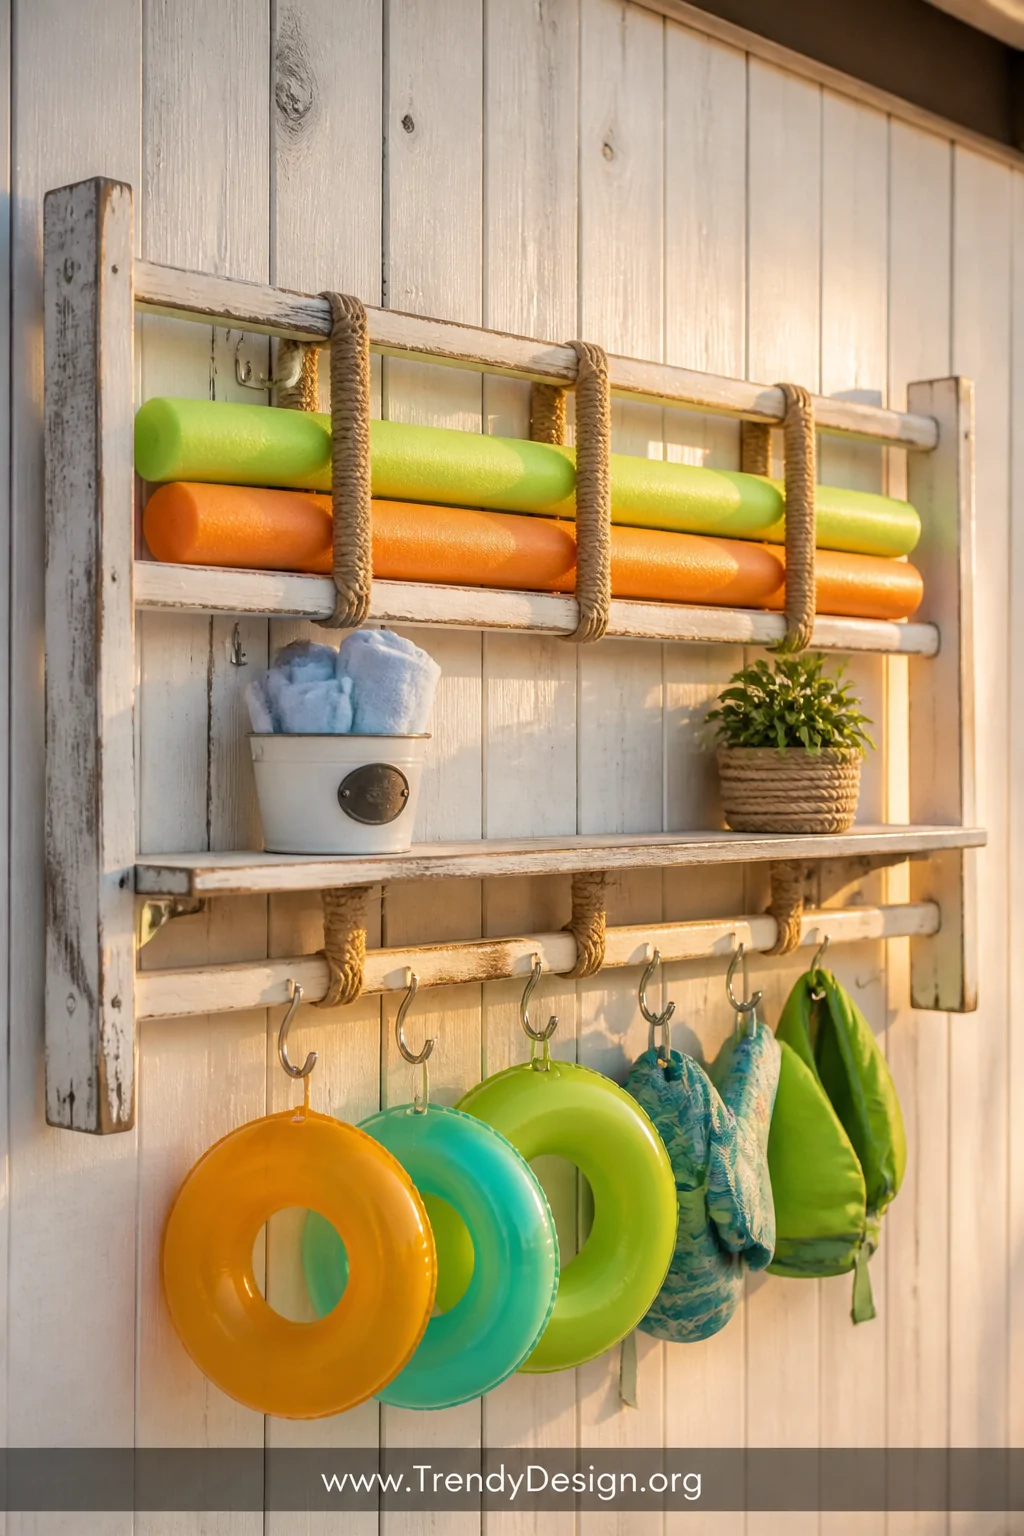
7. Mount a Wooden Ladder Shelf Horizontally
As an Amazon Associate I earn from qualifying purchases.
Take an old wooden ladder and mount it flat against your fence or garage wall using heavy-duty wall anchors. Each rung becomes a shelf or hanging point for pool floats, noodles, and inflatables. This is the kind of DIY pool float organizer that makes guests ask if you hired someone, and you get to casually say you knocked it out on a Saturday.
Wrap the rungs in rope or outdoor twine for a beachy look that also protects the wood from moisture. Sand and seal everything with exterior-grade polyurethane so it survives the full summer without warping or splitting under the sun.
- Repurpose an old wooden ladder to save money
- Hang s-hooks from rungs for extra hanging points
- Add a plank across two rungs to create flat shelf space
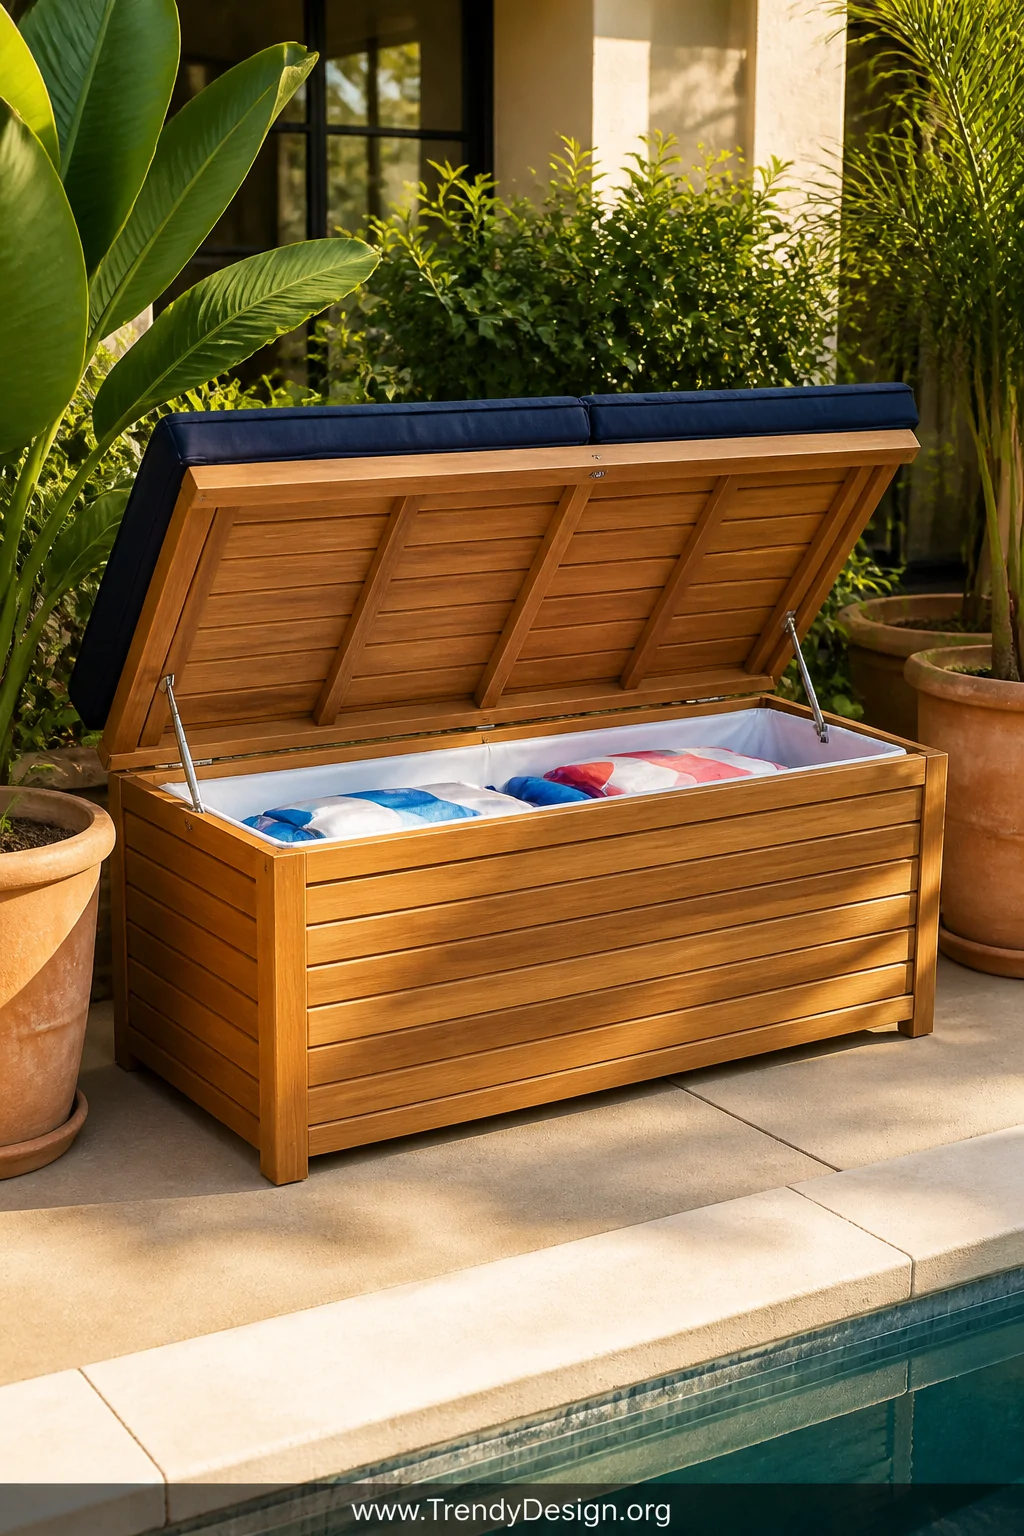
8. Create a Dedicated Float Station With a Storage Bench
As an Amazon Associate I earn from qualifying purchases.
Build or buy a simple outdoor storage bench with a lift-top lid and place it poolside as your official pool float storage station. Floats go inside, cushions go on top, and suddenly your pool area looks like a magazine spread instead of a yard sale. This is the move if you want storage that pulls double duty without screaming “utilitarian chaos.”
Use cedar or teak wood if you’re building from scratch both naturally resist moisture and insects without much maintenance. Add a waterproof foam cushion on the lid and you’ve got seating, storage, and style all rolled into one very satisfying DIY win.
- Drill small ventilation holes inside to prevent musty smells
- Line the interior with a plastic storage bin for easy cleaning
- Choose a bench size that fits your float collection plus room to grow
There you have it eight real, doable DIY pool float storage ideas that will keep your summer organized without costing a fortune or requiring a carpentry degree. Pick one, grab your tools, and reclaim your pool space before the chaos of peak season hits. Your future self floating peacefully on that giant avocado will absolutely thank you.
Leave a Reply