There is something absolutely magical about a quilt that carries the signatures, messages, and memories of the people you love most. Whether you are making a graduation gift, a wedding keepsake, or a retirement send-off, DIY quilt signing ideas can transform a beautiful blanket into a priceless heirloom. The trick is knowing which method works best for your fabric, your crowd, and your creative vision.
Honestly, not all signing methods are created equal, and choosing the wrong one can lead to faded ink, bleeding colors, or signatures that disappear after the first wash. Do not worry though — we have got you completely covered with five fantastic approaches that are fun, durable, and genuinely impressive. Grab your quilt blocks and let us dive right in!
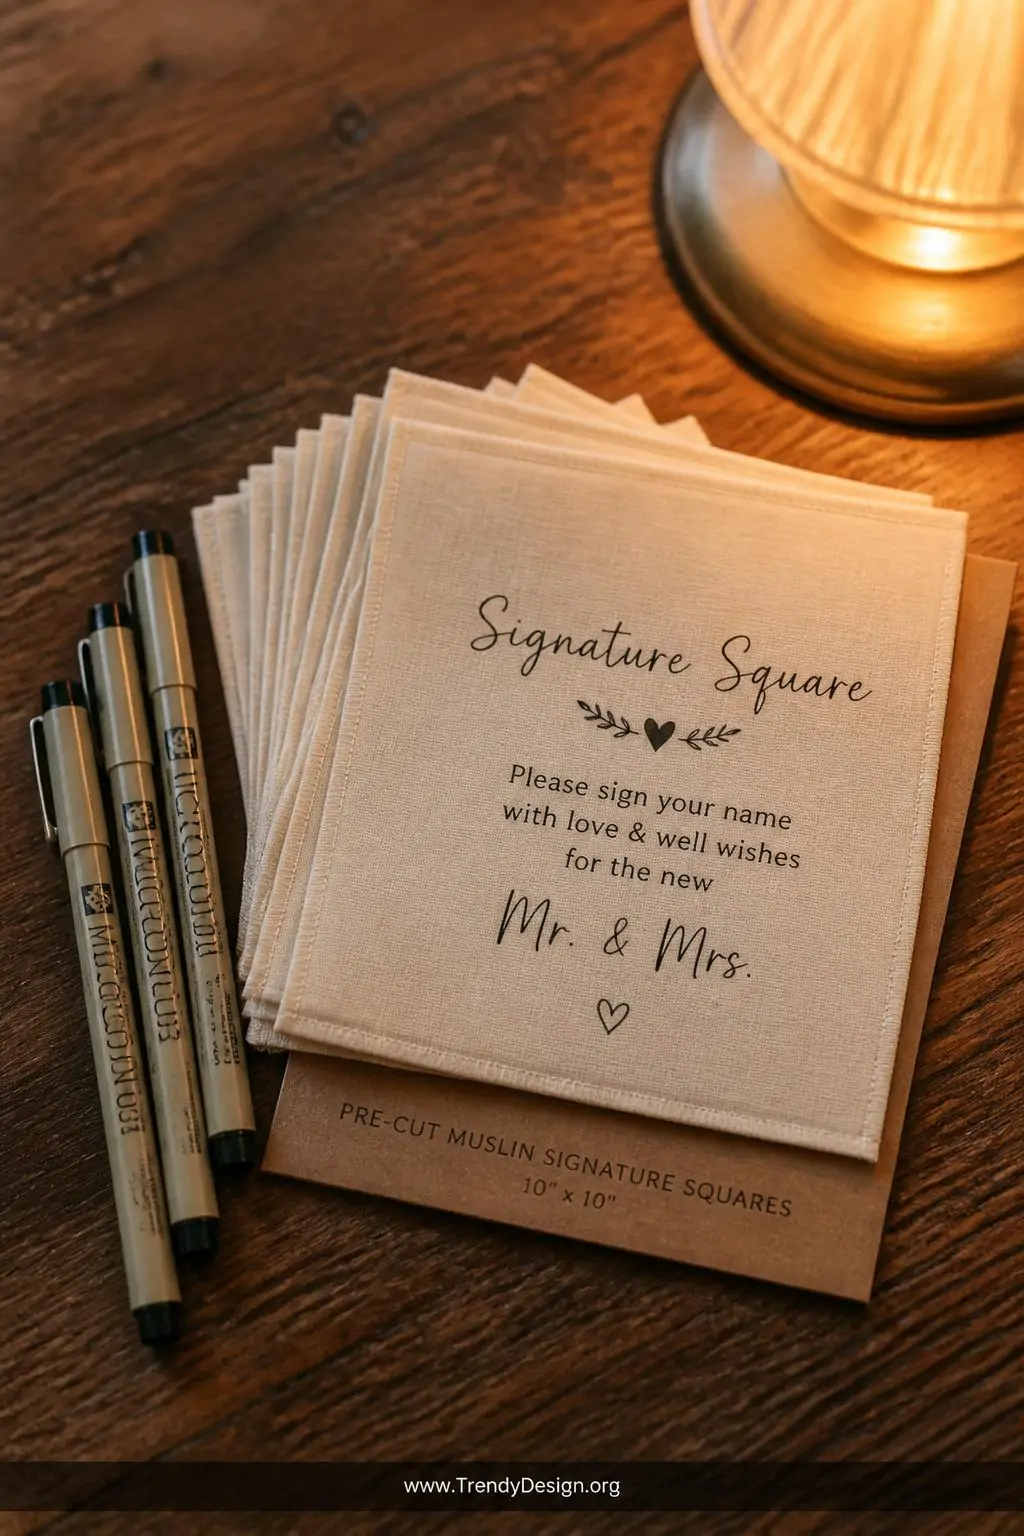
1. Fabric Markers on Pre-Cut Signature Blocks
As an Amazon Associate I earn from qualifying purchases.
This is the classic approach for a very good reason — fabric markers on pre-cut white or cream muslin blocks give every signer a clean, dedicated canvas to write on. You simply cut uniform squares or rectangles, hem the edges lightly, and pass them around at your gathering with a fine-tipped fabric marker in hand. The results are consistently neat, readable, and absolutely charming.
The key to success here is using permanent fabric markers that are heat-set after signing. Once everyone has added their name, message, or little doodle, run a hot iron over each block with a pressing cloth on top. This simple step locks the ink into the fibers and ensures it survives countless trips through the washing machine.
- Use Pigma Micron or Sharpie fabric markers for the crispest results
- Tape a piece of cardboard behind the block while signing to prevent bleed-through
- Offer both fine and medium tip markers so signers can personalize their style
- Pre-print light pencil guidelines so handwriting stays straight and legible
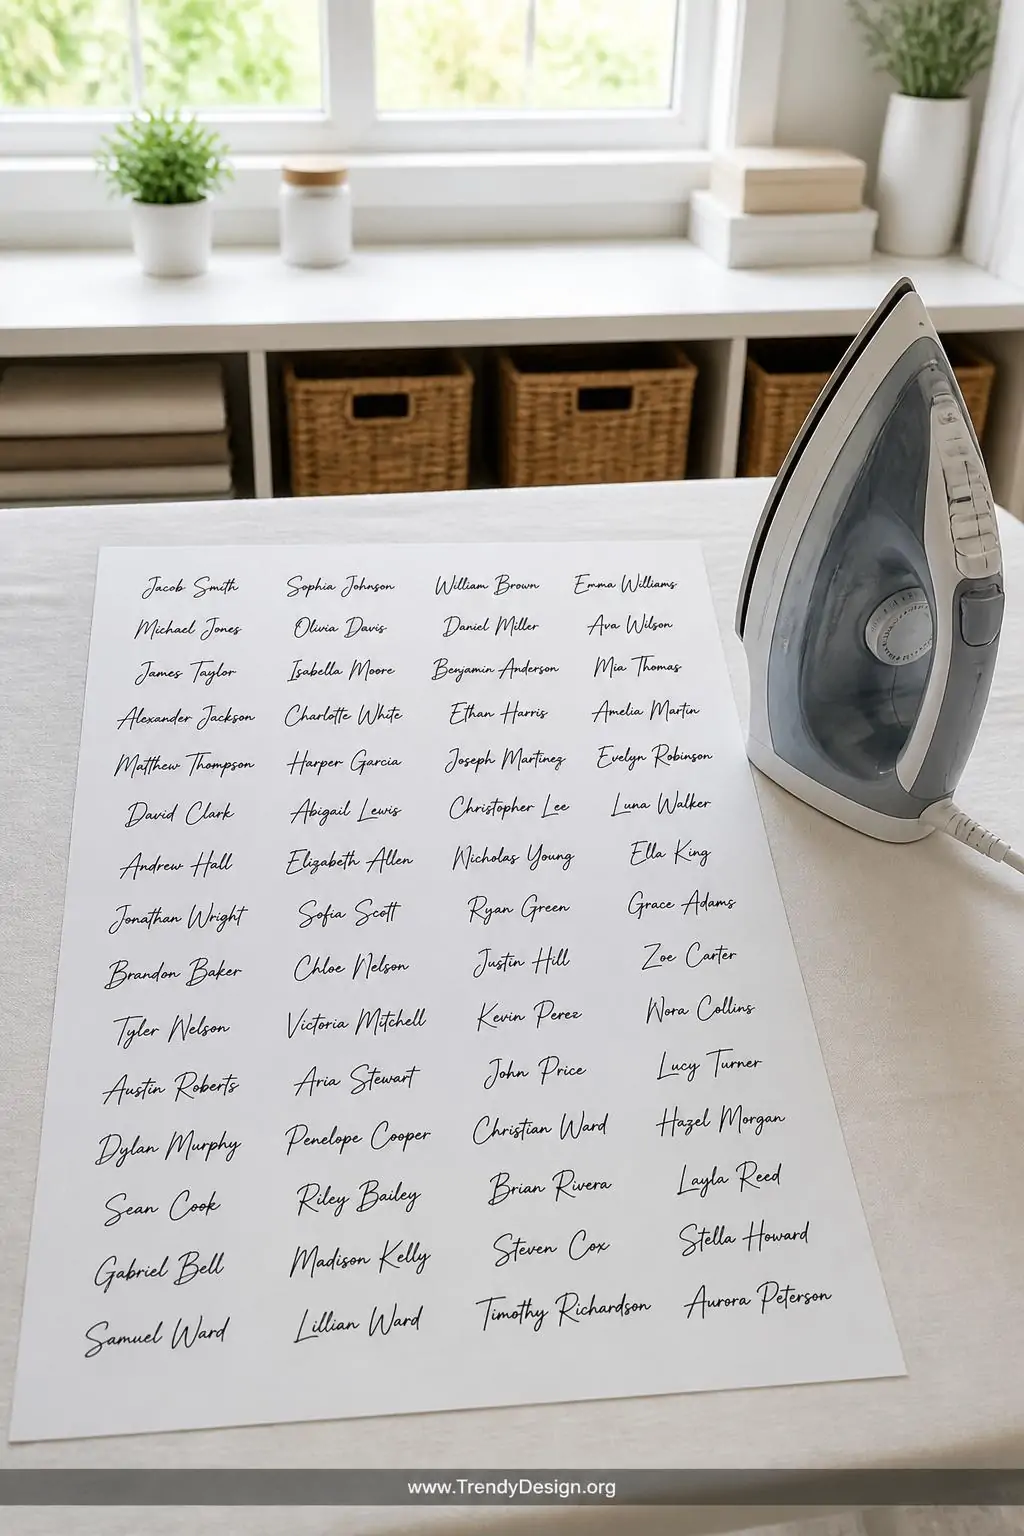
2. Iron-On Transfer Paper With Printed Signature Panels
As an Amazon Associate I earn from qualifying purchases.
If you want something a little more polished and tech-forward, iron-on transfer paper with digitally collected signatures is an absolute game-changer. You can gather signatures electronically by asking contributors to sign their name on a tablet or white paper and photograph it, then compile everything into a single printable sheet. IMO, this method is perfect for long-distance contributors who cannot attend the signing event in person.
Once you have your signature collection, print everything onto inkjet iron-on transfer paper and press it directly onto your quilt block fabric. The result looks incredibly professional and keeps every signature exactly as the person wrote it, quirky handwriting and all. That wobbly cursive from Grandma? Perfectly preserved forever.
Tips for a Smooth Transfer
- Mirror your image before printing so the text reads correctly after transfer
- Use a firm, flat surface and apply steady even pressure with your iron
- Peel the backing slowly while the fabric is still warm for the cleanest release
3. Embroidery Hoop Signature Stations With Stamping Ink Pads

As an Amazon Associate I earn from qualifying purchases.
Here is a genuinely fun idea that turns signing into an interactive activity — embroidery hoop signature stations equipped with fabric stamping ink pads let guests do so much more than just write their names. Set up a little table with stretched fabric in embroidery hoops, several ink pad colors, rubber alphabet stamps, and fine-tipped fabric pens for personal flourishes. People absolutely love having a creative station to play at during a party.
The embroidery hoop keeps the fabric taut and stable while people press stamps or write directly onto the surface. StazOn fabric ink pads work beautifully for this purpose because they bond permanently to fabric without requiring heat setting. FYI, this approach works especially well for children who might struggle with writing but can happily stamp their handprints or favorite shapes alongside their names.
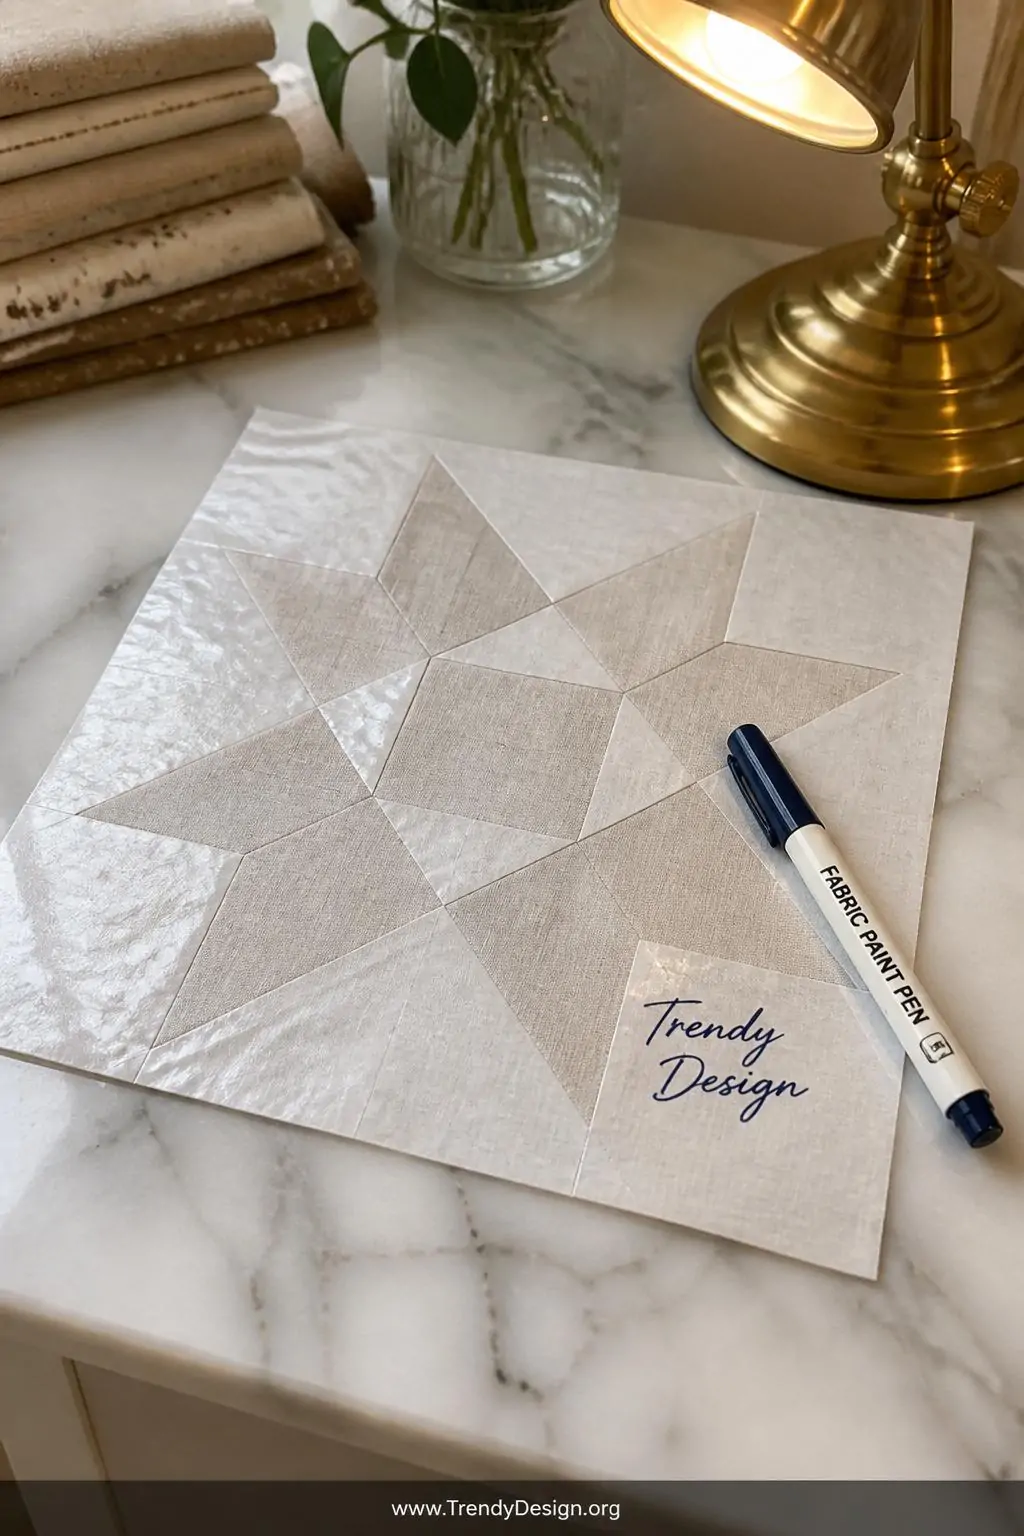
4. Freezer Paper Stenciled Signature Squares
As an Amazon Associate I earn from qualifying purchases.
This one feels like a little crafting secret that not enough people know about. Freezer paper temporarily adhered to fabric blocks creates a perfectly stable writing surface that makes even shaky handwriting look intentional and lovely. You simply iron the shiny side of freezer paper directly onto your fabric square, and it clings temporarily without leaving any residue behind. The paper stiffens the fabric just enough to make writing feel like signing a greeting card.
After everyone has signed using permanent fabric markers or fabric paint pens, peel the freezer paper away and heat-set your signatures. This method is especially brilliant for quilts with delicate or loosely woven fabrics that would otherwise shift and pucker under a signing pen. Easy, affordable, and genuinely clever.
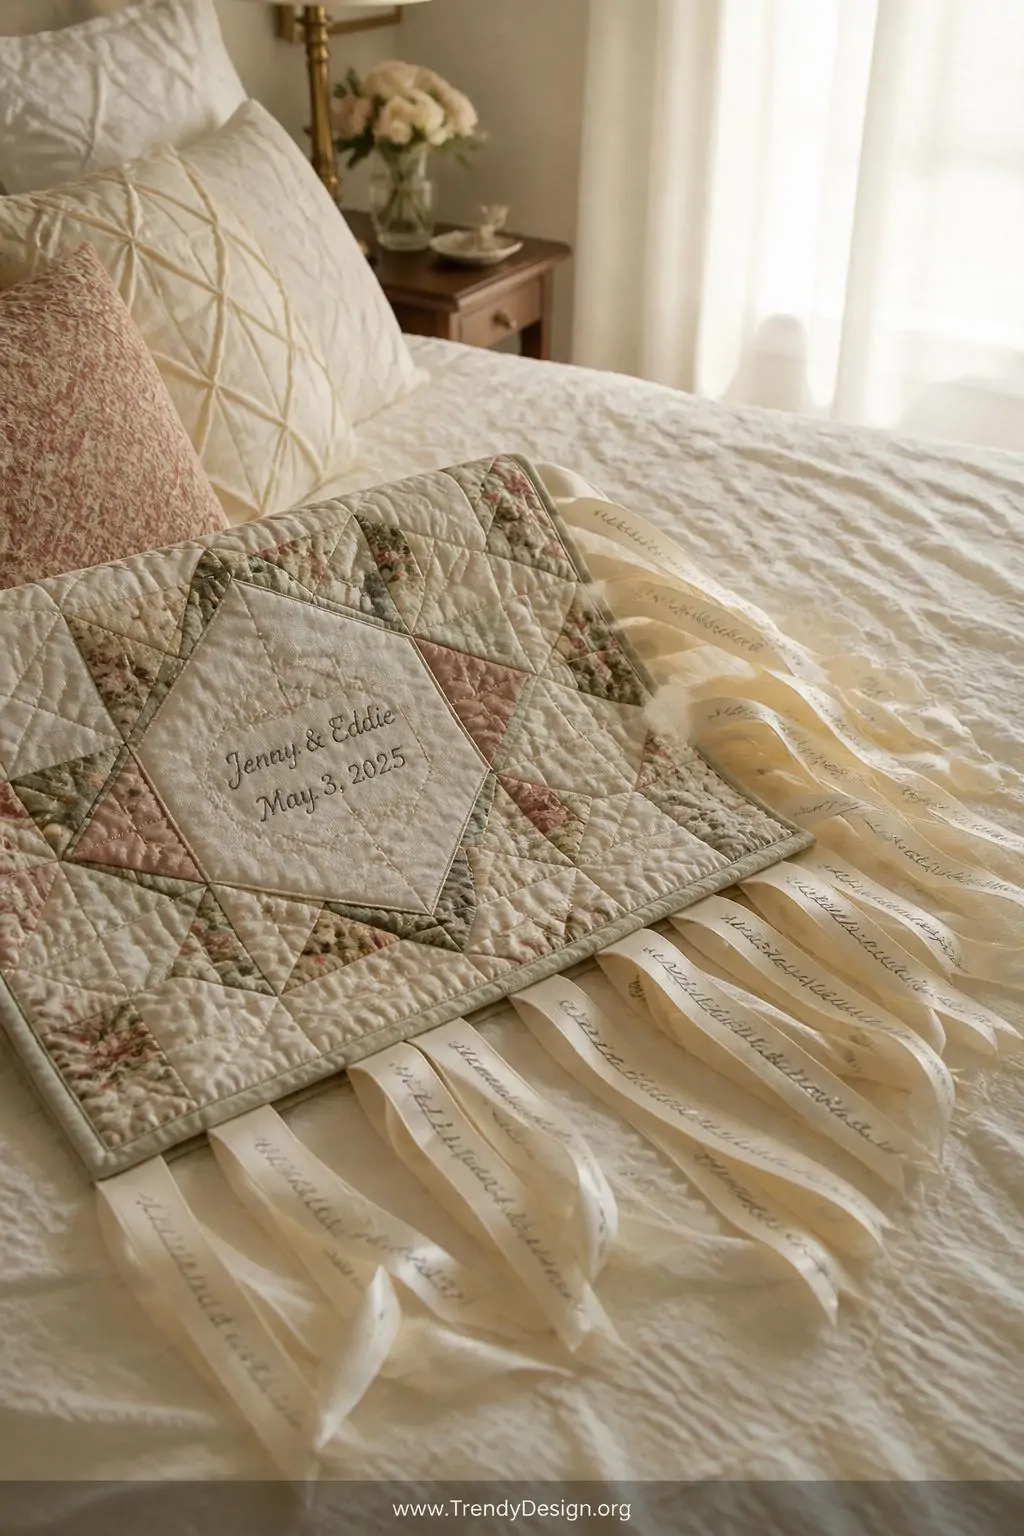
5. Pre-Sewn Ribbon Tag Bundles Attached to Quilt Blocks
As an Amazon Associate I earn from qualifying purchases.
Saving the most creative idea for last — pre-sewn satin or cotton ribbon tags stitched directly onto individual quilt blocks offer a three-dimensional, tactile signing experience unlike anything else. Each ribbon tag is essentially a small fabric label, folded and sewn at one end into the block seam, with the free end left available for writing. The effect looks absolutely stunning and adds gorgeous texture to the finished quilt.
Use white or ivory grosgrain ribbon at least three-quarters of an inch wide so there is enough surface area for a legible signature and short message. This DIY quilt signing idea works particularly beautifully on wedding quilts where the flowing ribbons add an elegant, romantic feel. Guests often comment that the ribbon tags make the quilt look like something straight out of a boutique shop.
The Bottom Line
A signature quilt is so much more than a blanket — it is a living archive of love, connection, and memory stitched together one block at a time. Whether you choose classic fabric markers, creative stamping stations, or gorgeous ribbon tags, the right DIY quilt signing idea will make your finished project something that gets passed down for generations.
The best method is honestly the one that fits your crowd, your timeline, and your creative energy. Pick your favorite from this list, gather your people, and start making something truly unforgettable together.
Leave a Reply