There’s something almost magical about a fresh wood stain. One afternoon, a can of stain, and suddenly that beat-up coffee table looks like it belongs in a design magazine. Whether you’re a total DIY newbie or someone who already owns more sandpaper than makes sense, these wood staining ideas will give you the inspiration — and the confidence — to get started.
From furniture to floors, wood staining is one of the most affordable ways to completely change the vibe of a room. Let’s dig into six of the best approaches you can try right now.
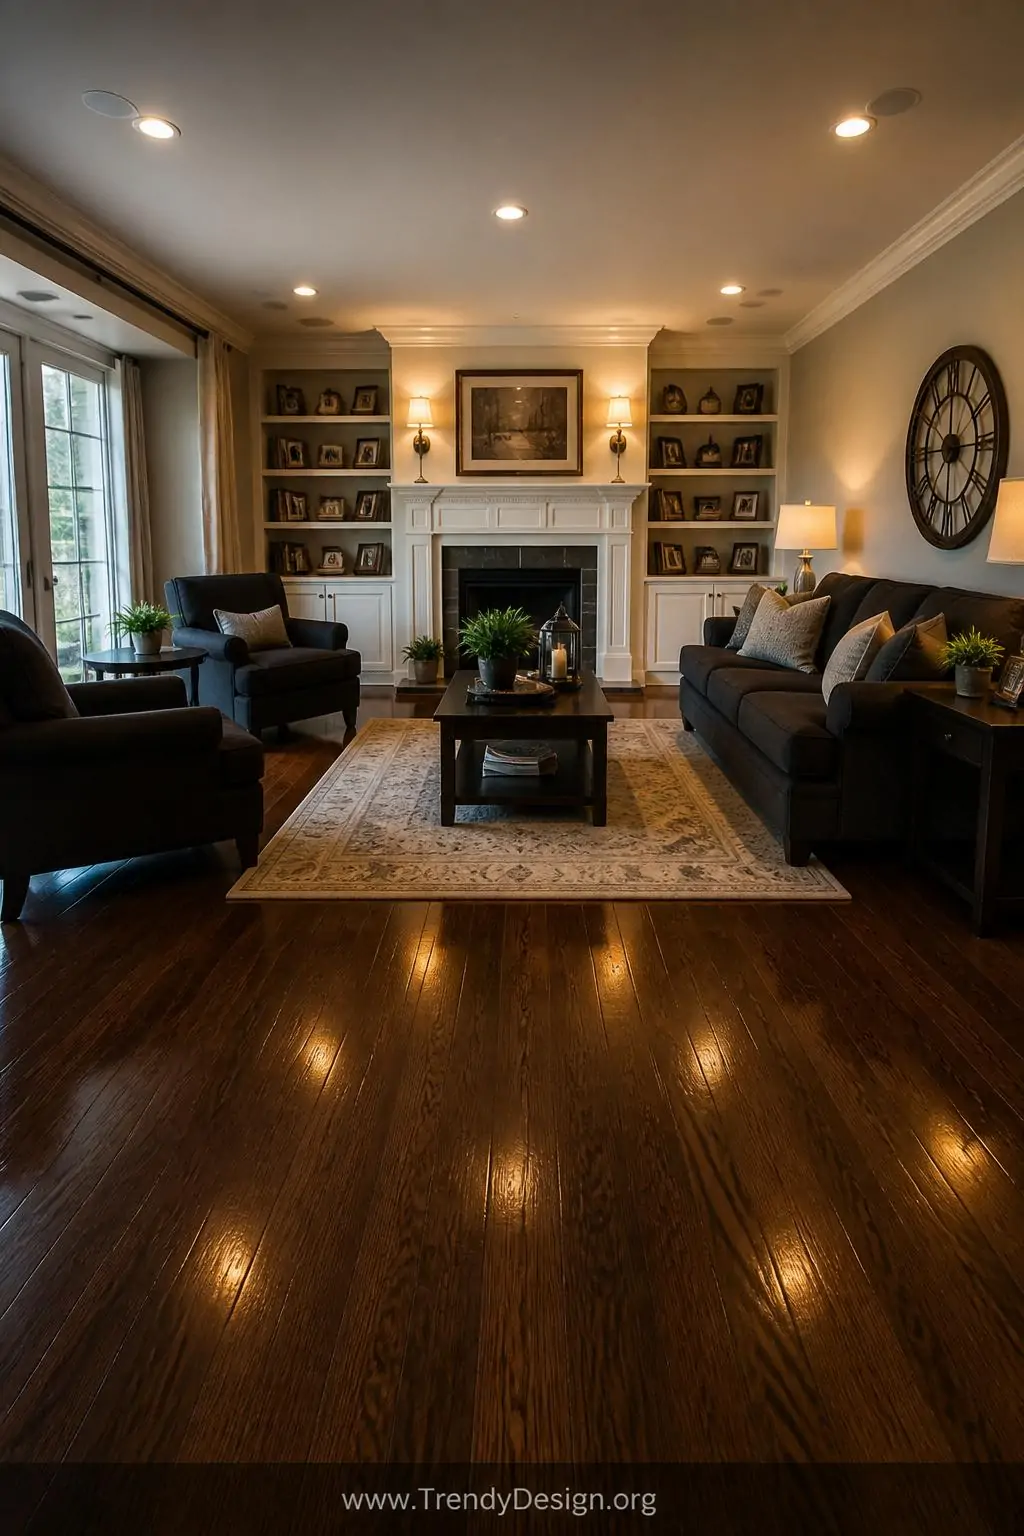
1. Classic Dark Walnut Stain on Hardwood Floors
As an Amazon Associate I earn from qualifying purchases.
If your hardwood floors are looking a little tired and dull, a dark walnut stain might be exactly what they need. This rich, deep tone adds warmth and sophistication to almost any room, and it pairs beautifully with both light walls and bold furniture choices.
Hardwood floors absorb stain incredibly well, which means you get that gorgeous, even finish without too much fuss. The key is proper sanding before you start — skip that step and you’ll be living with blotchy regrets for years.
- Sand floors thoroughly with 80-grit, then 120-grit sandpaper
- Wipe away all dust before applying the walnut stain
- Apply in the direction of the wood grain for the smoothest look
- Seal with a polyurethane finish for long-lasting protection
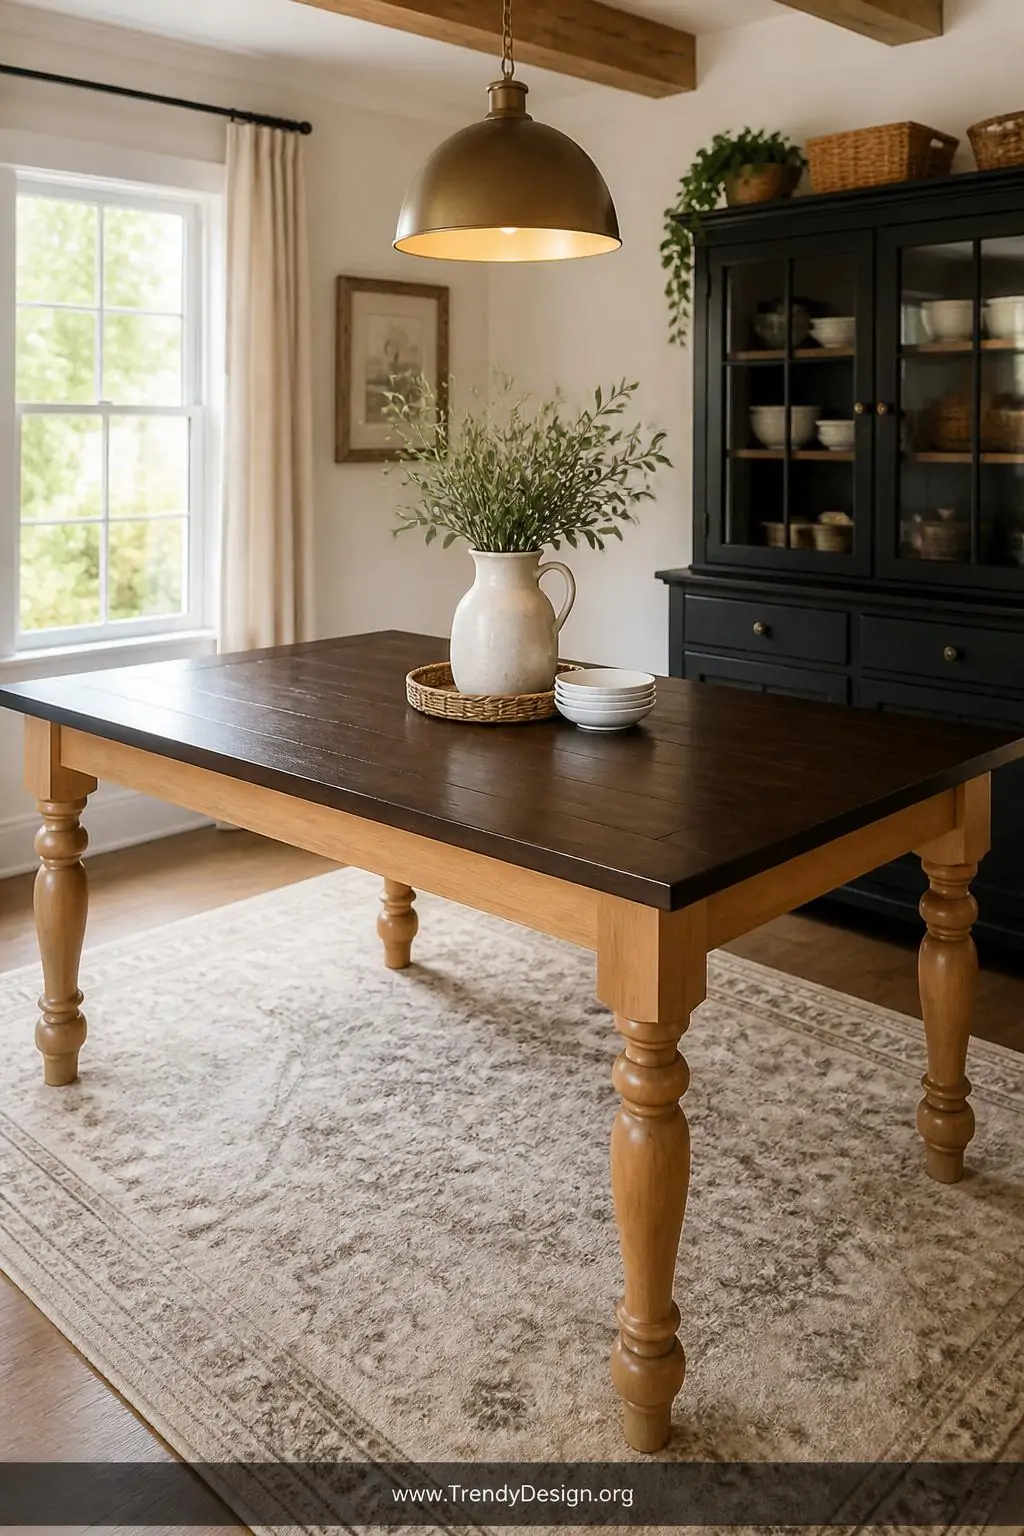
2. Two-Tone Stain Technique on a Wooden Dining Table
As an Amazon Associate I earn from qualifying purchases.
Honestly, a two-tone stain on a dining table is one of those wood staining ideas that looks wildly complicated but is actually pretty approachable. The concept is simple: you use a lighter stain on the table legs and a darker stain on the tabletop, creating a stunning contrast that makes the piece look custom-made.
This technique works especially well on farmhouse-style or solid wood dining tables. It adds visual depth and gives your dining area that intentional, curated feel without paying designer prices.
What You’ll Need
- Two complementary wood stains (think honey oak + espresso brown)
- Painter’s tape to keep the colors separated cleanly
- A foam brush for the legs and a lint-free cloth for the tabletop
- Clear sealant to protect both stain colors
3. Whitewash Stain on Wooden Bedroom Furniture

As an Amazon Associate I earn from qualifying purchases.
If you love that breezy, coastal, almost Scandinavian aesthetic, a whitewash stain on bedroom furniture is going to be your new obsession. Whitewashing doesn’t hide the wood grain — it actually highlights it — while giving the piece a soft, airy, sun-bleached quality that feels incredibly calming.
This technique works beautifully on dressers, nightstands, and bed frames. IMO, it’s one of the most underrated transformations you can do to a bedroom, especially if you’re working with older, darker furniture that feels heavy and dated.
Mix white paint with water at a 1:1 ratio, brush it on, and wipe it off — seriously, that’s most of the process. The longer you let it sit before wiping, the more opaque the finish will be.
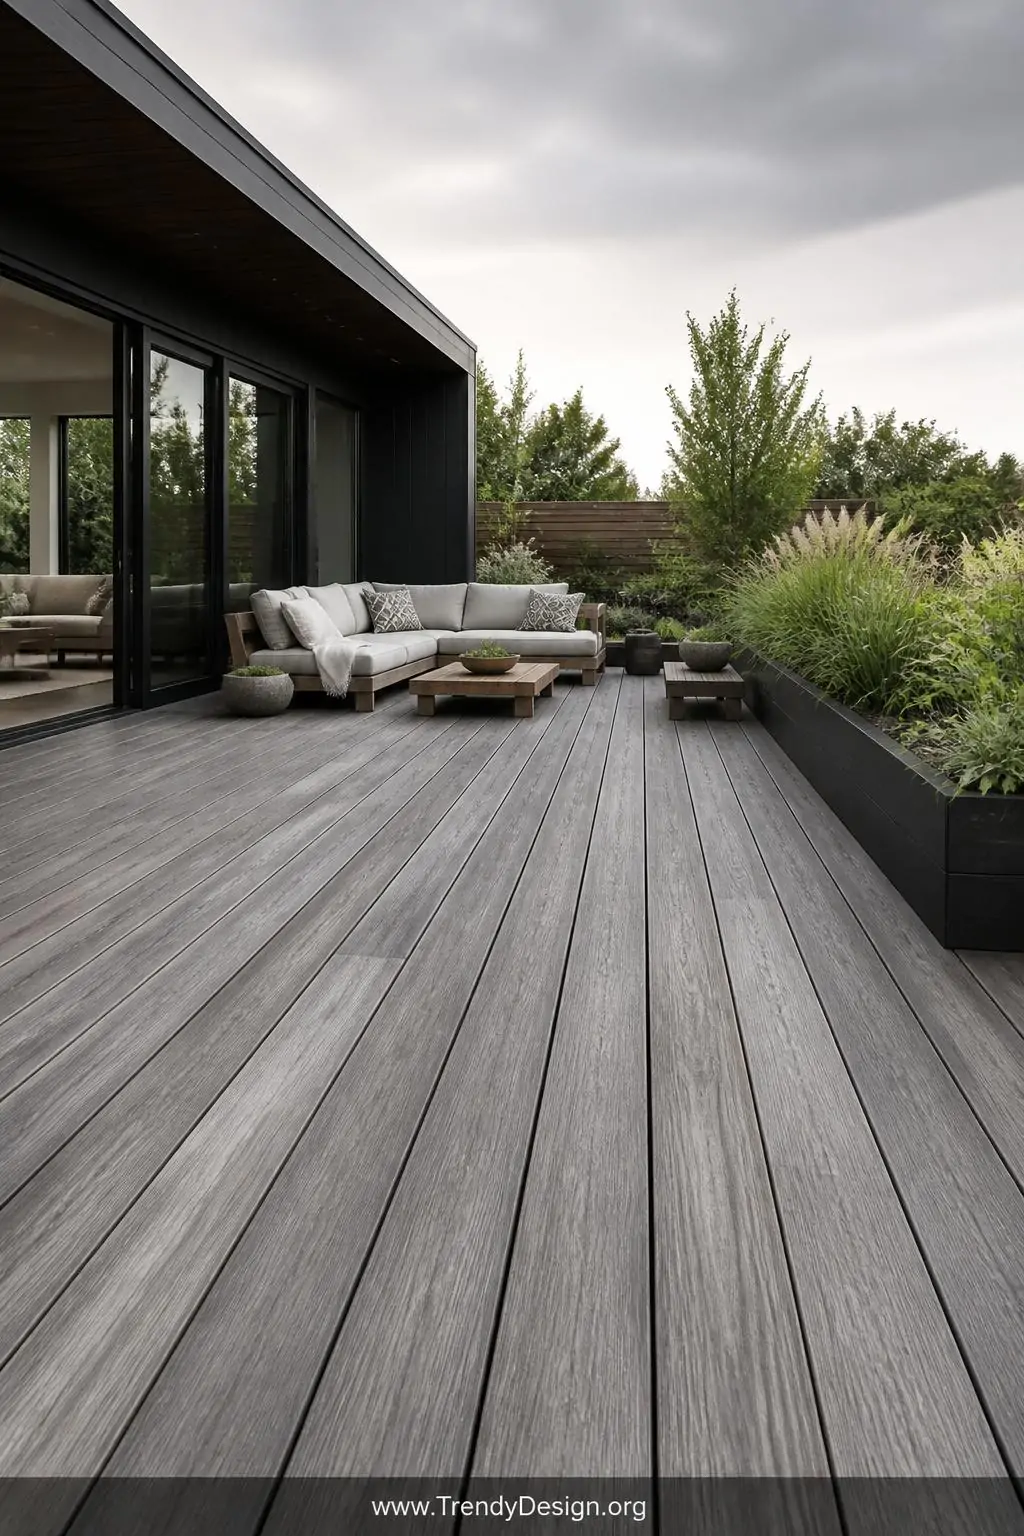
4. Gray Weathered Stain on Exterior Wooden Deck Boards
As an Amazon Associate I earn from qualifying purchases.
Your outdoor deck takes a beating from sun, rain, and basically every season on the calendar. A gray weathered stain on deck boards is both a protective move and a seriously stylish one. That driftwood-inspired, silvery-gray tone gives your outdoor space a modern, polished look that holds up beautifully over time.
Unlike paint, a penetrating wood stain soaks into the deck boards rather than sitting on top, which means it won’t peel or chip the way a painted surface might. That’s a huge win for low-maintenance homeowners everywhere.
- Clean and power wash the deck before staining
- Let the wood dry completely — at least 48 hours
- Choose a semi-transparent stain to keep the natural grain visible
- Apply a second coat for extra weather protection
5. Ebony Stain on a Wooden Bookshelf

As an Amazon Associate I earn from qualifying purchases.
FYI, painting a bookshelf is so last decade. An ebony stain on a wooden bookshelf gives you that bold, dramatic look without completely hiding the beauty of the wood underneath. The deep, almost black tone makes books and decorative objects pop like they’re on display in a gallery.
This is one of those wood staining ideas that works particularly well in living rooms and home offices where you want to make a statement. It pairs strikingly with brass hardware, white walls, and natural linen accents for that editorial, editorial-cool aesthetic everyone is chasing right now.
Pro Tips for an Even Ebony Finish
- Apply a wood conditioner first to prevent blotchiness
- Use a natural bristle brush for smoother application
- Wipe off excess stain after two to three minutes
- Allow full drying time between coats — patience is everything here
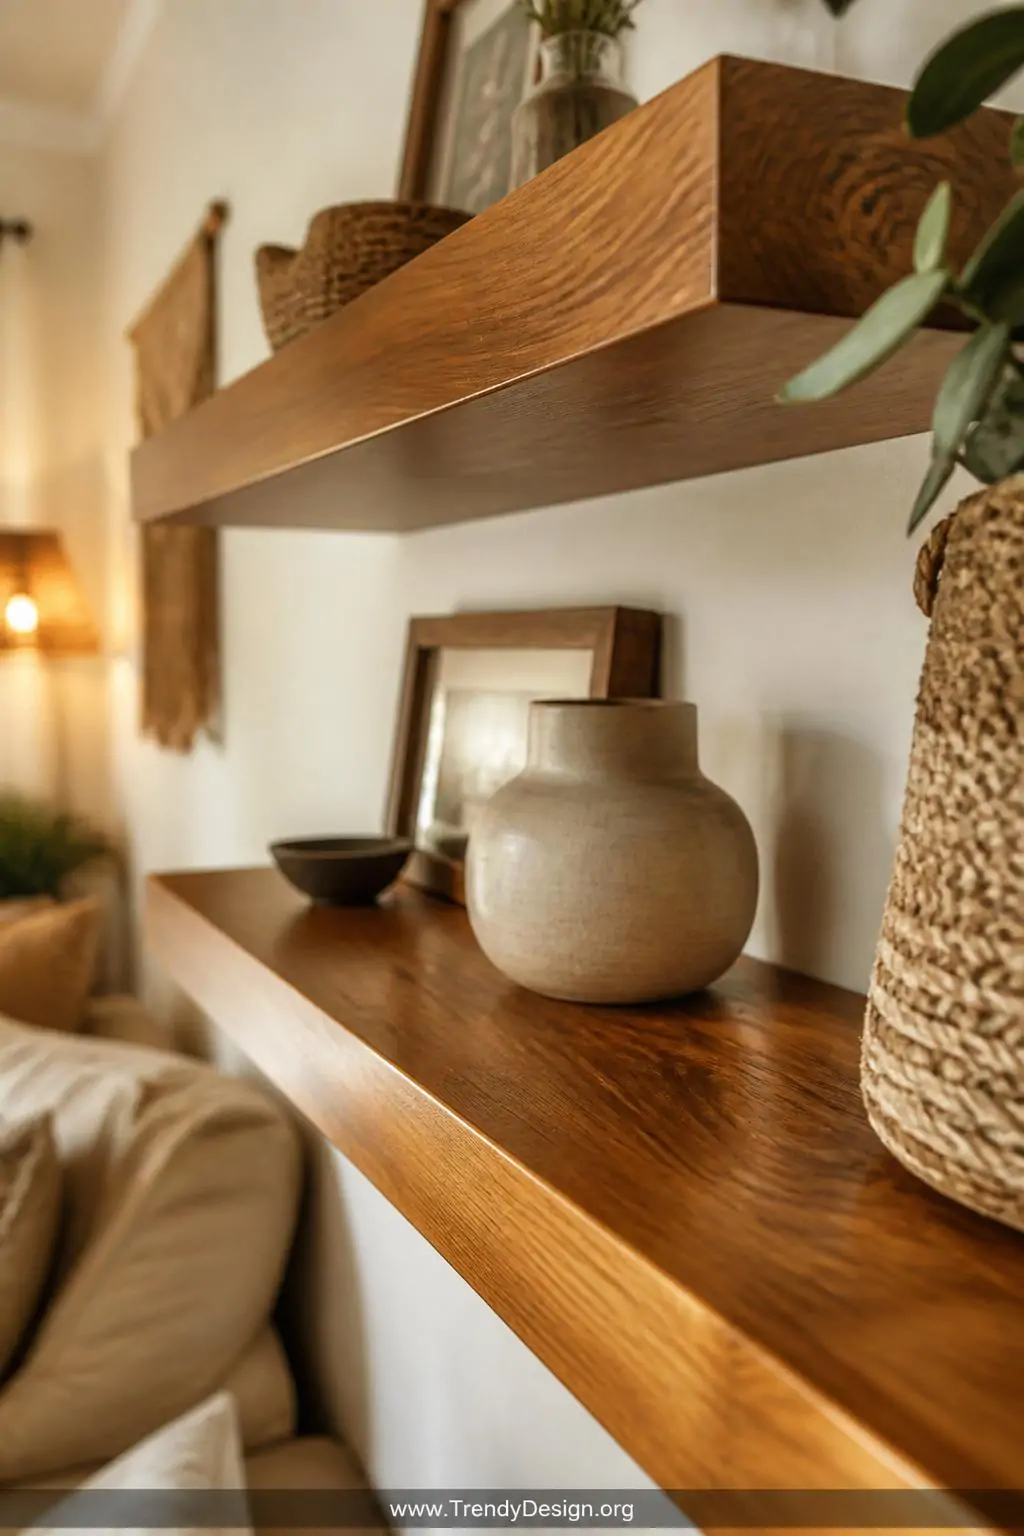
6. Honey Oak Stain on DIY Floating Wooden Shelves
As an Amazon Associate I earn from qualifying purchases.
Floating shelves are having their moment — and honestly, they deserve it. Applying a honey oak stain to DIY floating wooden shelves gives you that warm, golden finish that photographs beautifully and works with practically every interior style from boho to traditional.
The best part about staining floating shelves is that they’re small enough to be a low-pressure first project if you’re new to wood staining. You can practice your technique, try different application methods, and still end up with a finished product that looks genuinely impressive on your wall.
- Sand the shelf smooth with 150-grit sandpaper before staining
- Apply the honey oak stain with a clean cloth using circular motions
- Let it dry fully before adding a protective clear coat
- Install your brackets after the stain has completely cured
The Bottom Line
Wood staining is one of those home improvement skills that genuinely pays off — both in money saved and in that deeply satisfying feeling of looking at something beautiful you created yourself. From dramatic ebony bookshelves to soft whitewashed bedroom furniture, these wood staining ideas prove that a little stain goes a very long way.
Start with one small project, get comfortable with the process, and before you know it, you’ll be eyeing every wooden surface in your home with creative possibility. Your future self — and your future guests — will absolutely thank you for it.
Leave a Reply