Before you break down that giant shipping box and toss it in the recycling bin, hold on just a second. Those cardboard beauties are basically free crafting gold, and with a little creativity, they can become something genuinely stunning in your home. Whether you just got a massive Amazon delivery or you’ve been hoarding boxes in your garage (no judgment, honestly), these shipping box DIY ideas are about to change how you see cardboard forever.
The best part? You probably already have most of the supplies you need sitting around your house. Grab some scissors, dig out that hot glue gun, and let’s turn trash into treasure together.
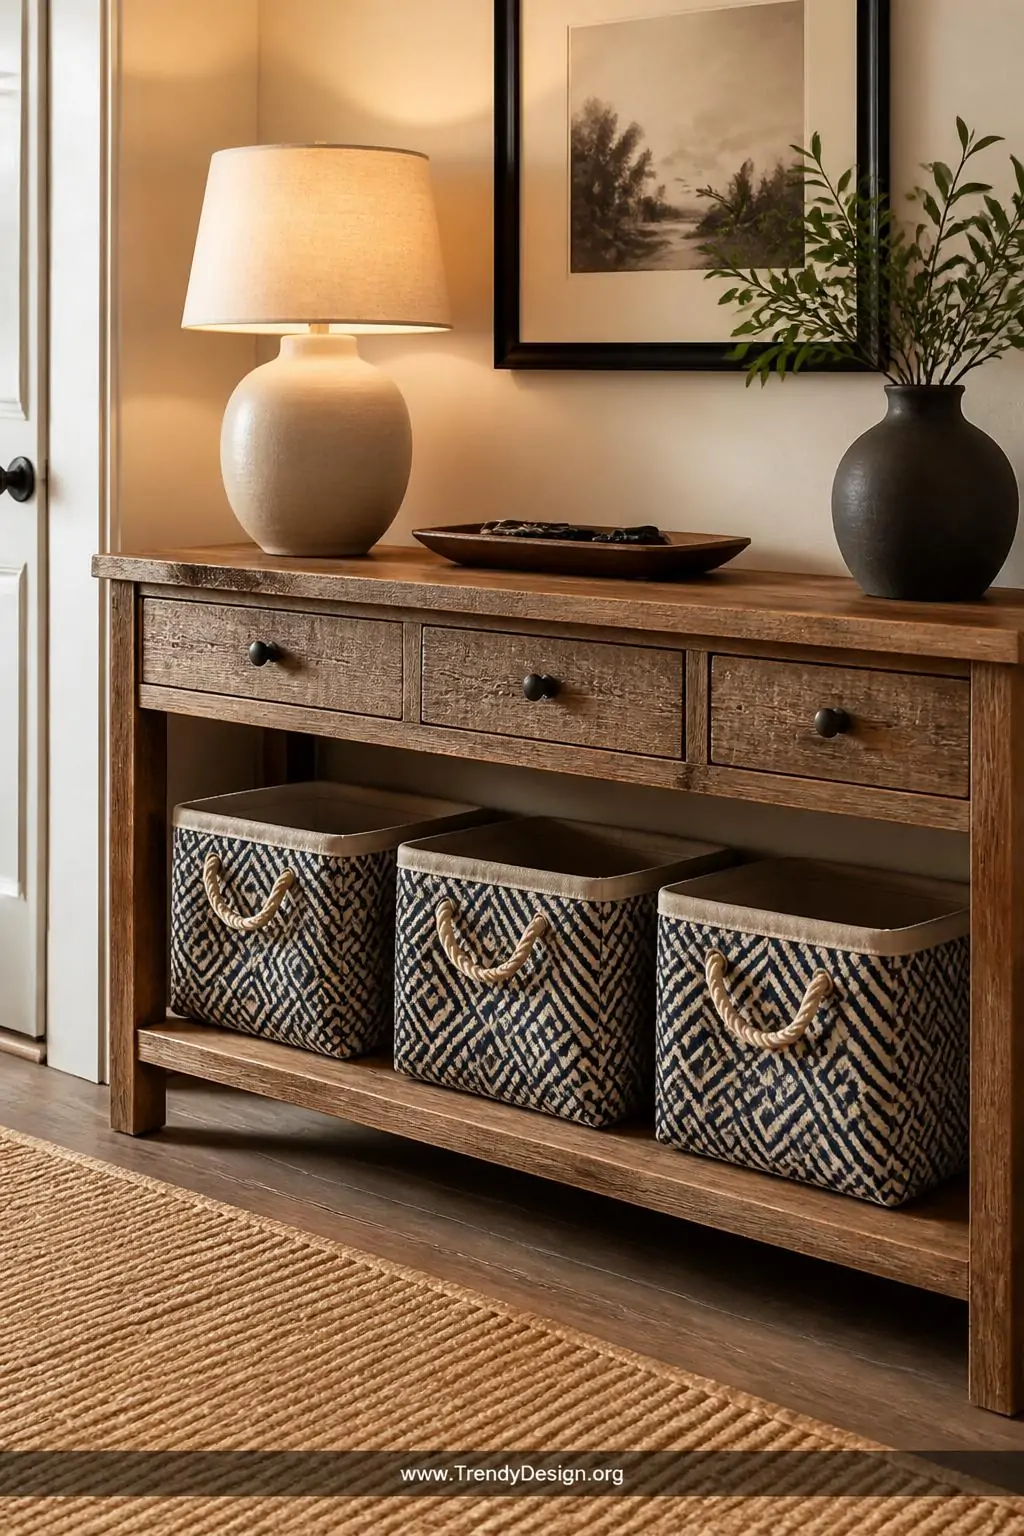
1. Cardboard Storage Bins With Fabric Lining
As an Amazon Associate I earn from qualifying purchases.
One of the most practical shipping box DIY ideas you’ll ever try is transforming a medium-sized shipping box into a beautiful fabric-lined storage bin. Cut the box down to your desired height, round the corners slightly if you want a softer look, and then line the inside and outside with a fun fabric using Mod Podge or spray adhesive.
These storage bins look absolutely gorgeous on shelves, in closets, or tucked under a console table. Choose a fabric that matches your existing decor, and nobody will ever guess you’re storing your stuff in a glorified Amazon box.
- Use heavyweight fabric for cleaner, crisper edges
- Reinforce the bottom with double layers of cardboard before lining
- Add rope handles on the sides for a boutique-worthy finishing touch
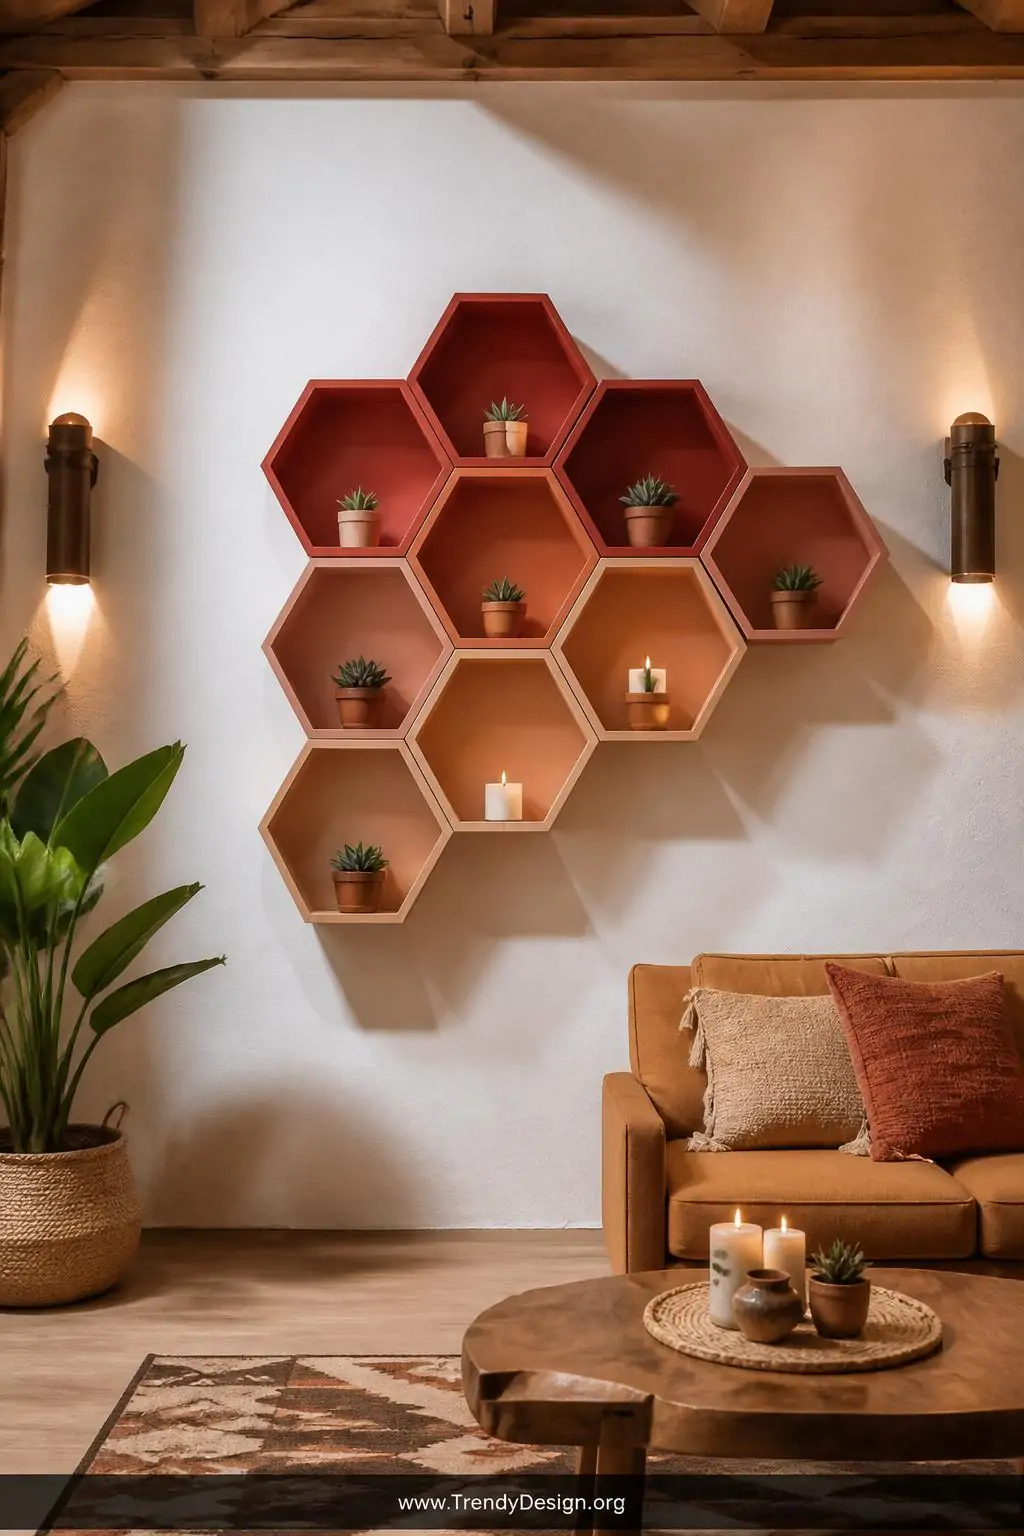
2. Wall-Mounted Honeycomb Shelves
As an Amazon Associate I earn from qualifying purchases.
Those flat-rate shipping boxes sitting in your garage? They’re about to become the coolest geometric wall shelves your home has ever seen. Cut hexagon shapes from multiple layers of cardboard, stack and glue them together for thickness, and arrange them in a honeycomb cluster on your wall.
Paint them in a single bold color or go ombre for a seriously Instagram-worthy wall installation. These hexagon shelves are lightweight enough to hang with simple picture hooks, yet sturdy enough to display small plants, candles, or your favorite trinkets.
Pro Tips for Sturdy Honeycomb Shelves
- Use at least six layers of cardboard glued together for proper shelf depth
- Sand the edges lightly with fine-grit sandpaper before painting
- Seal with two coats of clear acrylic spray for a polished, durable finish
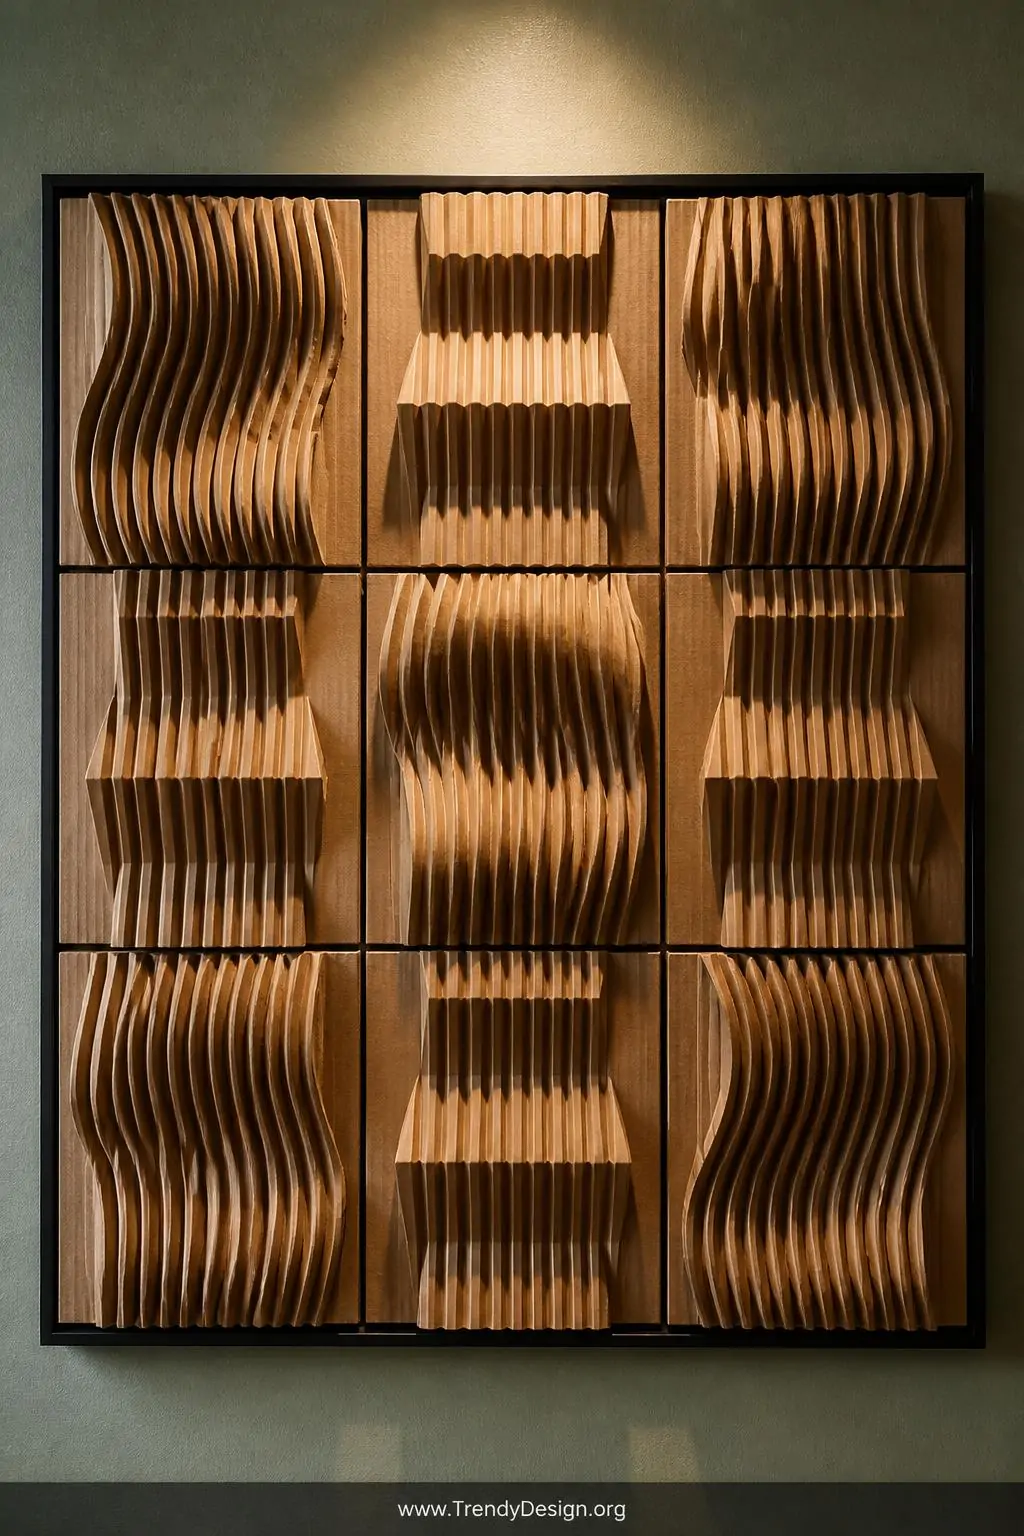
3. Corrugated Cardboard Wall Art Panels
As an Amazon Associate I earn from qualifying purchases.
FYI, that wavy corrugated layer inside your shipping box is an absolute design gem waiting to be discovered. Peel back the smooth outer layer of a large shipping box to reveal the gorgeous ridged texture underneath, then cut it into squares, triangles, or abstract shapes to create dimensional wall art panels.
Arrange your corrugated cardboard shapes in a grid pattern inside a simple frame, or glue them directly onto a painted canvas board. The natural texture creates incredible light and shadow effects that look like something you’d buy at a fancy boutique for way too much money.
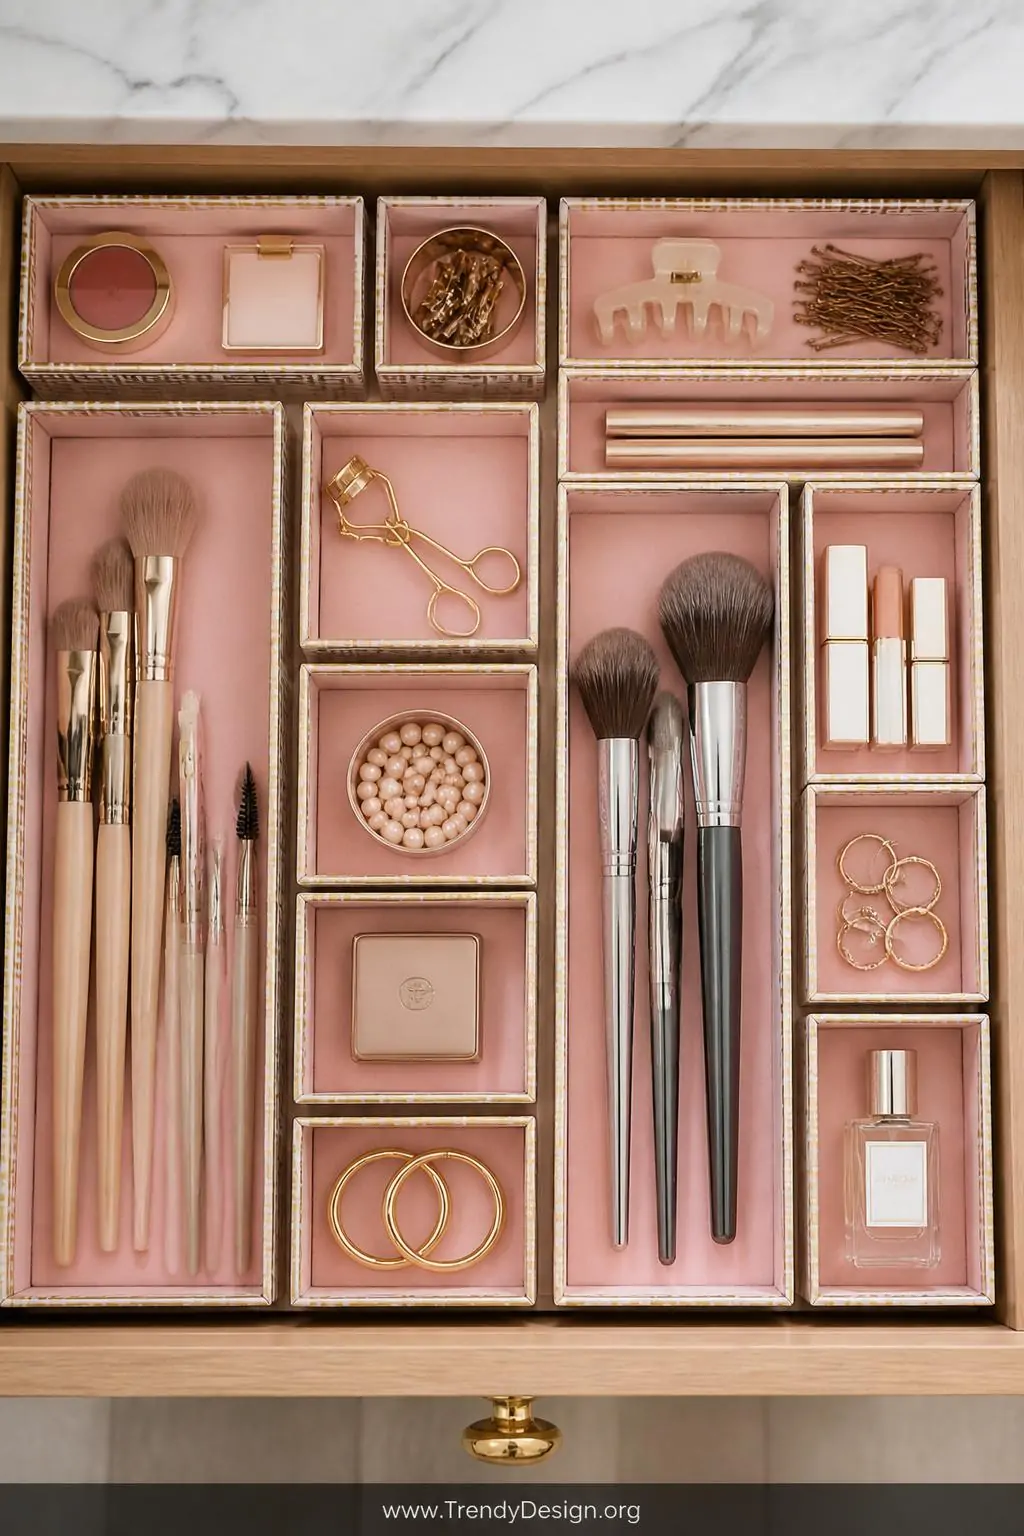
4. Cardboard Organizer Trays for Drawers
As an Amazon Associate I earn from qualifying purchases.
Small shipping boxes — especially those slim ones that phone cases or books arrive in — make absolutely perfect custom drawer organizers. Cut them down to the exact height you need, arrange them inside your drawer like a puzzle, and boom: instant organized life.
This is one of those shipping box DIY ideas that costs literally zero dollars and makes an enormous difference in your daily routine. IMO, this one alone is worth saving every box that comes through your front door. Line them with pretty contact paper for an extra polished look that’ll make your drawers feel like they belong in a lifestyle magazine.
- Measure your drawer dimensions before cutting the boxes down
- Mix different box sizes to create compartments of varying widths
- Use washi tape along the edges for a colorful, finished appearance
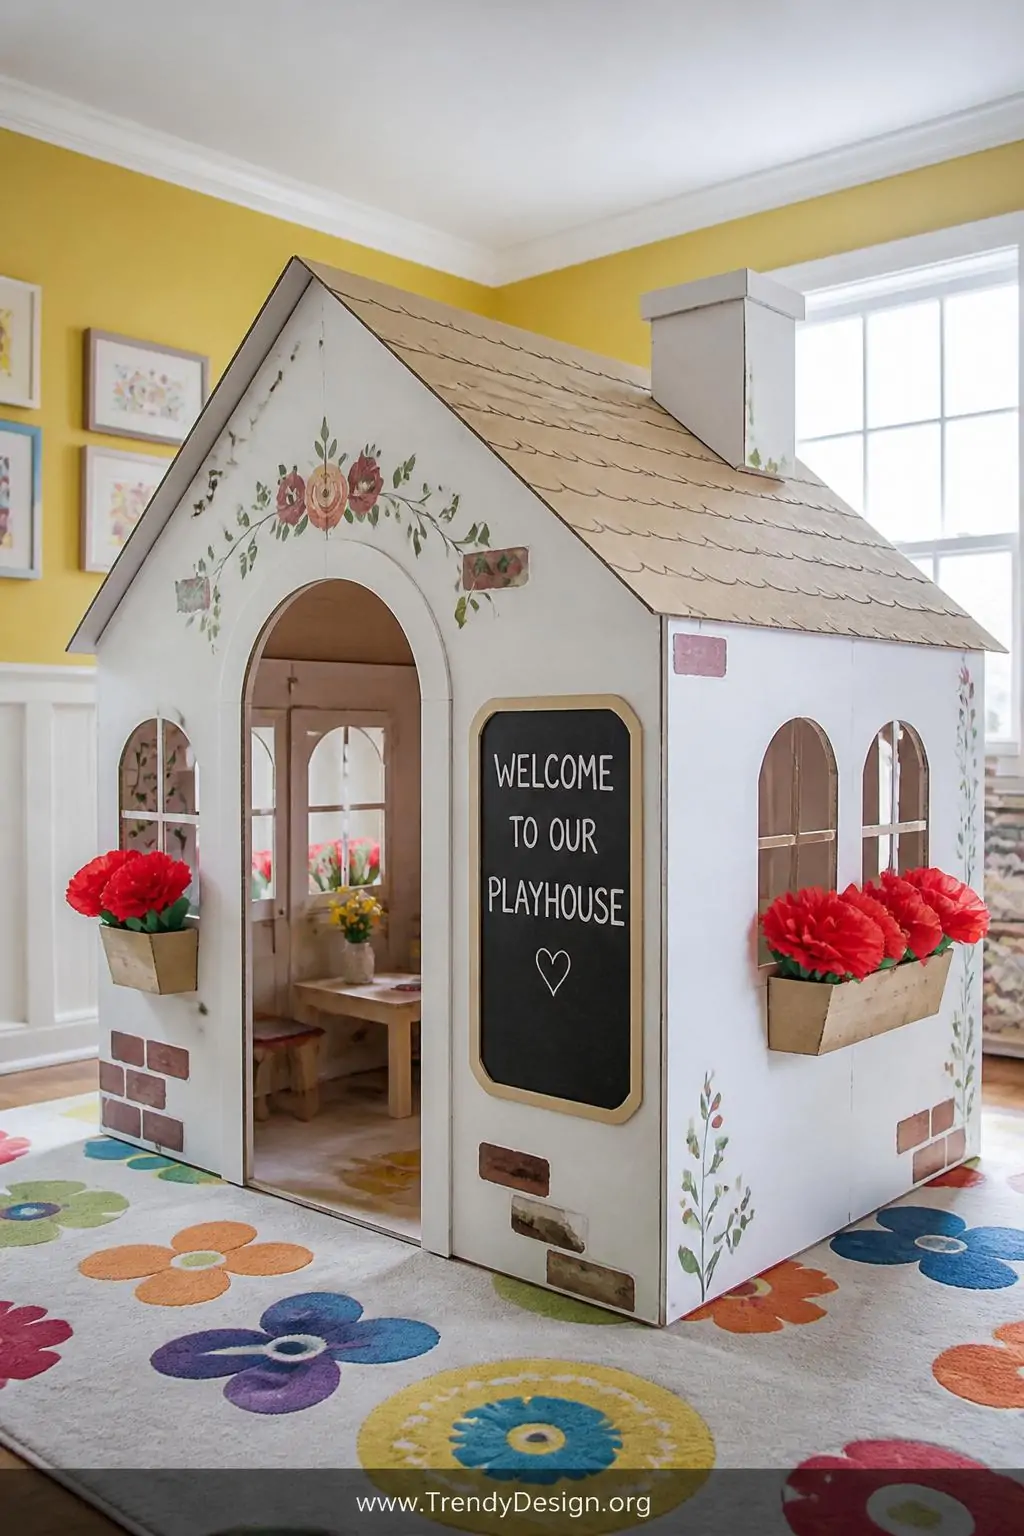
5. Shipping Box Playhouse for Kids
As an Amazon Associate I earn from qualifying purchases.
Okay, this one is pure magic if you have little ones at home. A large shipping box — think refrigerator or furniture-sized — transforms into the most epic cardboard playhouse your kids have ever seen. Cut out windows, add a proper door with a working hinge made from extra cardboard strips, and let the kids go wild decorating the outside.
Paint it like a cozy cottage, a rocket ship, or a fairy tale castle — the only limit is your imagination and how much paint you have on hand. These playhouses are surprisingly sturdy, and kids will play in them for weeks before the cardboard finally gives up the ghost.
Fun Additions to the Cardboard Playhouse
- Cut flower box shapes below windows and glue on paper flowers
- Add a working “doorbell” using a brass brad and a buzzer sticker
- Paint a chalkboard panel on one exterior wall for endless creativity
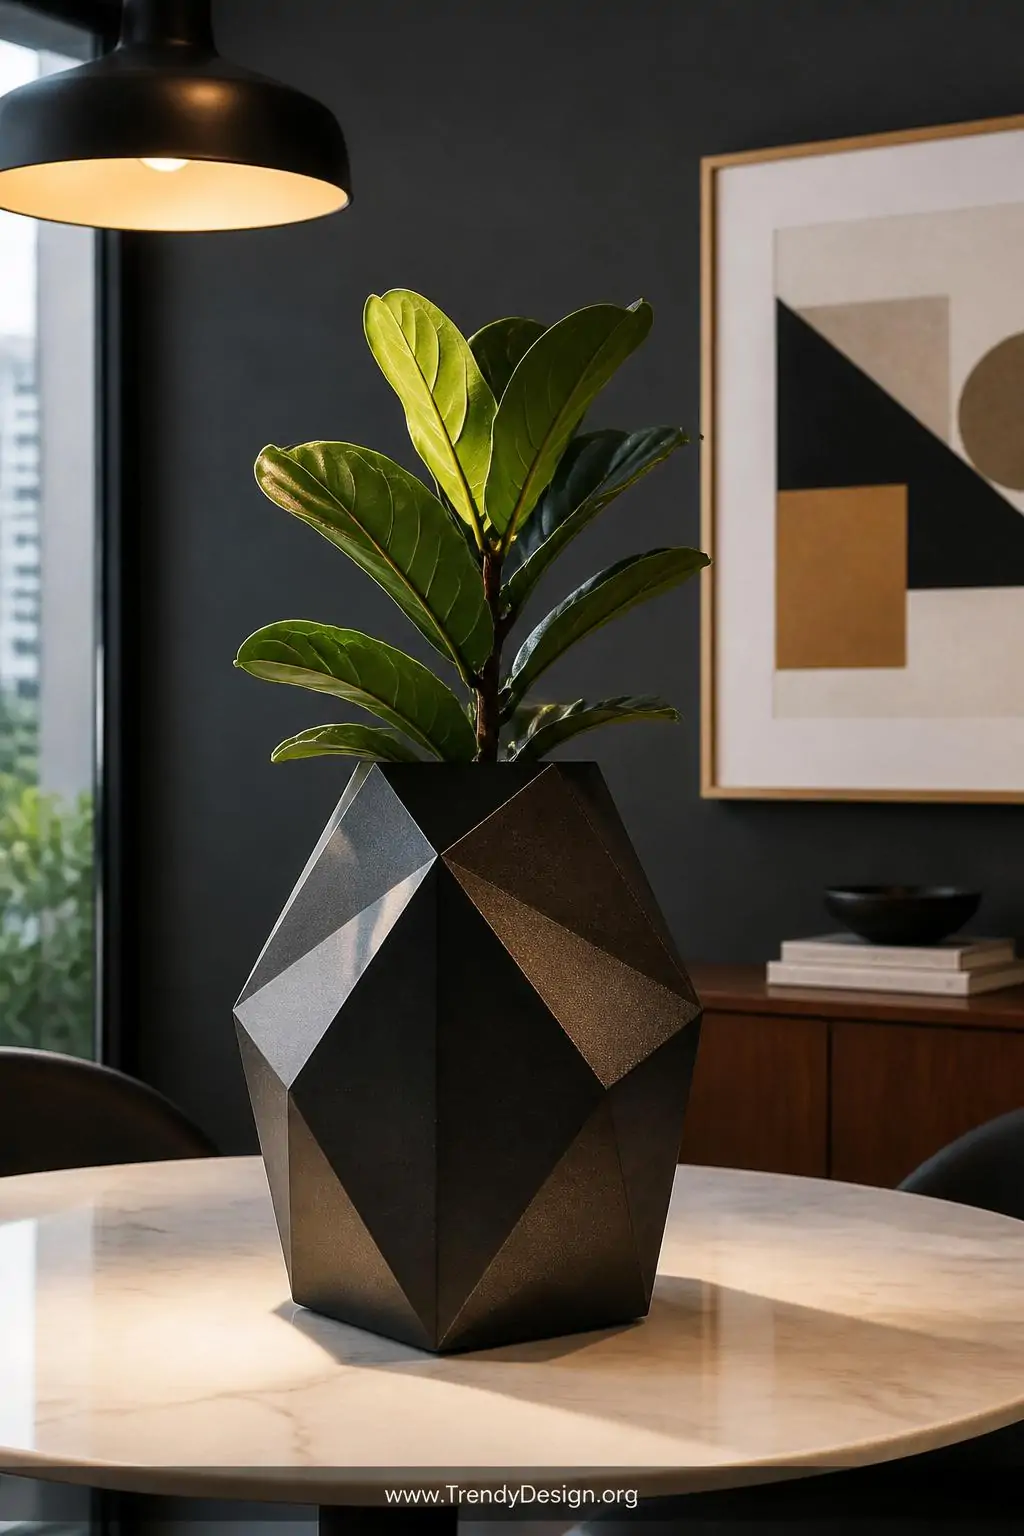
6. Architectural Model-Style Vase or Planter
As an Amazon Associate I earn from qualifying purchases.
Here’s a surprisingly sophisticated take on cardboard crafting: building a geometric vase or planter box using shipping box cardboard scored and folded into angular architectural shapes. Think sharp triangles, hexagonal prisms, or multi-faceted diamond forms that look genuinely sculptural sitting on your shelf or dining table.
Once your shape is assembled and glued, apply several coats of Mod Podge to waterproof the interior before dropping in a plastic liner or a small potted plant. Finish the outside with metallic spray paint in gold, copper, or matte black, and you’ll have a planter that looks like it belongs in a high-end design store.
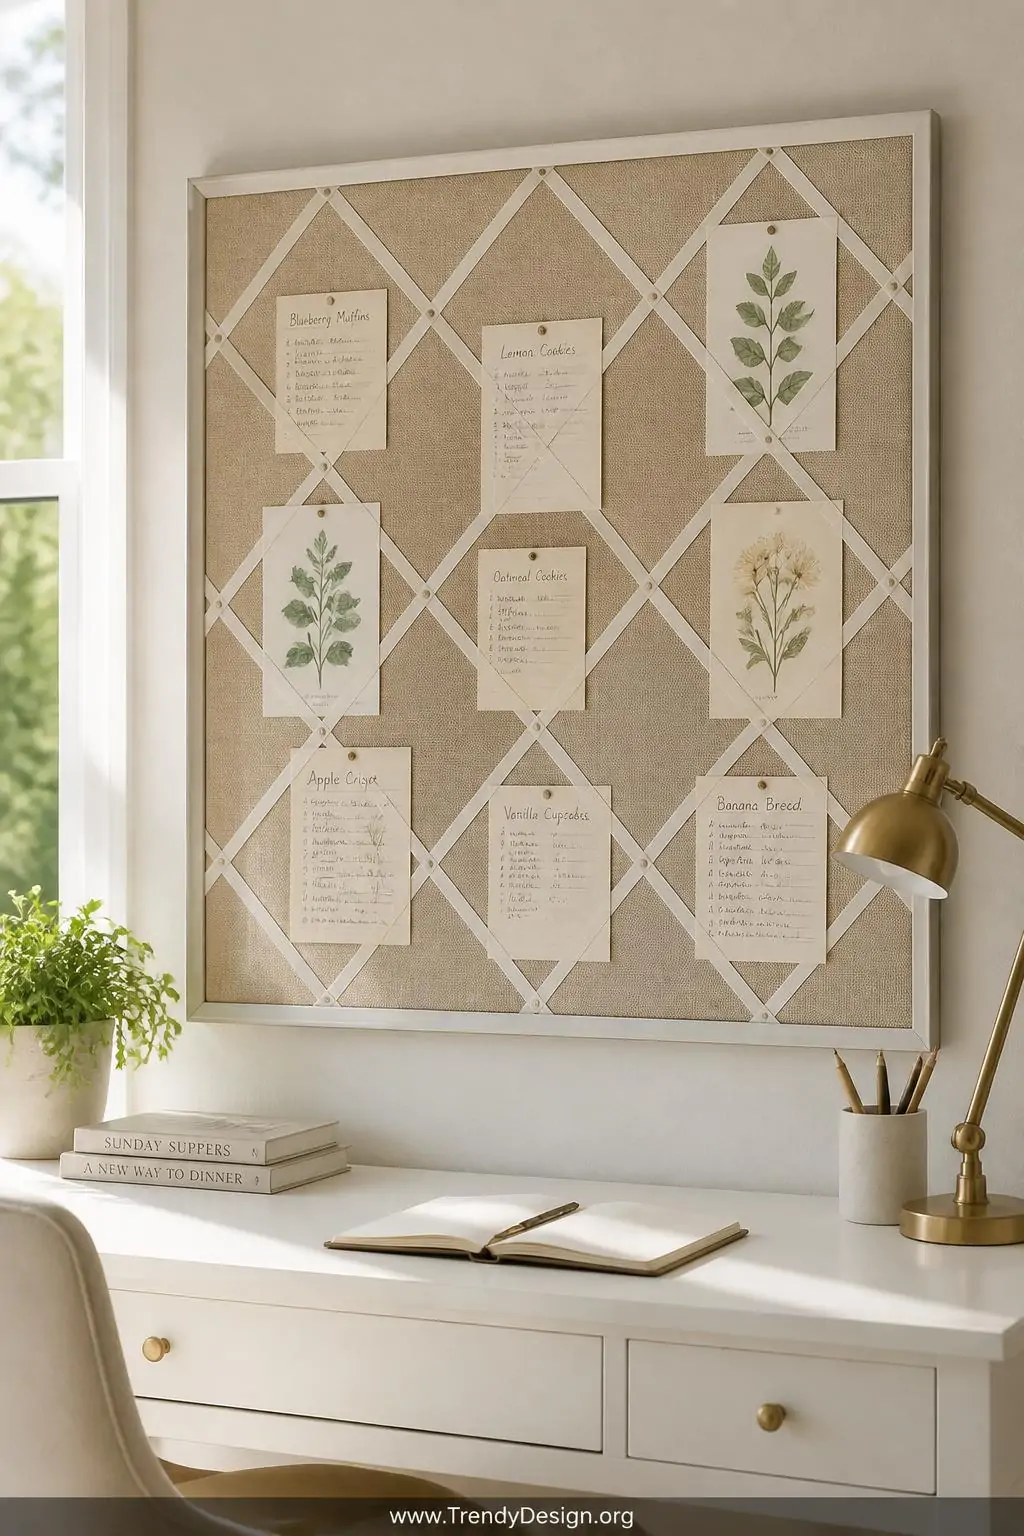
7. Corrugated Cardboard Bulletin Board
As an Amazon Associate I earn from qualifying purchases.
That large, flat side panel from a shipping box makes a surprisingly functional and stylish bulletin board when you dress it up properly. Cut it to your desired size, cover the front with a layer of thin batting and then a piece of linen or burlap fabric, and staple or glue everything neatly to the back.
Honestly, this is one of those shipping box DIY ideas that looks completely store-bought when finished. Add a simple frame made from thin strips of painted cardboard or balsa wood, and hang it in your home office or kitchen for a totally charming, functional display board that cost you basically nothing.
- Use a staple gun for the cleanest, most secure fabric attachment
- Add ribbon in a grid pattern across the front for a classic pinboard look
- Hang with two sturdy picture hooks for stability and level hanging
8. Cardboard Side Table With Geometric Design

As an Amazon Associate I earn from qualifying purchases.
This one might raise some eyebrows at first, but hear me out: a side table made entirely from layered and stacked shipping box cardboard is incredibly strong, genuinely stylish, and costs nothing. Stack multiple layers of cut cardboard circles or hexagons, gluing each layer together tightly, until you reach your desired table height.
The laminated cardboard structure becomes surprisingly rigid and load-bearing once fully dried and sealed. Finish with several layers of epoxy resin or thick polyurethane varnish to create a smooth, hardened surface, then top with a piece of glass if you want extra durability. FYI, people will absolutely not believe it’s made from cardboard.
9. DIY Cat Cave or Pet Hideaway

As an Amazon Associate I earn from qualifying purchases.
Your fur babies deserve a cozy hideaway, and a shipping box makes the coziest, most customizable cat cave imaginable. Cut an arched entrance in the front of a sturdy medium shipping box, reinforce the roof with an extra layer of cardboard, and then decorate the outside to match your home decor so it actually looks intentional.
Line the inside with a soft fleece blanket and tuck a little catnip toy inside for bonus points with your feline overlord. Paint the outside with non-toxic craft paint, add some geometric patterns or your pet’s name above the door, and you’ve got a pet hideaway that’s cute enough to keep out in your living room without any visual guilt whatsoever.
The Bottom Line
Who knew that pile of shipping boxes sitting by your recycling bin was actually a crafting goldmine? From storage solutions and wall art to playhouses and pet retreats, these shipping box DIY ideas prove that incredible home decor doesn’t require a big budget — just a little creativity and the willingness to get your hands slightly covered in glue.
Save your boxes, grab your supplies, and start creating. Your home (and your wallet) will absolutely thank you for it.
Leave a Reply